@bluecateng/pelagos-gpt
v0.1.10
Published
Bundled version of Pelagos for use in ChatGPT
Downloads
262


Readme
@bluecateng/pelagos-gpt
Bundled version of Pelagos for use in ChatGPT.
How to create a GPT to generate UI using Pelagos
ChatGPT can be used to interactively generate screens using Pelagos. By creating a GPT, the basic rules can be defined once for ease of use.
This guide shows how to create a custom GPT setup for Pelagos in ChatGPT.
What you need
Before you start, make sure you have:
- Access to GPT creation in ChatGPT on the web.
- The exact instruction text from prompt.md.
- The TypeScript definition reference at:
Step-by-step
1. Open the GPT builder
- Go to
https://chatgpt.com/gpts/editor. - Sign in.
- Start a new GPT.
ChatGPT supports creating GPTs from the GPT editor on the web, where you can configure the name, instructions, knowledge, capabilities, and sharing settings.
2. Set the GPT name
- In the Configure tab, find the Name field.
- Enter: pelagos-dev (or whatever you want to call it)
3. Add the core instructions
- Open the
prompt.mdfile on your computer. - Copy the full contents.
- In the GPT editor, paste that content into the Instructions field.
The GPT editor?s Instructions field is where you define how the GPT should behave, what it should do, and what it should avoid.
4. Add the TypeScript definitions as reference material
Use the index.d.ts file as supporting context for the GPT.
- Download https://storybook.dnsedge.tools/index.d.ts to your machine.
- In the GPT editor, go to Knowledge.
- Upload the downloaded
index.d.tsfile.
The GPT editor supports adding files under Knowledge so the GPT can reference them during chats.
5. Add a description (Optional)
In Description, add a short summary. Example:
A GPT for Pelagos.6. Enable useful capabilities
In Capabilities, enable the ones that fit your original GPT setup.
Recommended defaults for a dev-oriented GPT:
- Web Search: optional
- Canvas: required
- Image Generation: usually off unless needed
- Code Interpreter / Data Analysis: optional
The GPT editor lets you turn capabilities on or off depending on what the GPT needs to do.
7. Leave Actions empty
8. Choose the recommended model
In Recommended Model, choose the default model you want for the GPT.
The editor supports setting a recommended model for the GPT.
10. Save and test the GPT
- Save the GPT.
- Open the preview/test panel.
- Try a few prompts that depend on both:
- the behavior rules from
prompt.md - the definitions from
index.d.ts
- the behavior rules from
Good test prompts:
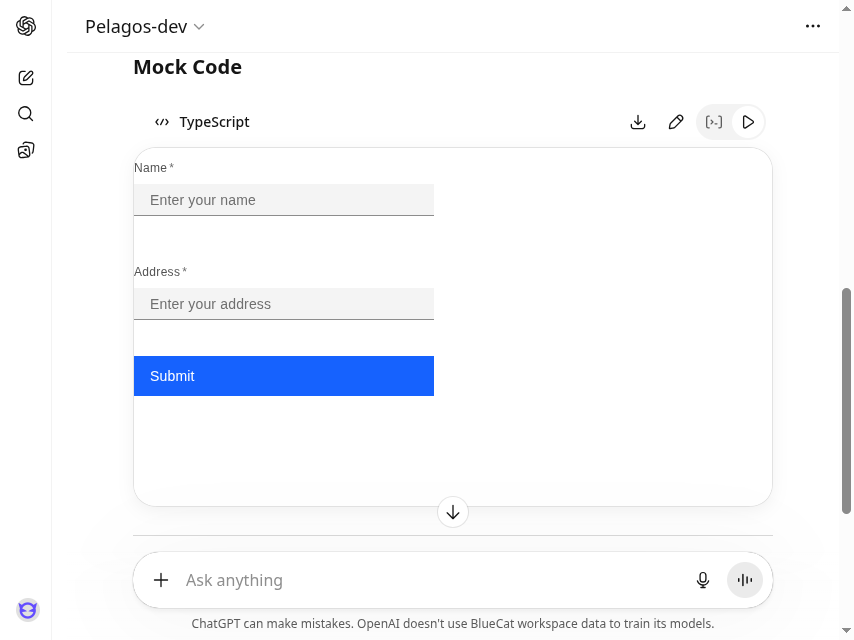
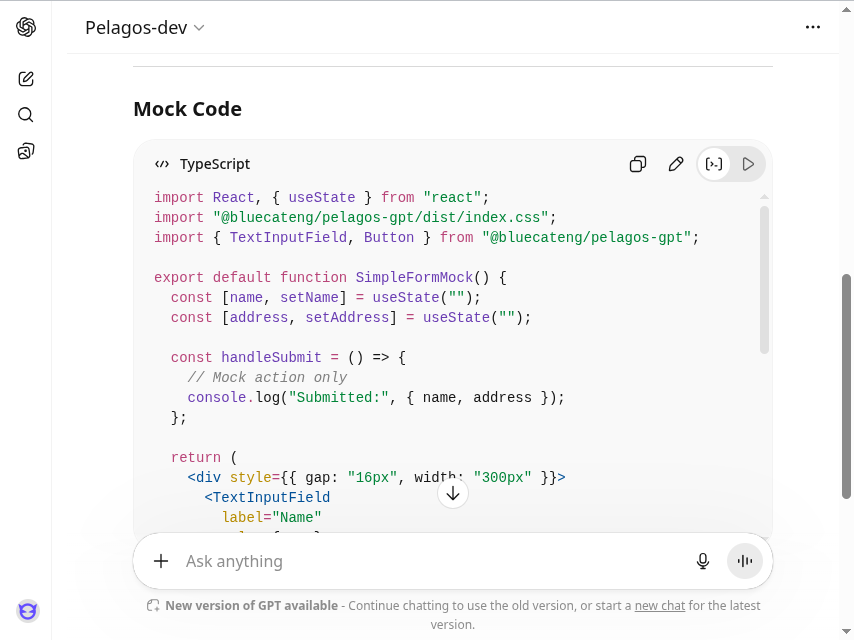
Create a form that allows user to enter name and address.This should produce source code similar to this:
And clicking the "Preview" button, it will display the generated UI: