
@esri/react-arcgis
v5.2.0
Published
A few components to help you get started using the ArcGIS API for JavaScript and esri-loader with React
Downloads
11,529
Maintainers
 kit12303
 jordantsanz
 allieraney
 robert.vo
 noahmulfinger
 ssylvia
 paulcpederson
 jgravois
 patrickarlt
 nixta
nixta odoe
odoe jwasilgeo
 tomwayson
 benstoltz
 dbouwman
 thollingshead
 hhkaos
 dpaddock
 esri_dev
 driskull
 jamin415
 katelynseitz
 jpurusho
 rlibed
 mtschudi
 ajturner
 gavinr
 kellyhutchins
 mjuniper
 john4818
 pr3tori4n
 gbrown-gis
 haoliang
 macandcheese
 jcfranco
 alan0002
 richgwozdz
 rweber.esri
 vivzhang
 juliannemarik
 drspacemanphd
Readme
react-arcgis


This project provides a library with a few ready to use React components (<Map />, <Scene />, <WebMap />, and <WebScene />) to get you started using the ArcGIS API for JavaScript in your React application. These components use esri-loader under the hood to lazy-load the ArcGIS API modules.
IMPORTANT: You do not need react-arcgis to use the ArcGIS API in your React application. If the above generic components do not suit your needs you can very easily create your own React components that load the ArcGIS API for JavaScript using esri-loader. Alternatively, you could get started with the components in this library and then add your own components as needed.
Installation
- Run
npm i --save esri-loader @esri/react-arcgisin your React application
If you need to support browsers lacking a native promise implementation, you will have to add a global Promise constructor polyfill to your project, as react-arcgis does not include one. See the esri-loader documentation for more details.
Basic Usage
IMPORTANT: You must load ArcGIS API styles before using the components in this library. The snippets below assume you've already used one of the ways that esri-loader provides you with to load the ArcGIS API CSS.
Render a simple map in React:
import React from 'react';
import * as ReactDOM from 'react-dom';
import { Map } from '@esri/react-arcgis';

ReactDOM.render(
  <Map />,
  document.getElementById('container')
);
Or, render a 3D web-scene:
import React from 'react';
import * as ReactDOM from 'react-dom';
import { Scene } from '@esri/react-arcgis';

ReactDOM.render(
  <Scene />,
  document.getElementById('container')
);
You can also add webmaps and webscenes from ArcGIS Online:
import React from 'react';
import * as ReactDOM from 'react-dom';
import { WebMap, WebScene } from '@esri/react-arcgis';

ReactDOM.render(
    <div style={{ width: '100vw', height: '100vh' }}>
        <WebMap id="6627e1dd5f594160ac60f9dfc411673f" />
        <WebScene id="f8aa0c25485a40a1ada1e4b600522681" />
    </div>,
  document.getElementById('container')
);
If you want to change the style of the Map or Scene, just give it a class:
import React from 'react';
import * as ReactDOM from 'react-dom';
import { Scene } from '@esri/react-arcgis';

ReactDOM.render(
  <Scene className="full-screen-map" />,
  document.getElementById('container')
);
You can also pass properties into the Map, MapView, or SceneView via the viewProperties or mapProperties props:
import React from 'react';
import { Map } from '@esri/react-arcgis';

export default (props) => (
    <Map
        class="full-screen-map"
        mapProperties={{ basemap: 'satellite' }}
    />
)
These properties are passed directly to the available properties on the corresponding ArcGIS API classes:
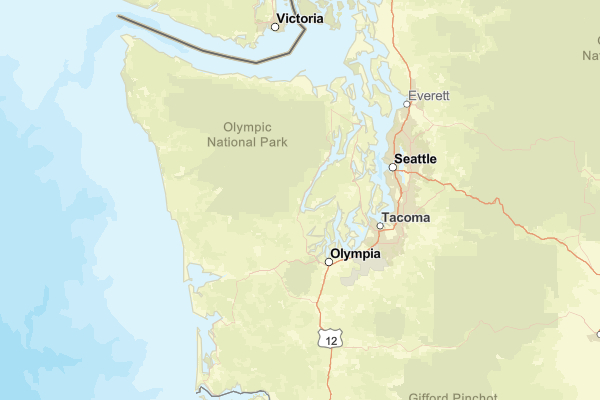
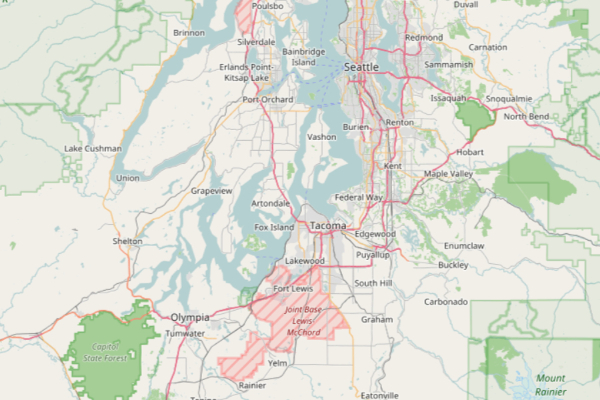
import React from 'react';
import { Scene } from '@esri/react-arcgis';

export default (props) => (
    <Scene
        style={{ width: '100vw', height: '100vh' }}
        mapProperties={{ basemap: 'satellite' }}
        viewProperties={{
            center: [-122.4443, 47.2529],
            zoom: 6
        }}
    />
)
If you want to access the map and view instances directly after they are loaded, pass in an onLoad handler:
import React from 'react';
import { Map } from '@esri/react-arcgis';

export default class MakeAMap extends React.Component {
    constructor(props) {
        super(props);
        this.state = {
            map: null,
            view: null
        };

        this.handleMapLoad = this.handleMapLoad.bind(this)
    }

    render() {
        return <Map className="full-screen-map" onLoad={this.handleMapLoad} />;
    }

    handleMapLoad(map, view) {
        this.setState({ map, view });
    }
}
Don't forget an onFail handler in case something goes wrong:
import React from 'react';
import { WebScene } from '@esri/react-arcgis';

export default class MakeAScene extends React.Component {
    constructor(props) {
        super(props);
        this.state = {
            status: 'loading'
        };

        this.handleFail = this.handleFail.bind(this);
    }

    render() {
        return <WebScene className="full-screen-map" id="foobar" onFail={this.handleFail} />;
    }

    handleFail(e) {
        console.error(e);
        this.setState({ status: 'failed' });
    }
}
Advanced Usage
Configuring esri-loader
By default, the components in this library will use esri-loader's default options, which means they will lazy-load the modules from the CDN version of the ArcGIS API for JavaScript used by the version of esri-loader you have installed. See the esri-loader configuration documentation for information on how you can customize esri-loader's behavior.
Using setDefaultOptions()
The easiest way to do this is by calling esri-loader's setDefaultOptions() once at application startup before any of the components in this library are rendered.
import React from 'react';
import * as ReactDOM from 'react-dom';
import { setDefaultOptions } from 'esri-loader';
// app contains react-arcgis components
import { App } from './components/App.js';

// configure esri-loader to lazy load the CSS
// the fisrt time any react-arcgis components are rendered
setDefaultOptions({ css: true });

ReactDOM.render(
  <App />,
  document.getElementById('app')
);
This requires esri-loader@^2.12.0. If you are using an older version of esri-loader you should probably upgrade.
Using loaderOptions
If you can't use setDefaultOptions(), you can use the loaderOptions prop provided by each of the components in this library. That will be passed as options to loadModules(). Keep in mind that if you use loaderOptions, you must pass the same options to all react-arcgis components in your application, as well as any places where your application calls loadModules() directly.
Creating Your Own Components
The functionality available through the ArcGIS API for JavaScript goes well beyond just rendering maps, and if your application needs to do more with the map than simply show it, you will likely need to load and use additional classes from the ArcGIS API and provide the instances of those classes with references to the maps you've created with the components in this library.
Fortunately you've already installed esri-loader, which allows you to load any additional ArcGIS API modules your application might need. Also, react-arcgis provides the children of <Map />, <Scene />, <WebMap />, and <WebScene /> with access to their parent's map and view instances through props.
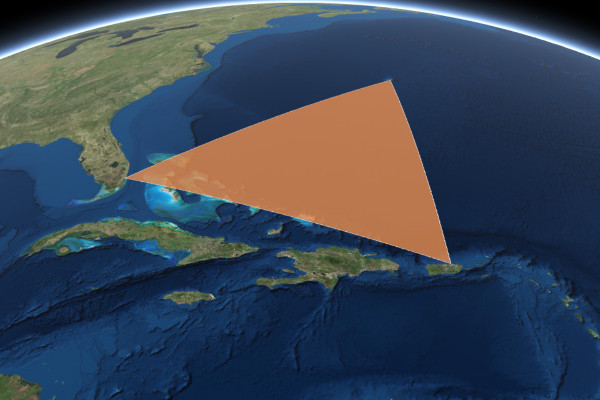
For example, let's convert a Bermuda Triangle graphic from this example into a react component:
import { useState, useEffect } from 'react';
import { loadModules } from 'esri-loader';

const BermudaTriangle = (props) => {

    const [graphic, setGraphic] = useState(null);
    useEffect(() => {

        loadModules(['esri/Graphic']).then(([Graphic]) => {
            // Create a polygon geometry
            const polygon = {
                type: "polygon", // autocasts as new Polygon()
                rings: [
                    [-64.78, 32.3],
                    [-66.07, 18.45],
                    [-80.21, 25.78],
                    [-64.78, 32.3]
                ]
            };

            // Create a symbol for rendering the graphic
            const fillSymbol = {
                type: "simple-fill", // autocasts as new SimpleFillSymbol()
                color: [227, 139, 79, 0.8],
                outline: { // autocasts as new SimpleLineSymbol()
                    color: [255, 255, 255],
                    width: 1
                }
            };

            // Add the geometry and symbol to a new graphic
            const graphic = new Graphic({
                geometry: polygon,
                symbol: fillSymbol
            });
            setGraphic(graphic);
            props.view.graphics.add(graphic);
        }).catch((err) => console.error(err));

        return function cleanup() {
            props.view.graphics.remove(graphic);
        };
    }, []);

    return null;

}

export default BermudaTriangle;
Now we can use the <BermudaTriangle /> component within our <Map />, <Scene />, <WebMap />, or <WebScene />, and the map and view props will automatically be supplied by react-arcgis:
import * as React from 'react';
import { Scene } from '@esri/react-arcgis';
import BermudaTriangle from './BermudaTriangle'; // The Graphic component we just made

export default (props) => (
    <Scene class="full-screen-map">
        <BermudaTriangle />
    </Scene>
)
Using the ArcGIS Types
See the esri-loader documentation on working with ArcGIS types.
Migrating
From v4 to v5
First, make sure esri-loader is installed as a dependency of your application:
npm install --save esri-loaderThen, update any import statements for loadModules():
// Replace old `loadModules` imports...
// import { Map, loadModules } from '@esri/react-arcgis';

// With a new, separate esri-loader import:
import { Map } from '@esri/react-arcgis';
import { loadModules } from 'esri-loader';
Contributions
Anyone is welcome to contribute to this package. However, we do not plan to add any more components to this library. If you have created a component that you'd like to share, we encourage you to share it via CodeSandbox or a gist. Once you've done that feel free to open an issue and we'll help spread the word.
We gladly welcome bug fixes or improvements to documentation.
Here are some commands that may be helpful for development:
npm test: Runs the unit testsnpm run build: Builds the application
To run the demo application against the code you are developing, you'll need to run these commands:
npm link
npm run build
cd demo
npm i
npm link @esri/react-arcgis
npm start
Keep in mind that the start script only watches for changes to code in the demo app. You'll have to re-run npm run build each time you make changes in to the library and want to verify them in the demo app.
License
Copyright © 2017-2019 Esri
Licensed under the Apache License, Version 2.0 (the "License"); you may not use this file except in compliance with the License. You may obtain a copy of the License at
http://www.apache.org/licenses/LICENSE-2.0
Unless required by applicable law or agreed to in writing, software distributed under the License is distributed on an "AS IS" BASIS, WITHOUT WARRANTIES OR CONDITIONS OF ANY KIND, either express or implied. See the License for the specific language governing permissions and limitations under the License.
A copy of the license is available in the repository's LICENSE file.