
@figma/code-connect
v1.4.9
Published
A tool for connecting your design system components in code with your design system in Figma
Downloads
4,324,552
Maintainers
 christinabannister-figma
 slees-figma
 ptomas
 mina-asham-figma
 rishir2024
 tweightman-figma
 islobodiuk
 rgullyfigma
Keywords
Readme
Code Connect
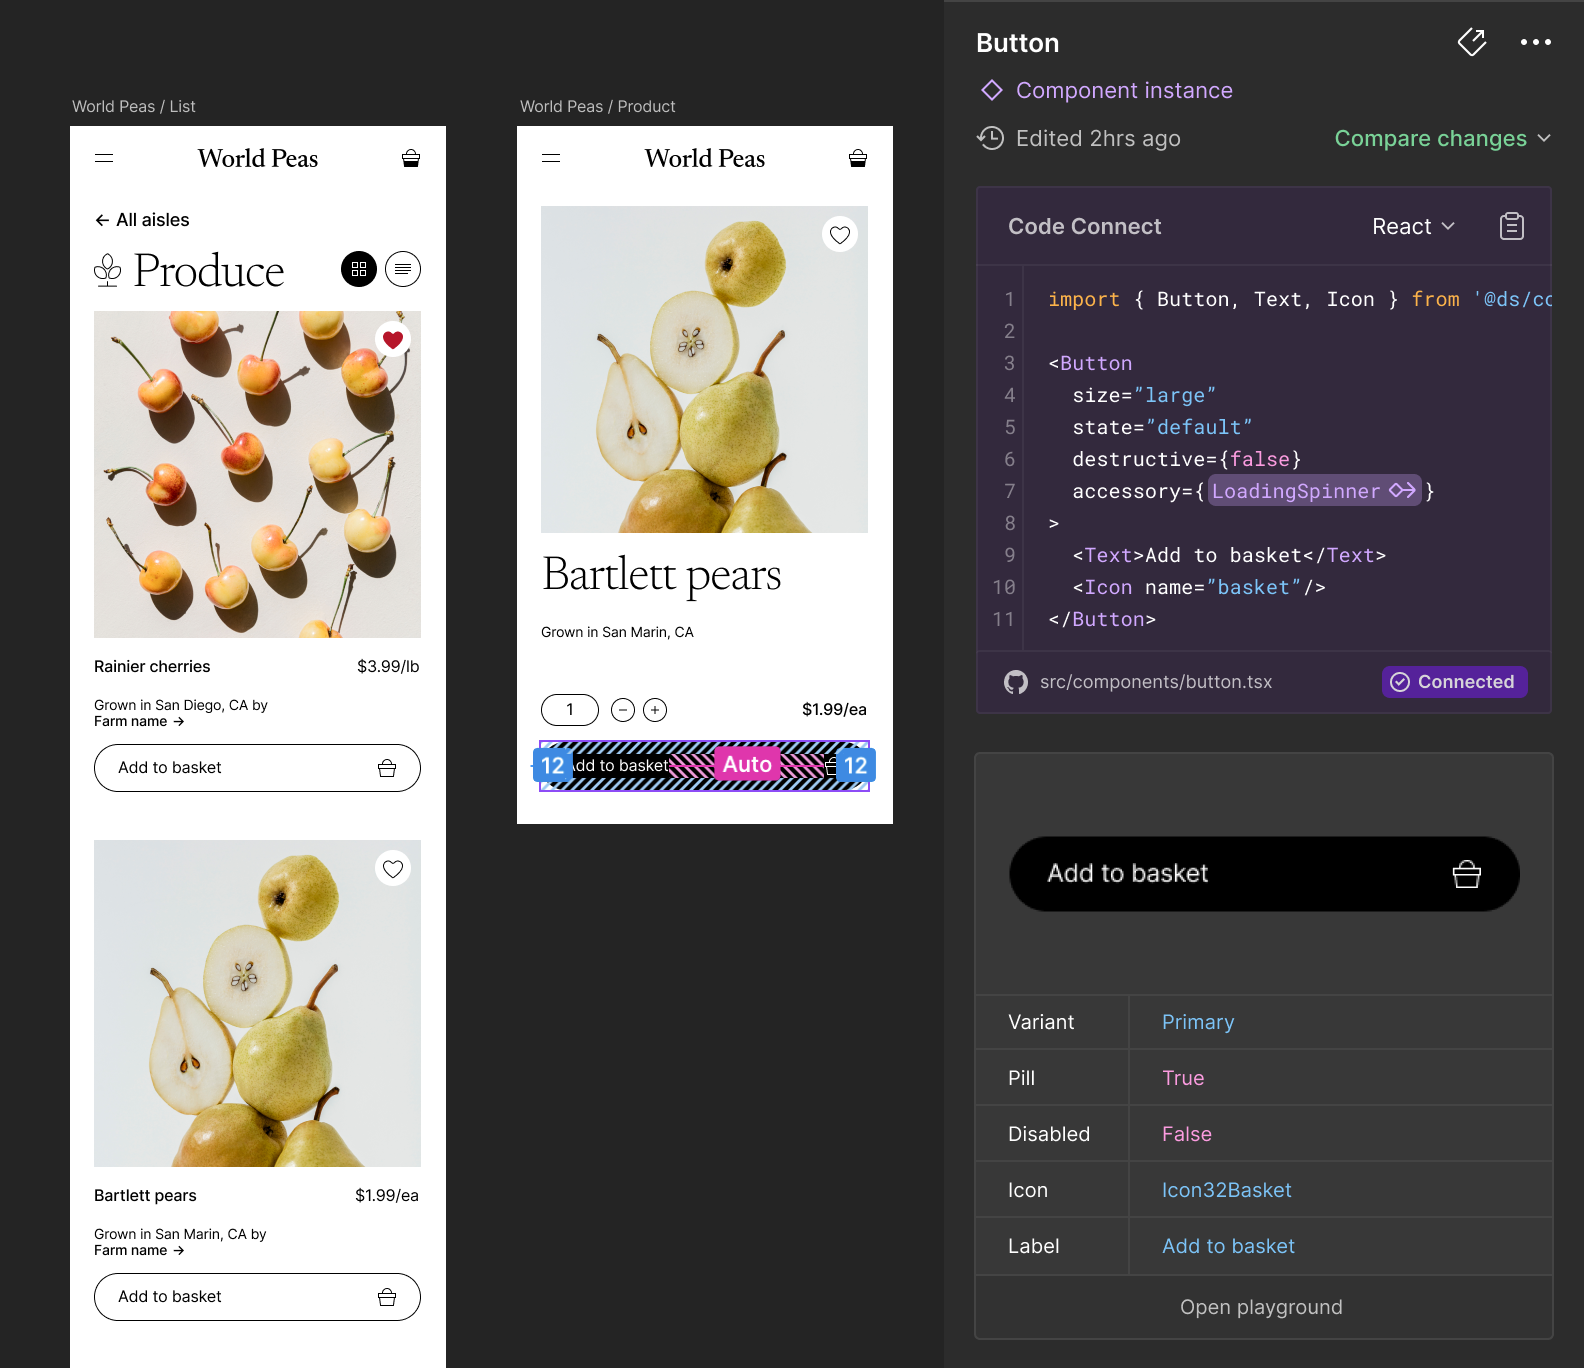
Code Connect is a tool for connecting your design system components in code with your design system in Figma. When using Code Connect, Figma's Dev Mode will display true-to-production code snippets from your design system instead of autogenerated code examples. In addition to connecting component definitions, Code Connect also supports mapping properties from code to Figma enabling dynamic and correct examples. This can be useful for when you have an existing design system and are looking to drive consistent and correct adoption of that design system across design and engineering.
Code Connect is easy to set up, easy to maintain, type-safe, and extensible. The easiest way to get started is using template files — a framework-agnostic way to represent any code snippet, giving you full control over how components appear in Dev Mode. Code Connect also includes framework-specific integrations for React (and React Native), Storybook, HTML (e.g. Web Components, Angular and Vue), SwiftUI and Jetpack Compose.
[!NOTE] Code Connect is available on Organization and Enterprise plans and requires a full Design or Dev Mode seat to use.
Documentation
Use Figma’s Code Connect to make your design system easily accessible to your developers and create a shared source of truth for both the design and code elements.
Our Getting Started guide will walk you through setting up Code Connect and publishing your first components using template files. Code Connect Documentation →
For framework-specific prop mapping and variant support, see the integration guides for: