@johntalton/mcp2221
v4.0.4
Published
Full featured MCP2221 library with WebHID and node support over StreamAPI 🥳

Readme
MCP2221
Full featured MCP2221 library with WebHID and node support over StreamAPI 🥳


![]()


Standard Adafruit link.
Features
Support full range of command and functionality, including:
Password Protected
- Access Password setting
- New password Flash writes
- Alter Security settings
- no guard against humans
Status
- Reset
- Clear Interrupt
- I²C Diagnostics
- ADC output
General Purpose
- Digital In / Out (Gpio)
- ADC 3x
- DAC
- Clock
- Interrupt on Change (with variable edge detection)
- USB Host Suspend and Configuration state
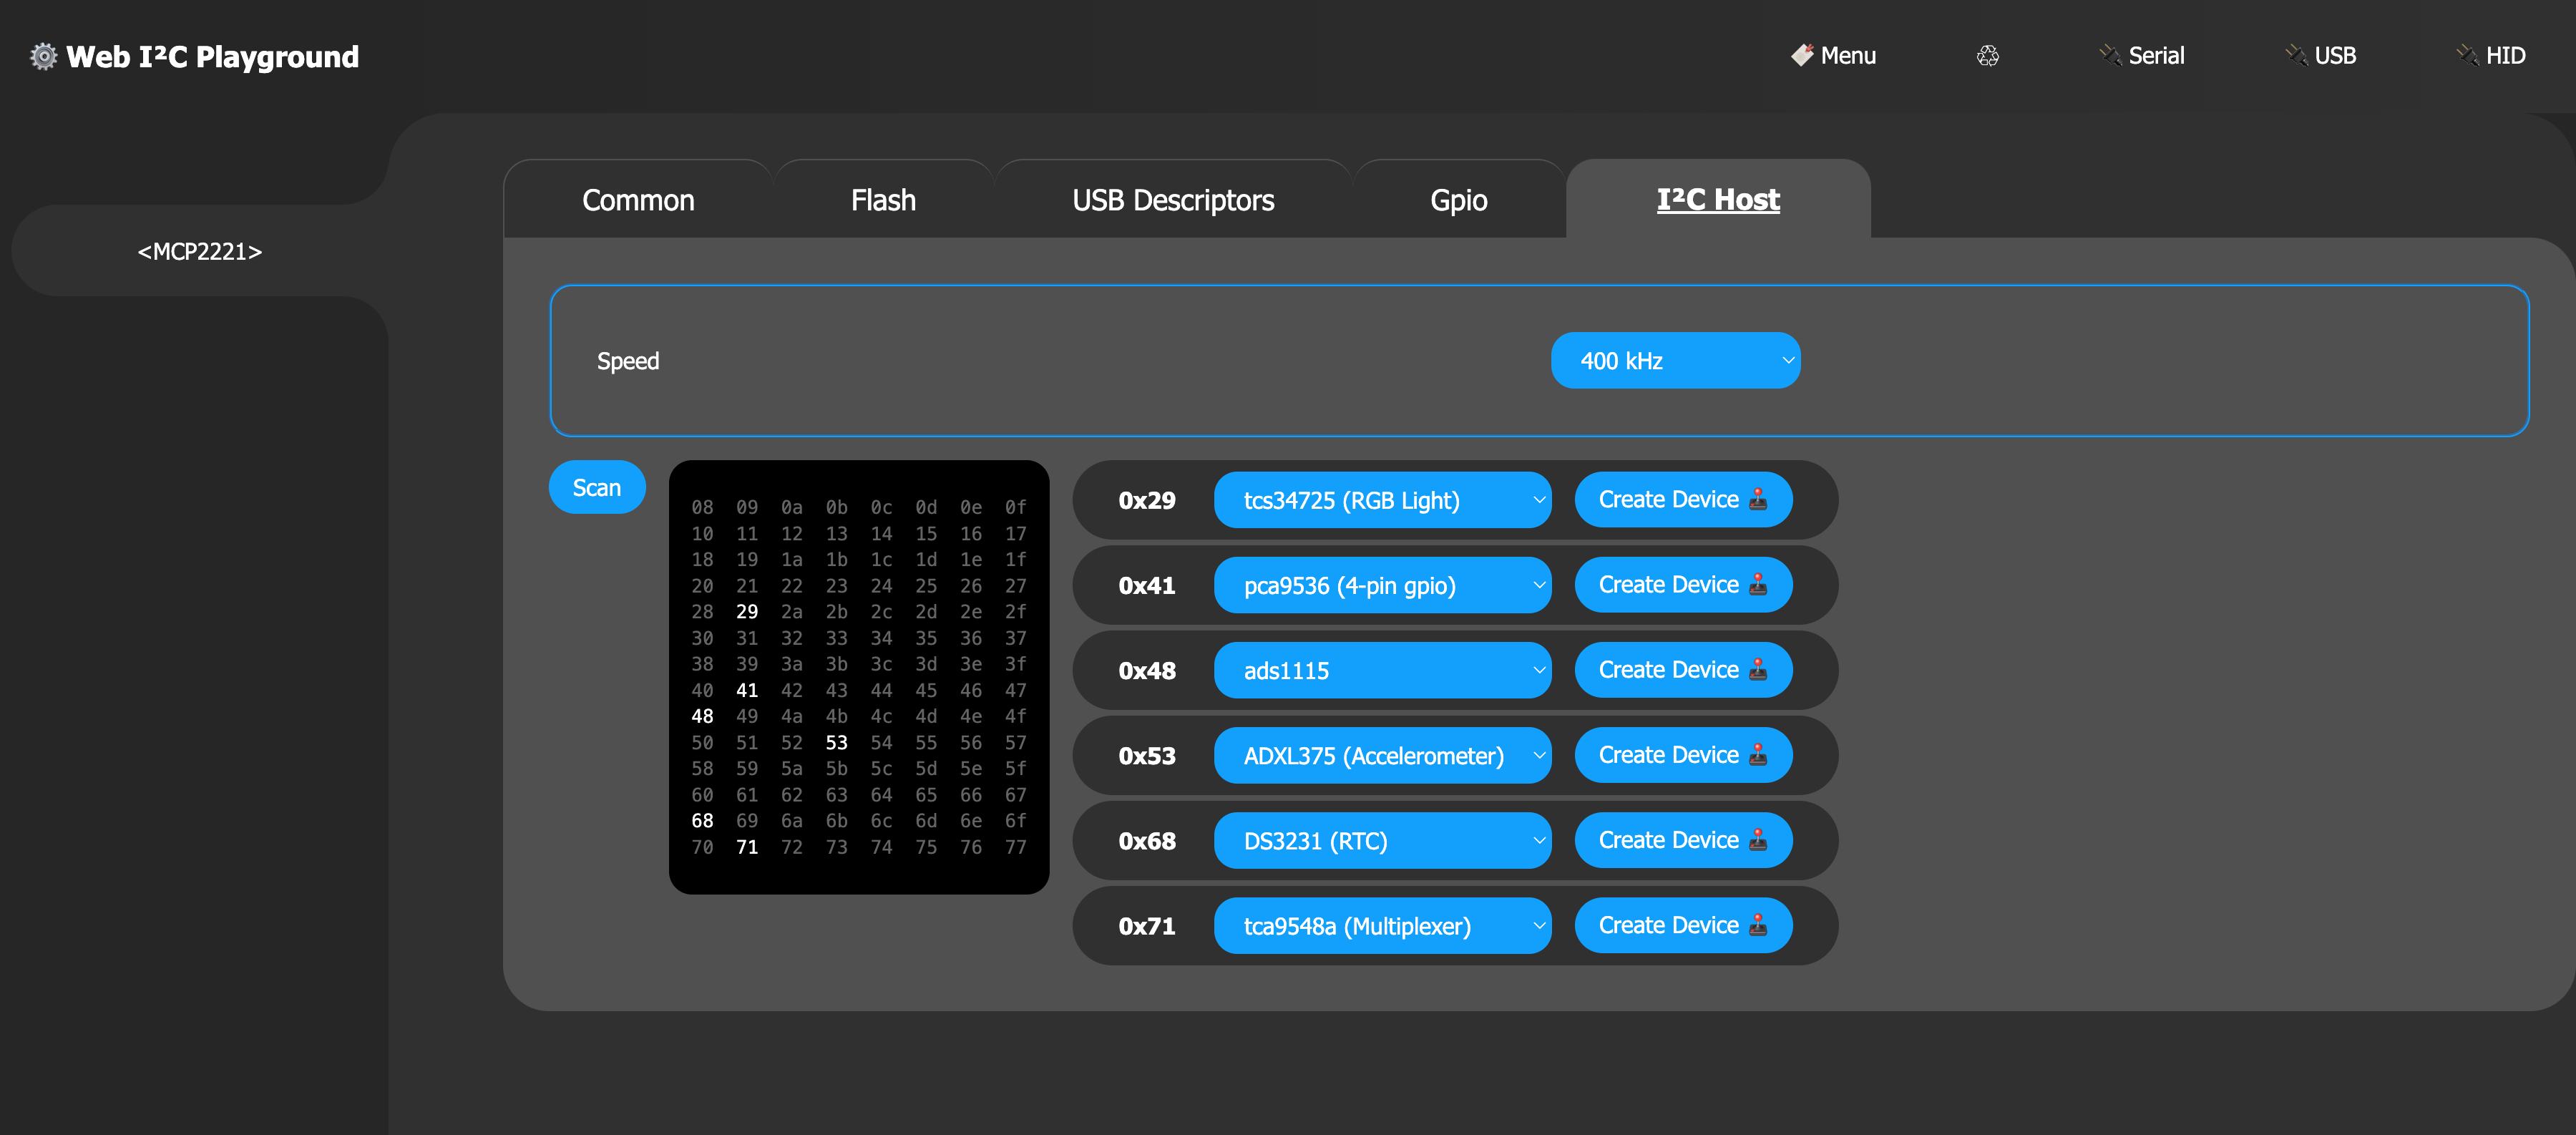
I²C
- standard direct methods
- addition
I2CBusabstraction support
USB
- USB Descriptor support
- vendor / product Id
- requested mA
- etc
Example
The following example gives the outline of the usage pattern for creating the binding layer between the underlying HID implementations and this chip library.
import { MCP2221 } from '@johntalton/mcp2221'

const hidDevice = { /* likely navigator.hid.getDevices() ... etc */ }
const source = new HIDStreamSource(hidDevice)
const chip = MCP2221.from(source)

// do something with the chip
const { adc } = await chip.common.status()
const { ch0, ch1, ch2 } = adc
Stream API
Individual HID implementations are abstracted over the Stream API that supports BYOB (bring you own buffer) and Byte specific stream.
As such, the interface HIDStreamSource is used to normalize the sources into a stream.
Two examples of Stream Sources are given bellow: WebHID and Node-HID.
Web HID
The WebHID interface provides a robust browser based HID implementation (browser support)
The example code above can be updated to use the the concrete WebHIDStreamSource.
The API has several way of acquiring a HIDDevice, most common is to make a request for existing connected devices via navigator.hid.getDevices().
NOTE: an un-packaged version of WebHIDStraemSource can be found here. (future package publication may be forthcoming)
Node HID
NodeJS provides several HID binding packages. In the following example we will use the node-hid package.
As with WebHID, there are several interaction patters, and device discovery techniques. The following code explicit opens the device by vID/pID (note that the MCP2221 has the ability to "change" its IDs, it's defaults are used here).
NOTE: the current NodeHIDStreamSource is un-packaged, and can be found here
import { MCP2221 } from '@johntalton/mcp2221'
import HID from 'node-hid'
import { NodeHIDStreamSource } from './hid-stream-source.js'

const VENDOR_ID = 1240
const PRODUCT_ID = 221
const hid = await HID.HIDAsync.open(VENDOR_ID, PRODUCT_ID)
const source = new NodeHIDStreamSource(hid)
const chip = MCP2221.from(source)

// do something with the chip, like clear the interrupt flag
await chip.sram.set({ gp: { interrupt: { clear: true } } })
USB Descriptors
Setting the USB descriptors can effect how the device is discovered. HID implementation code should take into account those variation (as well as vendor and product ID assignments).
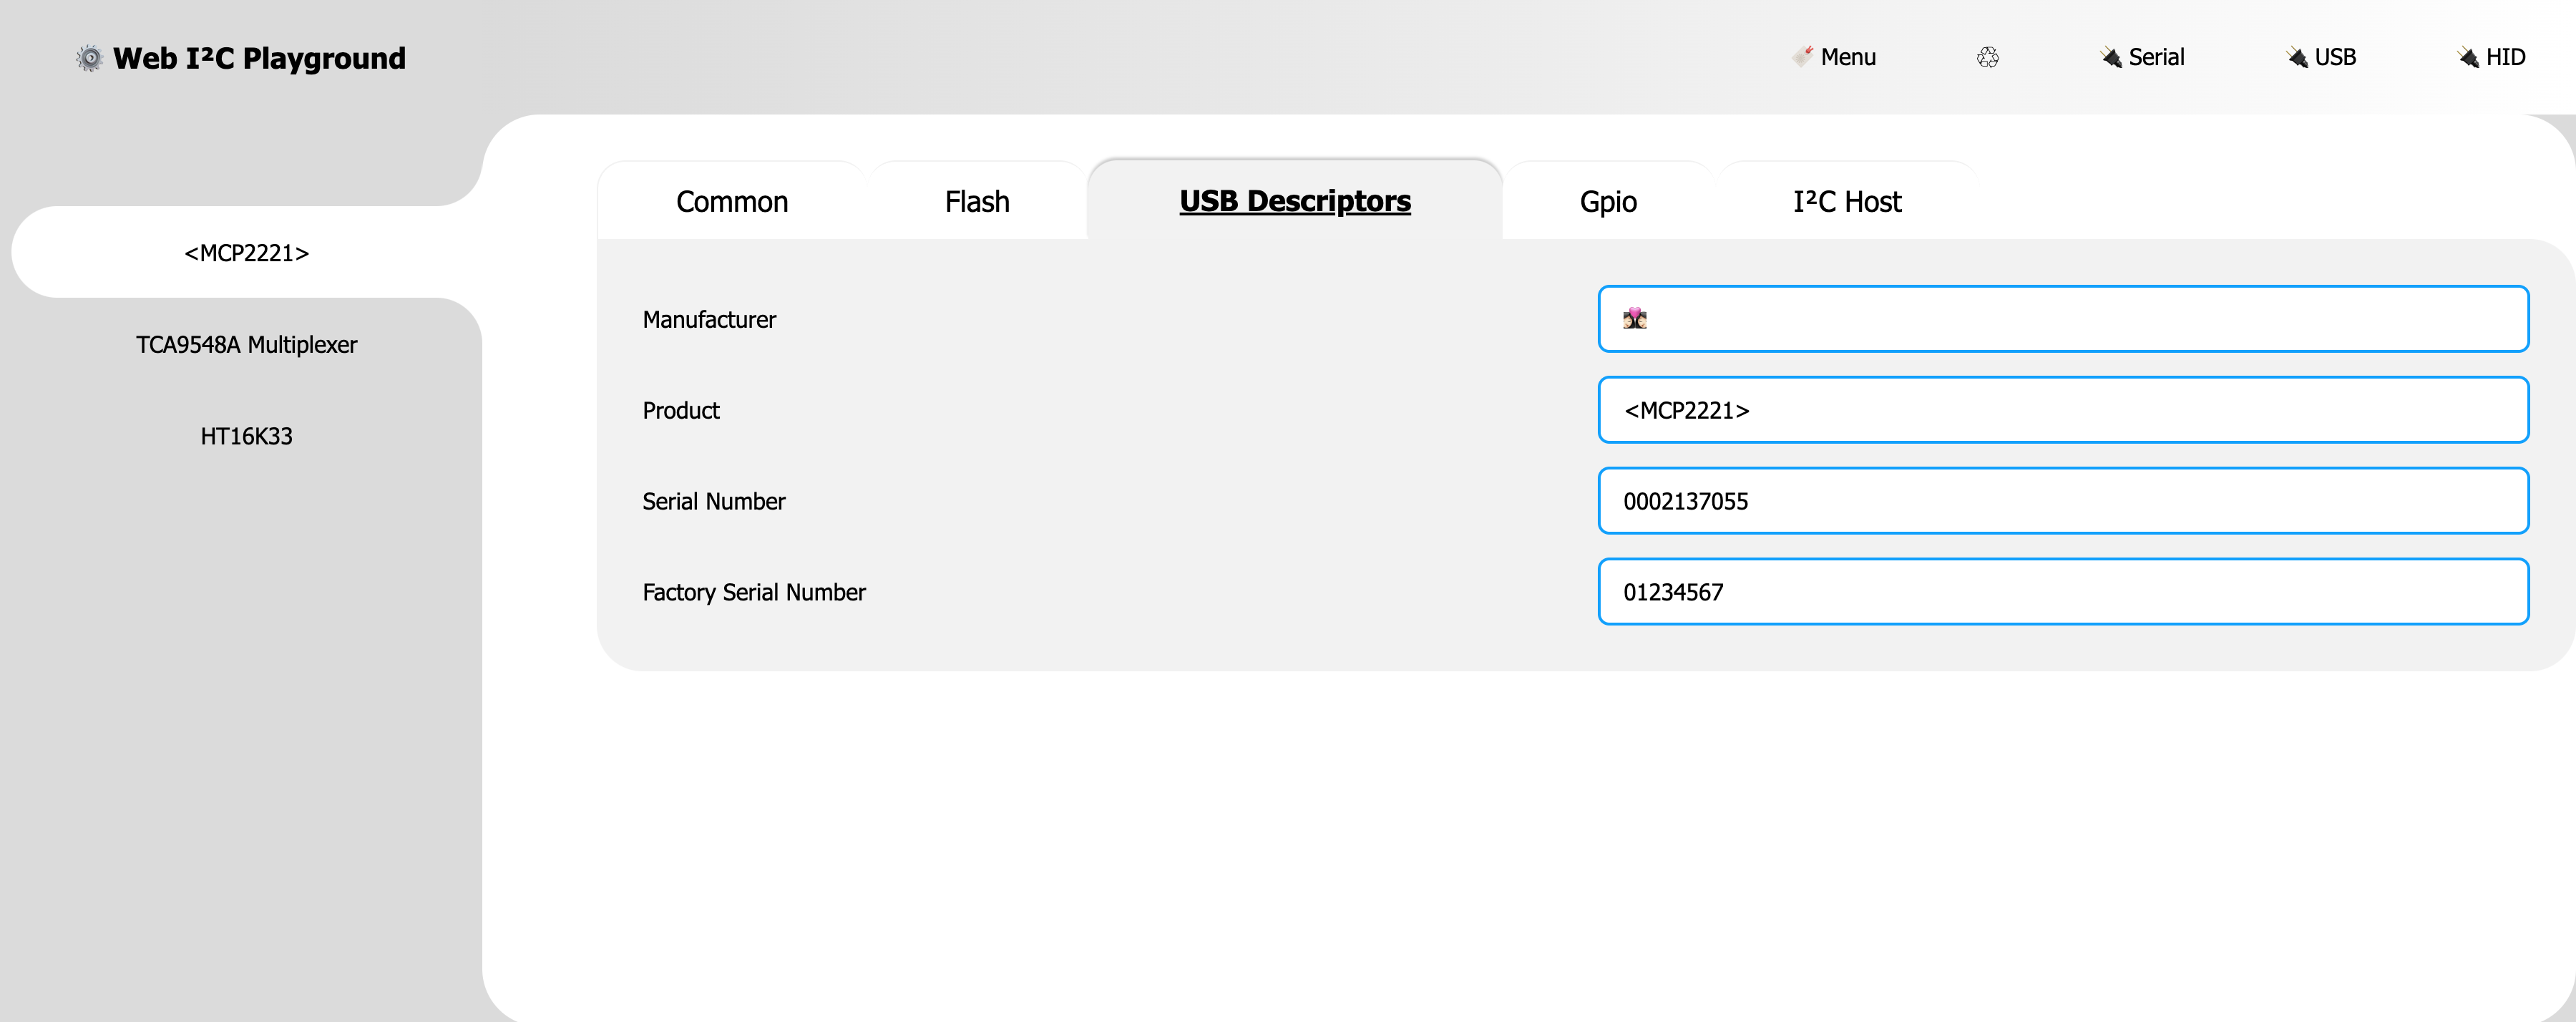
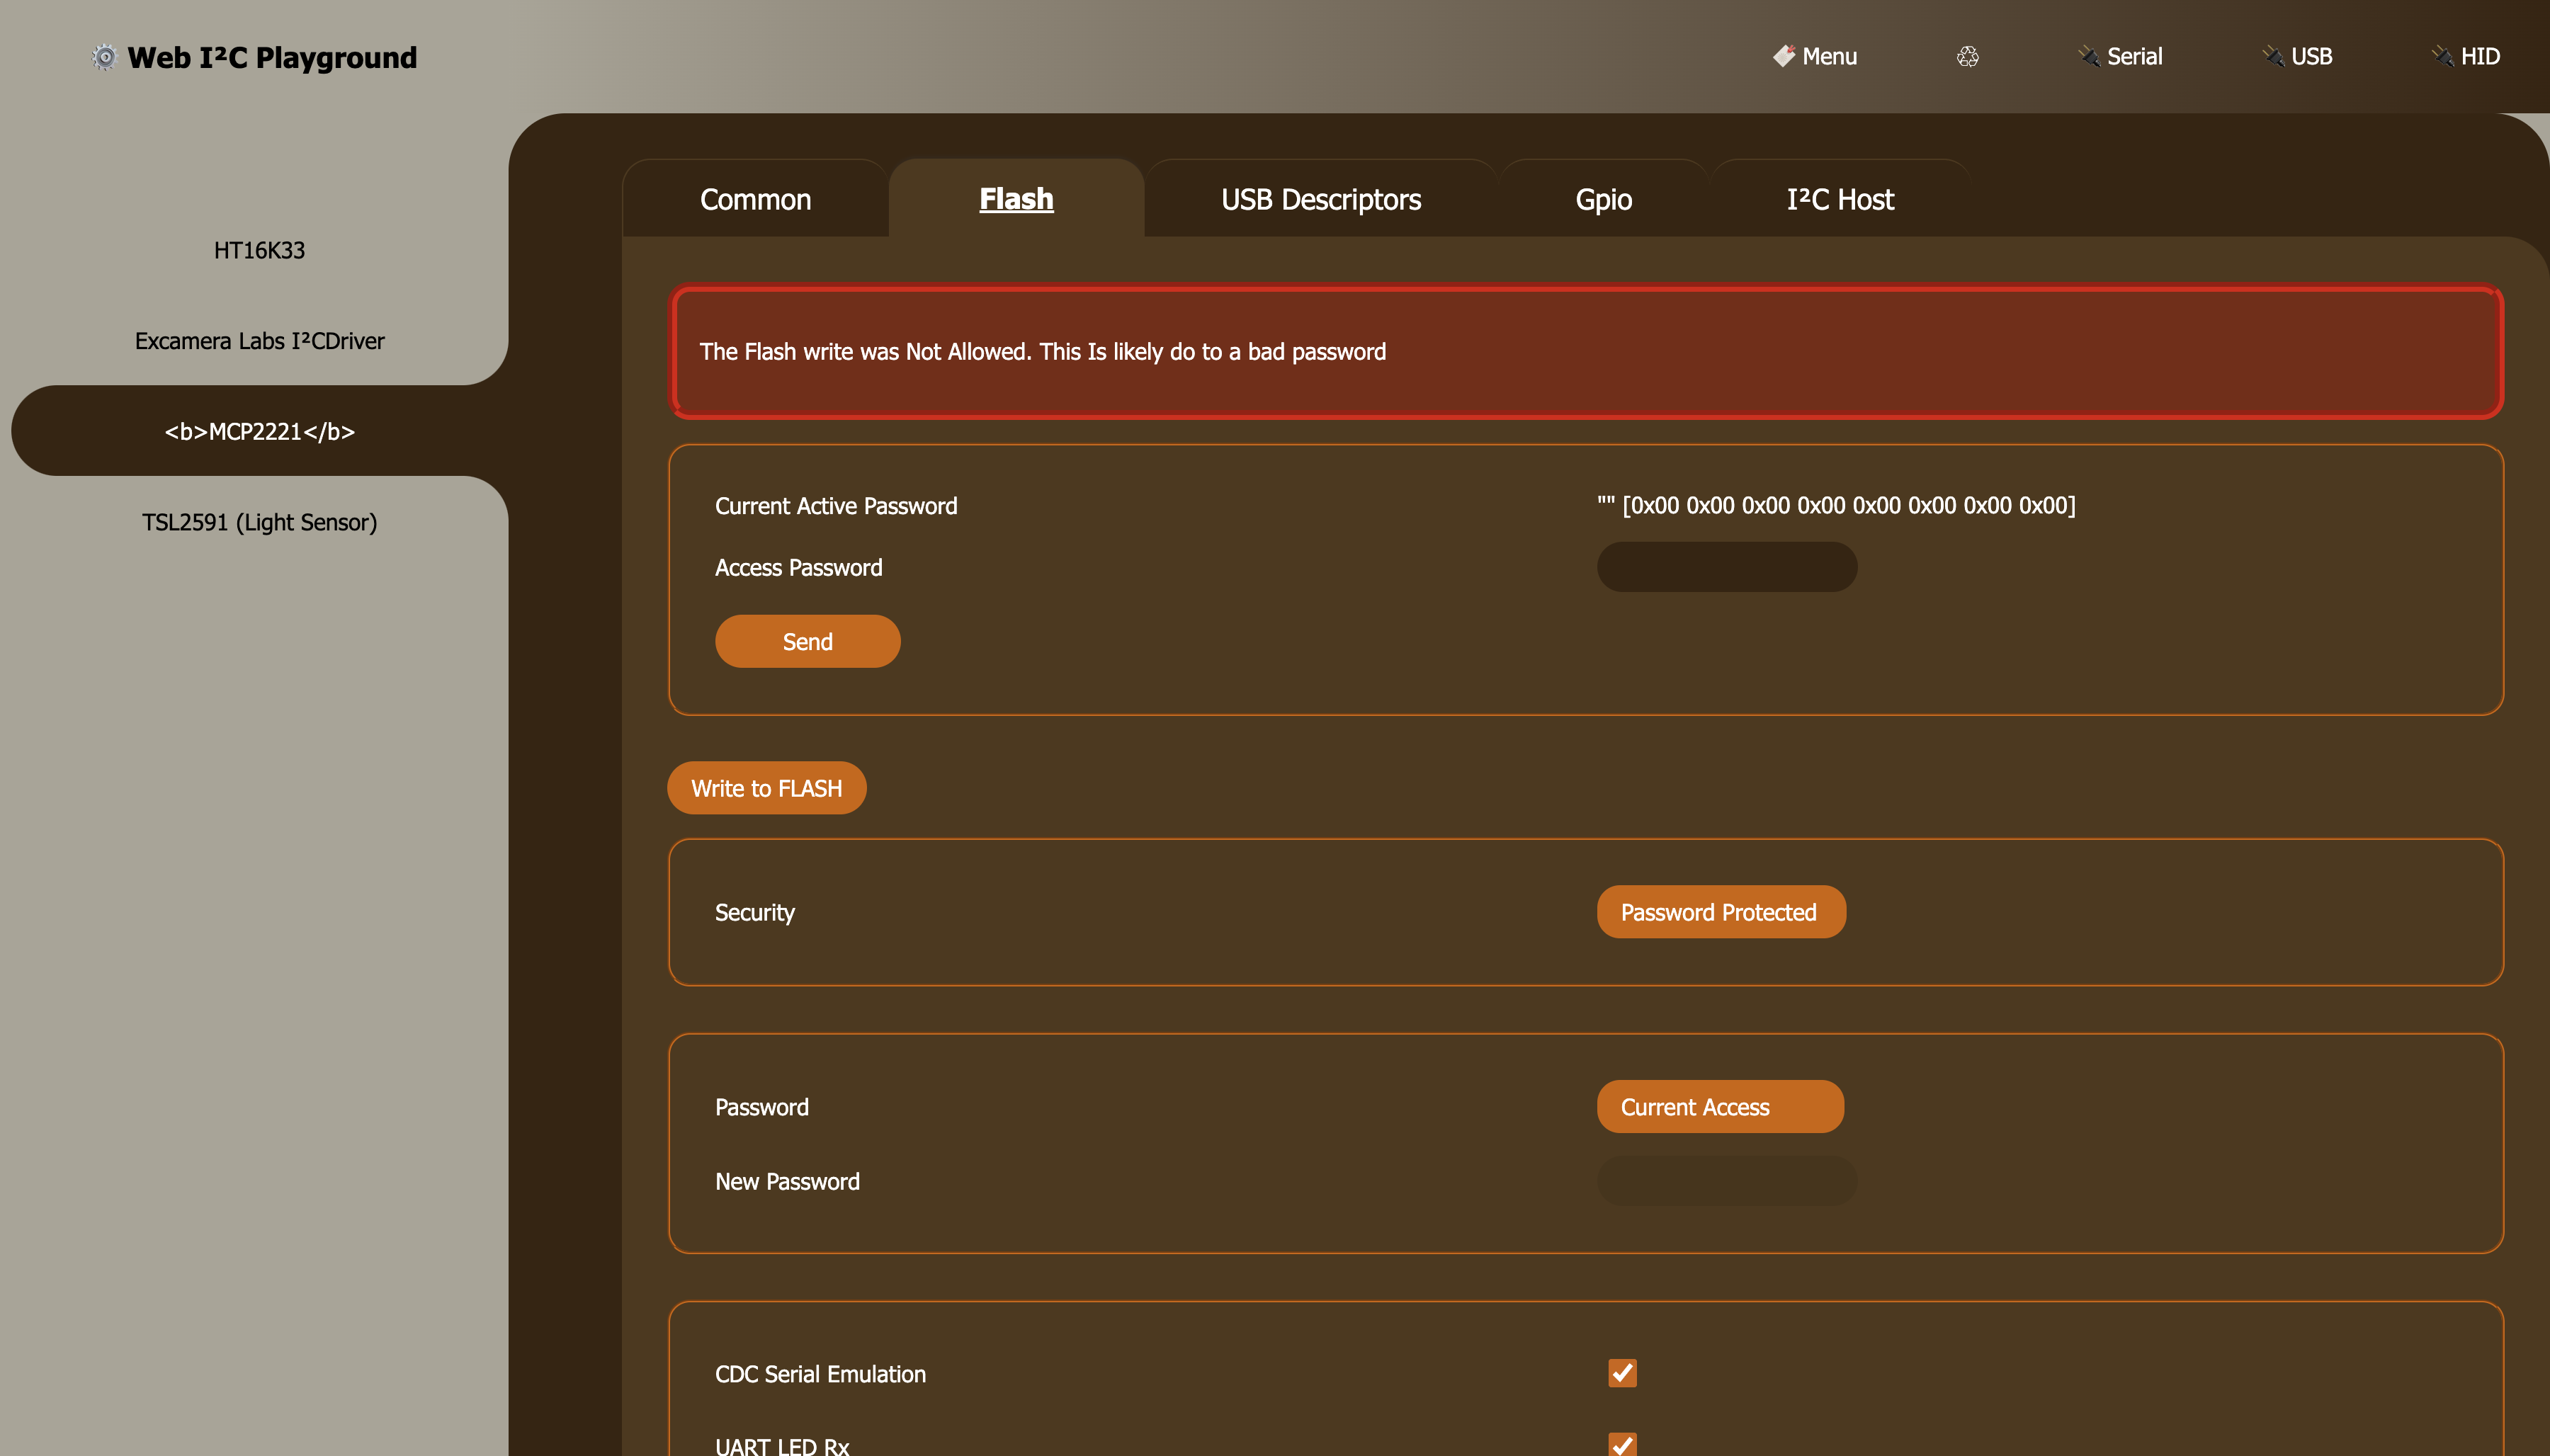
Note: Descriptors are considered parts of the FLASH and are subject to Security restriction.
I²C
I2CBus abstraction (recommended)
Basic usage of such API can be useful in some instances. However, due to complexities and error checking logic, it is recommended to use the I2CBus abstraction layer
Direct API
The MCP2221 exposes several low-level I²C constructs. These can be used to build custom bus interactions
Note: the chip's I²C state machine can hang / crash is care is not taken to check status and appropriately cancel transaction. I2CBus usage is encouraged, and may also be a good reference.
The following example is simplification from the the above I2CBus implementation code.
const chip // chip from base examples

// request a read of length 3 bytes from address 0x70 (7-bit address)
const REQUESTED_I2C_BYTE_LENGTH = 3

// start the request
const { status } = await chip.i2c.readData({
    address: 0x70,
    length: REQUESTED_I2C_BYTE_LENGTH
})
if(status !== 'success') { throw new Error('☠️') }
// check i2c state and other transfer values for readiness

//
// it is almost sertian that a call to `status` is needed, the commands "success" status value is not sufficiant for checking the state of the bus
// const { status, i2cStateName, ... } = await device.common.status({ opaque })
// if (__i2cStatusIsNotOk__) { throw new Error('😢') }

// if that all went well then attempt to get the buffer
// here we allow the chip to allocate the buffer
// BYOB can be used here also for performance / efficiency
const { validData, buffer, readBackBytes } = await chip.i2c.readGetData()
if(!validData) { throw new Error('🧨') }
if(readBackBytes === REQUESTED_I2C_BYTE_LENGTH) { throw new Error('👎') }


// process the data
// check if the returned buffer is a view and coheres it into a Uint8Array
const u8 = ArrayBuffer.isView(buffer) ?
    new Uint8Array(buffer, buffer.byteOffset, buffer.byteLength) :
    new Uint8Array(buffer)

// deconstruct TypedArray
const [ one, two, three ] = u8
Security
While the chips SRAM settings (gpio etc) can be changed at will, these settings must explicit be save into FLASH.
Under normal conditions the chip's Security setting is "Unlocked". This allows for writing to the FLASH without restriction.
However, if set to "Password Protected", the chip will enforce the sending of the password (once per "session") prior to FLASH writes.
Failure to set the password during a "session" will prevent further password attempts until the "session" is over.
Note: Assumption about string padding (space vs null), justification and encoding (ut-8 etc) effect password byte representation. It is "wise" to use the same software to get AND set the password.