
@mr_roiz/codeforge
v1.19.0
Published
TUI tool for practicing live coding interview exercises

Maintainers
 mr_roiz
Readme
⚒ codeforge


A terminal forge for sharpening your coding skills.
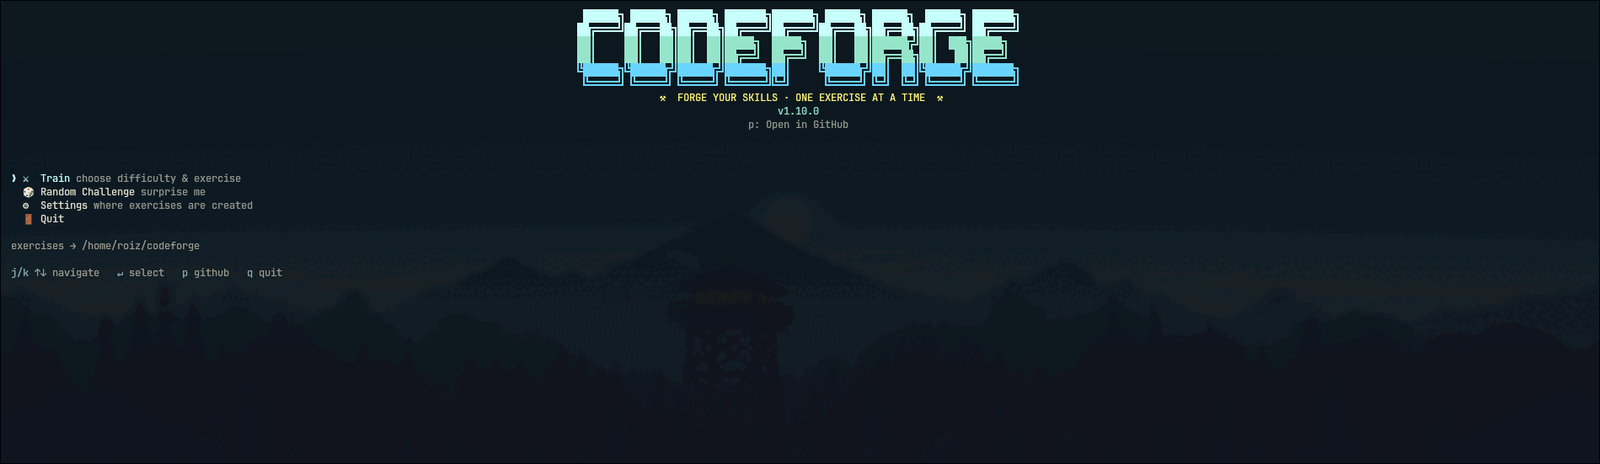
In an era where more and more code is written by prompting, a quiet gap is growing: the ability to sit in front of a blank function and reason your way to a working solution from scratch. AI coding is great at shipping features. It does not train the fundamentals that keep you effective when there's no auto-complete to lean on: problem decomposition, data-structure fluency, edge-case instinct, and the confidence to write correct code while someone watches.
codeforge exists to close that gap. It drops a self-contained exercise into your working directory — problem statement, examples, constraints, hints, and a hidden test suite — then gets out of your way. You solve it in your own editor, your own way. When you're ready, codeforge runs the tests and tells you the truth: pass or fail, with the exact cases that broke, plus a plain read on how your solution scales.
Interviews are one place these skills get measured, but the goal is broader: becoming a sharper problem solver every day. The exercises are curated from real problems, and the tests are unforgiving. But passing is the floor, not the ceiling — so codeforge also estimates the complexity you landed on, the way an interviewer would ask.
Why a TUI
The terminal is where developers already live, and this is a selector, not an
IDE. codeforge never tries to be your editor, format your code, or manage your
solution. You decide your editor, your plugins, your keybindings, your
workflow — run it in vim, neovim, VS Code, Cursor, Zed, Helix,
whatever you love. codeforge only checks the output. That is the whole
contract.
What you get
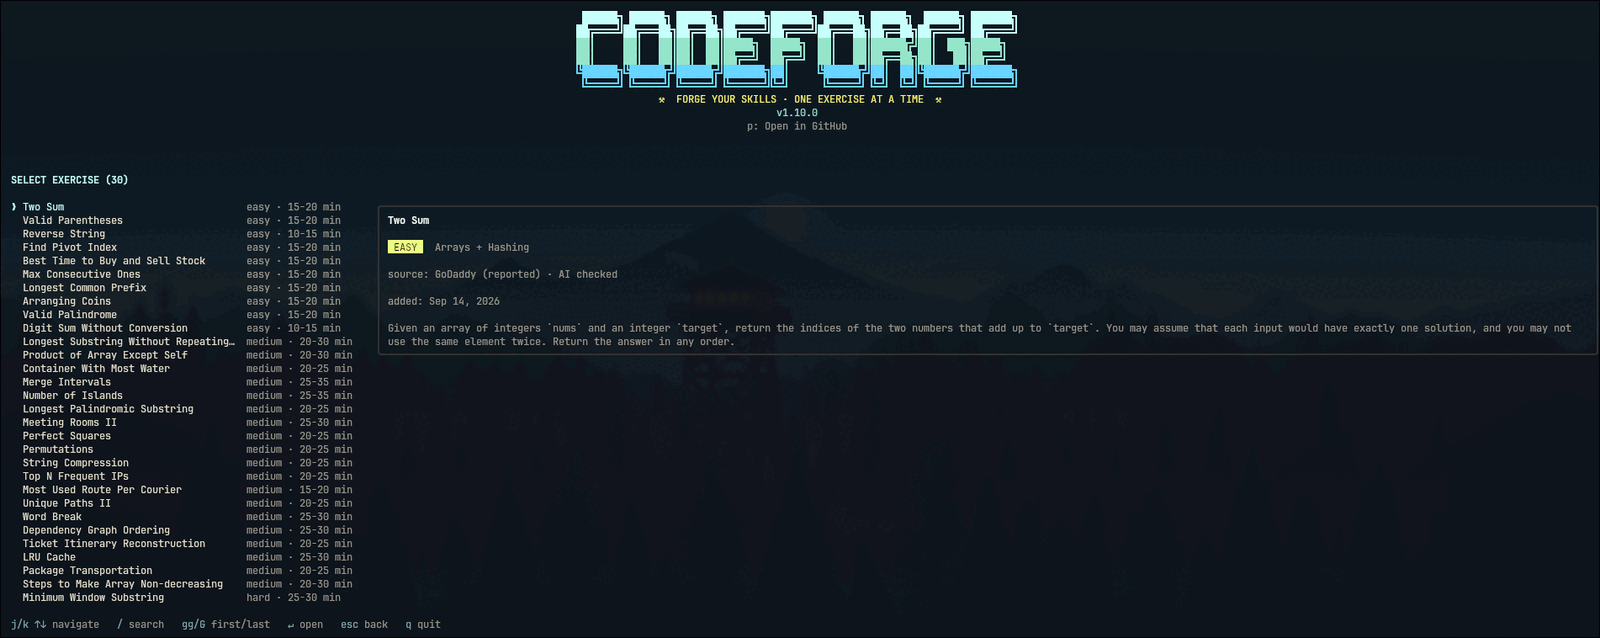
- A growing library of curated algorithmic exercises across Easy, Medium, and Hard, chosen to train the patterns that keep showing up in real code and coding rounds. Highlights: Two Sum, Valid Parentheses, Two Pointers & Sliding Window (Longest Substring, Minimum Window Substring), Prefix/Suffix & Intervals (Product Except Self, Merge Intervals, Meeting Rooms II), Graph/Grid (Number of Islands, Dependency Graph Ordering), DP (Word Break, Unique Paths II, Perfect Squares, Longest Palindromic Substring), design (LRU Cache, Chainable Calculator), plus practical-logic tasks (Weighted Voting, Top-N Frequent IPs, Ticket Itinerary, Most-Used Route Per Courier).
- TypeScript-first exercise templates and Jest test suites.
- Keyboard-driven TUI with a game-flavored feel: browse by difficulty, get a random challenge, read the statement, reveal hints, and forge your solution.
- Progress at a glance — the home screen shows how much of the catalog you've solved, overall and per difficulty, plus your total attempts.
- Honest testing — the test file is regenerated every run, so you cannot "fix" the tests to make yourself pass.
- Big-O feedback — every run reads your solution and gives a rough
complexity estimate (e.g.
O(n)), with a confidence and a one-line reason, so you can tell a brute force from the real thing.
Install
Install the CLI globally from npm:
npm install -g @mr_roiz/codeforge
codeforge
Or run it without installing anything:
npx @mr_roiz/codeforgeRequires Node.js 20 or newer. It's an interactive TUI — run it directly in a terminal (not piped).
Development
For local development no build is needed — run straight from source:
pnpm install
pnpm dev            # tsx, runs the TUI from src (resolves @ aliases directly)
To build and run the distributable CLI:
pnpm build
node dist/index.js
# or link it globally:
pnpm link --global
codeforge
How to practice
Launch
codeforge.(Optional) Open Settings to choose where exercises are created. Defaults to
~/.codeforge/exercises.Train to browse by difficulty, or Random Challenge for a surprise.
Open an exercise to read it — nothing is written yet. You can browse the statement, examples, constraints, hints (
h), and the full graded test cases (c) to decide whether to attempt it.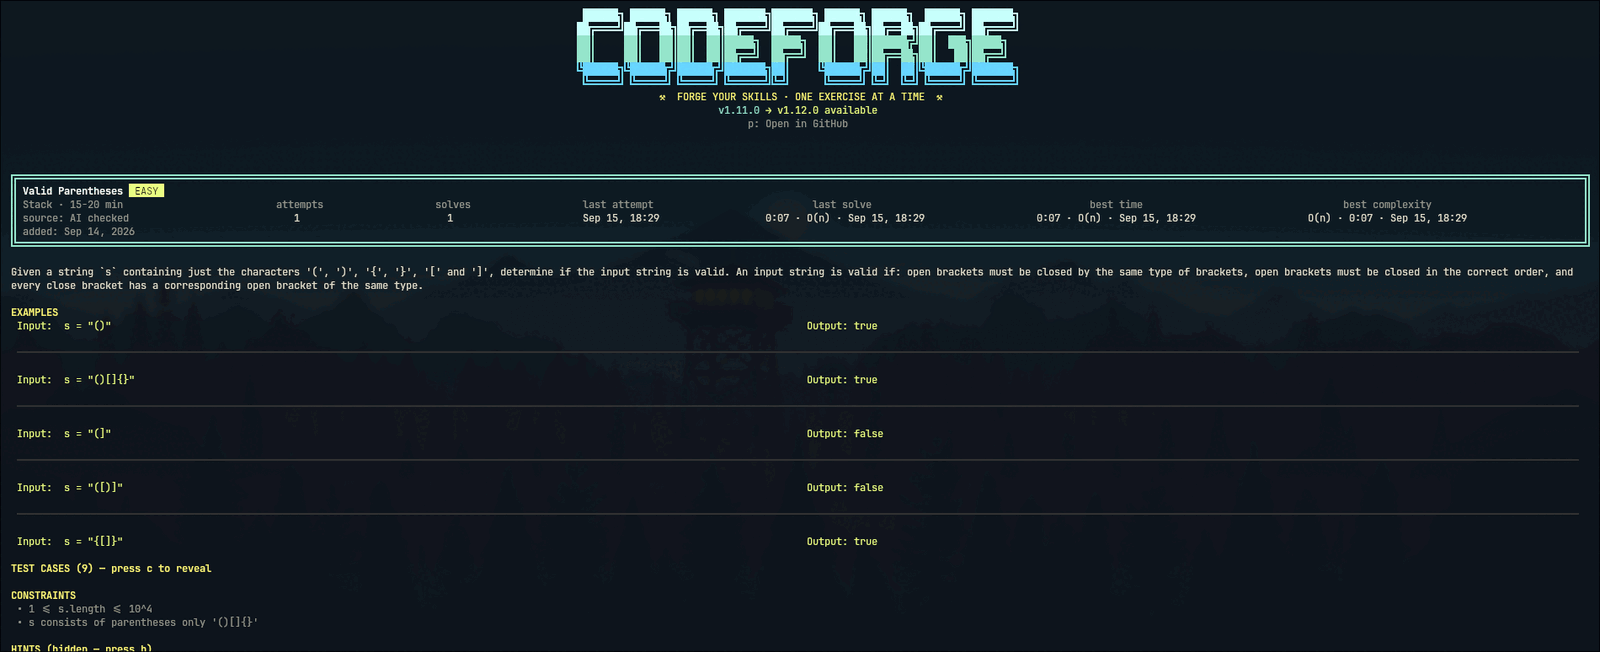
Press
sto start it — this creates the files and starts the clock. (Or presstto run the tests right away; codeforge creates the files first if they don't exist yet.) If a solution from a previous session is already there,sasks whether to reset it back to the stub before starting. The files land under<settings-dir>/<exercise-id>/:~/.codeforge/exercises/two-sum/ exercise.ts ← your solution (yours to edit) exercise.test.ts ← the test suite (auto-generated, don't touch)Open
exercise.tsin your editor and implement the function — or just pressoin the TUI to launch it. The problem statement, examples, constraints, and hints are all in the file header.Back in the TUI, press
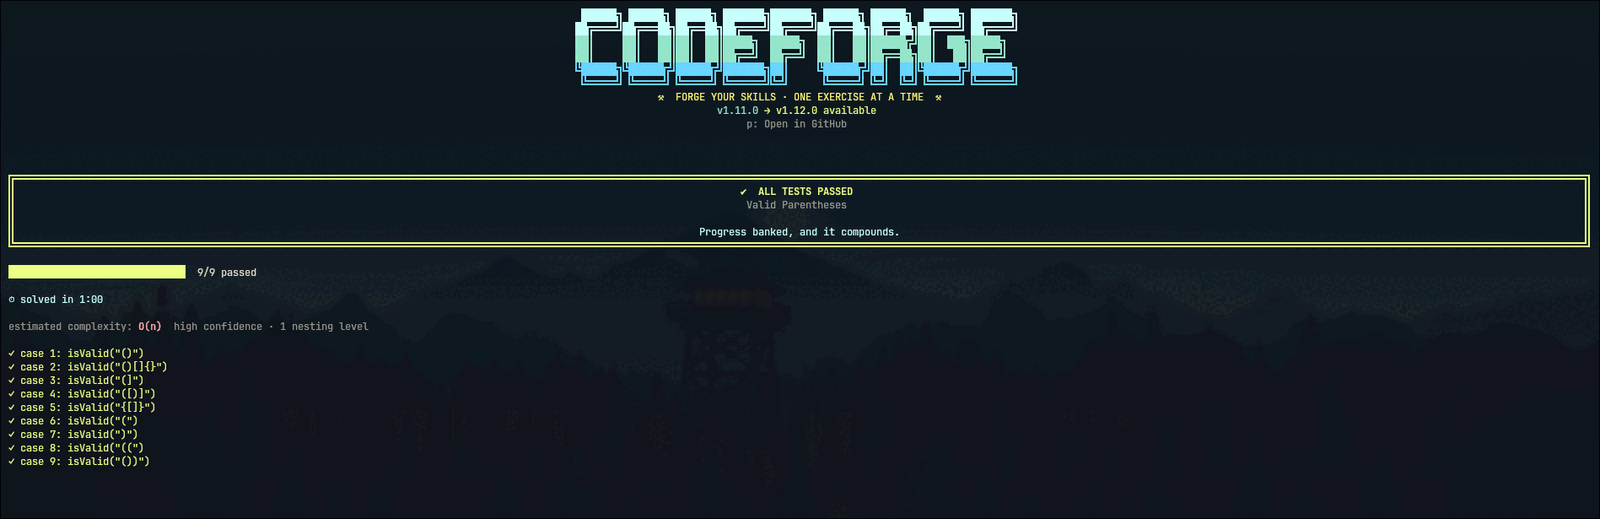
tto run the tests. Pressron the results screen to run them again after another edit.Green bar = you're done. Red bar = read the failing cases and go again. Passing runs are recorded, marking the exercise solved with its best time. The clock stops on a pass — its final time is frozen on the exercise page, and
rstarts a fresh timed attempt.Either way, the results screen reads your solution and estimates its complexity — a quick "is this the right shape?" check alongside the tests.
| Passing run | Failing run |
| ----------- | ----------- |
|  |
| 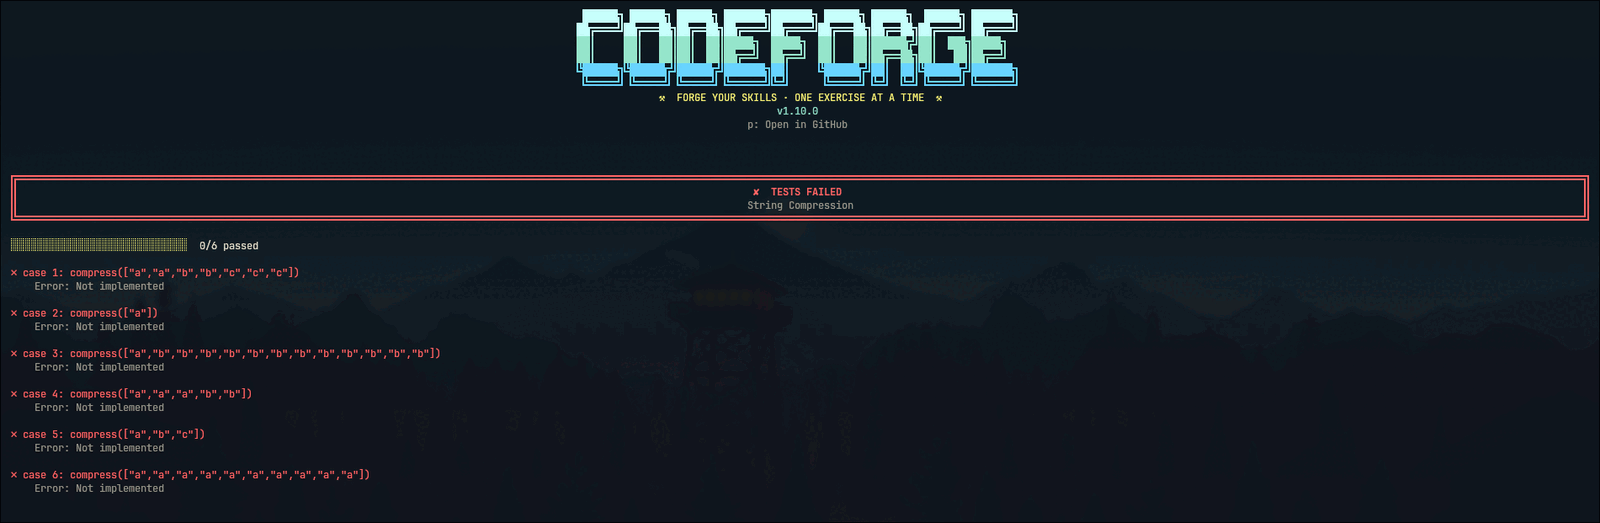 |
|
Settings
⚙ Settings lets you set the directory where exercises are created. The path
is validated and created (mkdir -p), then saved to a config file so it
persists across runs:
| Platform | Config file |
| ------------- | ---------------------------------------- |
| Linux / macOS | $XDG_CONFIG_HOME/codeforge/config.json (defaults to ~/.config/…) |
| Windows | %APPDATA%\codeforge\config.json |
Resolution order (highest first):
CODEFORGE_DIRenvironment variable — handy for scripting/CI- the directory saved in Settings
- the default,
~/.codeforge/exercises
~ is expanded, and relative paths are resolved against the current directory.
Progress
codeforge keeps a small record of your practice in
~/.codeforge/state.json, independent of which exercises directory you use. For
each exercise it remembers your attempts and solves, the moment of your last
run, and snapshots of your best solves — the fastest, and the cleanest in
complexity. Solved exercises are marked with a ✓ in the exercise list, and the
highlighted exercise lays its stats out as columns, both in the list's detail
panel and on the exercise page.
An attempt is a test run made while the clock is running; runs with the clock stopped aren't recorded at all. A solve is counted whenever a run passes while timed. Re-checking an old solution never inflates the count, because opening existing work never starts the clock — you'd have to reset it (which starts a fresh, countable attempt) first.
The file is written atomically, so an interrupted run can't corrupt it. Press
x on an exercise to clear just that exercise's stats, or choose Reset
Progress on the main menu to clear everything (it asks for confirmation first).
The main menu also shows a live overview — solved out of the catalog, per
difficulty, plus total attempts.
Complexity
Read the tests, and you learn whether your solution is right. Read the complexity, and you learn whether it's good. After every run, codeforge walks your syntax tree and puts a rough Big-O on the results screen:
estimated complexity: O(n) high confidence · 1 nesting levelIt reasons about the shape of your code — how deeply loops and array methods
nest, whether they walk the same collection or different ones, whether you sort,
whether a search space halves, whether you recurse — so it's comfortable with
O(1), O(log n), O(n), O(n log n), O(n²) and multi-variable products
like O(n·m), and honest when it can't tell (it says so, and lowers its
confidence rather than guessing). The estimate travels with your progress, so an
exercise's best complexity sits next to its best time.
It's a heuristic, not a proof: it can't see through data structures or amortization. Treat it as a nudge — a way to catch an accidental brute force before it becomes a habit.
Editor
Press o on an exercise to start working on it in your editor. If the
exercise hasn't been started yet, codeforge creates the files first (never
overwriting a solution), starts the clock, and opens exercise.ts. Opening an
exercise that already has a solution just launches the editor — it never starts
or resets the timer. It picks an editor like this:
$EDITOR— may include arguments, e.g.EDITOR="code --wait"$VISUAL- the first of
code,cursor,zed,windsurf,subl,nvim,vim,nano,hx,emacs,microfound on yourPATH - otherwise the OS default handler for the file
Terminal editors (vim, nvim, nano, …) take over the terminal while you
edit, and codeforge comes back when you quit them. GUI editors open
independently and leave the TUI running.
Keys
| Key | Action |
| ---------- | ------------------------------- |
| ↑ / ↓ | Navigate |
| ↵ | Select / open |
| s | Start (or reset & start) the clock |
| t | Run tests |
| o | Open in your editor |
| r | Restart the clock |
| x | Reset this exercise's stats |
| c | Show/hide the graded test cases |
| h | Toggle hints |
| p | Open the project on GitHub |
| esc | Back |
| q | Quit |
Exercise folder layout
src/
  exercises/         one file per exercise + a barrel (index.ts)
    types.ts         the Exercise interface
    two-sum.ts
    number-of-islands.ts
    ...
  utils/
    generate.ts      renders exercise.ts + the Jest test file
    runTests.ts      spawns the isolated Jest runner
    jestRunner.ts    runs Jest in a child process, returns JSON results
  app/               TUI screens (Ink + React)
    hooks/           action hooks (exercise flow, config)
    store/           Jotai atoms (screen, config, session, progress)
  components/        logo, selector, shared UI
  lib.ts             programmatic API (packaged as dist/lib.js)
  index.tsx          TUI entry / bin (packaged as dist/index.js)
tsup.config.ts       bundler config (entry points, ESM, Node target)
Adding an exercise is one file plus one line in the barrel.
Path aliases
Imports use @ aliases with no file extensions — no more ../../ chains:
| Alias | Points to |
| -------------- | ------------------- |
| @app/* | src/app/* |
| @components/*| src/components/* |
| @exercises | the exercise barrel |
| @exercises/* | src/exercises/* |
| @utils/* | src/utils/* |
They are declared once in tsconfig.json (paths) and resolved natively by the
tsup/esbuild build (tsup.config.ts), which bundles the source into
dist/index.js, dist/lib.js, and dist/jestRunner.js. tsx resolves the same
aliases in dev. No extension-rewriting step, no runtime loader. (Node's native
subpath imports only accept #, and tsc never rewrites paths, so a bundler
is the clean way to keep @ aliases extensionless.)
Notes
- Tests run through Jest in an isolated child process, so the TUI never gets clobbered by test output.
- Existing solutions are never overwritten silently — codeforge only creates
exercise.tsif it is missing, andt/onever touch it. The one exception isson an exercise that already has a solution, which asks first and only wipes it back to the stub if you confirm. Your work is safe. - The test suite is always refreshed, so it stays in sync with the exercise definition.
- Generated tests normalize
-0to0, so implementations that produce negative zero (e.g. Product of Array Except Self) aren't failed unfairly.
Contributing
Contributions are very welcome — the best part of this project is the exercise library, and it gets better with every real problem people add.
Add an exercise
Create
src/exercises/<kebab-case-id>.tsusing the shared interface:import type { Exercise } from '@exercises/types'; export const myExercise: Exercise = { id: 'my-exercise', name: 'My Exercise', createdAt: '2026-09-14', // ISO date (YYYY-MM-DD) — shown in the TUI as "added" difficulty: 'medium', // 'easy' | 'medium' | 'hard' type: 'Arrays + Hashing', time: '20-30 min', description: '...', // plain text; the generator writes it into the file header examples: [{ input: '...', output: '...', explanation: '...' }], constraints: ['...'], // NOTE: include `export` — the generated tests import this function functionSignature: 'export function myFn(nums: number[]): number', hints: ['...'], tests: { // optional: set to true if the solution mutates its input instead of returning (e.g. reverse-string) mutatesInput: false, cases: [ { input: [[1, 2, 3]], expected: 6 }, // optional: set `sorted: true` when the answer is an array in any order { input: [[3, 1, 2]], expected: [1, 2, 3], sorted: true }, ], }, };Register it in the barrel
src/exercises/index.ts(export it and add it to theexercisesarray).
That's it — the TUI, the generator, and the Jest suite all pick it up automatically.
Guidelines
- Skill relevance over novelty. Prefer problems that train a transferable pattern (arrays, two pointers, intervals, graphs, DP, design) over one-off puzzles. Problems that show up in real coding rounds are especially welcome — this is a forge for skills, not a puzzle dump.
- Correct, unambiguous tests. Every case must have exactly one valid
answer (or mark
sorted: truewhen order doesn't matter). Add edge cases: empty input, duplicates, negatives, boundaries. - Respect the stated constraints. Don't add tests that violate your own
constraints(e.g. testingn = 0when the constraint says1 <= n). - Keep dependencies minimal. The runtime is
ink+react; testing isjest+ts-jest. Please don't add libraries for things the standard library already does. - No solution in the TUI. codeforge generates the problem and checks the output — solving happens in the user's own editor. Keep it that way.
- TypeScript-first, formatted with the project's existing style.
Provenance labels
Every exercise shows where it came from, declared inline on the exercise
object. Omit it and the label defaults to AI checked (tests reviewed by
AI only). Levels:
| Level | Meaning |
| ------------ | --------------------------------------------------------- |
| ai-checked | default — tests reviewed by AI, no human confirmation |
| reported | seen in public candidate reports / aggregators |
| verified | a human confirmed it was used in a real interview |
validation is a list, so an exercise can accumulate provenance over time:
// src/exercises/two-sum.ts
export const twoSum: Exercise = {
  id: 'two-sum',
  validation: [
    { level: 'reported', source: 'GoDaddy' },
    // a human later confirmed it was asked at EPAM:
    // { level: 'verified', source: 'EPAM' },
  ],
  ...
};
That renders as GoDaddy (reported) · AI checked. Add a verified entry and it
becomes GoDaddy (reported) · EPAM (human-verified) · AI checked. Please don't
claim verified without first-hand knowledge.
Development
For local development no build is needed — run straight from source:
pnpm install
pnpm dev            # tsx, runs the TUI from src (resolves @ aliases directly)
pnpm typecheck      # tsc --noEmit
pnpm dev also spawns the TypeScript test runner via tsx, so exercising
solutions works without building.
To produce the distributable CLI:
pnpm build          # tsup → dist/index.js, dist/lib.js, dist/jestRunner.js
node dist/index.js  # run the TUI from the build
src/lib.ts is a programmatic API (exercises, ensureGenerated, runJest,
…) and is what the verification harness drives.
There is no separate test suite for the tool itself yet — the fastest verification is to add an exercise, generate it, implement the reference solution, and confirm the suite goes green (and red when you break it).
Pull requests
- One exercise or one focused change per PR, please.
- In the PR description, note the source/context for any exercise you add (e.g. "seen in a senior backend live session") and confirm you verified both a passing and a failing run.
Releases
Releases are automated with semantic-release
on every push to main. Commit messages must follow
Conventional Commits; the next version is
derived from them:
| Commit | Release |
| ---------------------------------------- | ------- |
| fix: …, perf: …, refactor: …, etc. | patch |
| feat: … | minor |
| feat!: … or a BREAKING CHANGE: footer | major |
semantic-release then bumps package.json, updates CHANGELOG.md, and creates
the git tag and GitHub Release. Instead of publishing directly, it stages the
package on npm (npm stage publish); a maintainer must approve the staged
version with 2FA before it becomes public.
The workflow lives in .github/workflows/release.yml and uses an NPM_TOKEN
repository secret (a granular access token without 2FA bypass — it can
stage, not publish). It needs npm CLI ≥ 11.15.0, which the workflow installs.
Approve or reject a staged version (2FA required):
npm stage list                  # find the stage id
npm stage view <stage-id>       # inspect
npm stage approve <stage-id>    # publish it
npm stage reject <stage-id>     # discard it
Bootstrap: staged publishing can only target a package that already exists. The first version (
@mr_roiz/[email protected]) must be published directly with 2FA before the automated staging flow can take over:npm publish --access public
To preview a release locally (no publish, requires a GITHUB_TOKEN):
pnpm release --dry-runBuilt because shipping features and solving problems from scratch are different skills. Practice the one you want to keep sharp.