
azure-iot-central
v1.6.0
Published
Receive Json from previous node, send it to IoT Central provisioned device (Scope ID, Device ID, SAS Key). Supports mqtt, amqp, http. Supports commands, reported, desired properties and file upload. This is a fork of: https://github.com/pietrobr/node-red-
Maintainers
 grtn316
Readme
Node-RED Azure IoT Central connector
This connector allows you easily connect your node red project to Azure IoT Central, providing the Scope ID, Device ID and Primary Key created in Azure IoT Central portal for a specific Device unsing SAS or X509 certificates. See here for more details.
This connector supports MQTT, AMQP, HTTP as transport.
You can send telemetry from your device to the cloud as json playload.You can look at the Raw data view to have a first look at the data received by IoT Central.
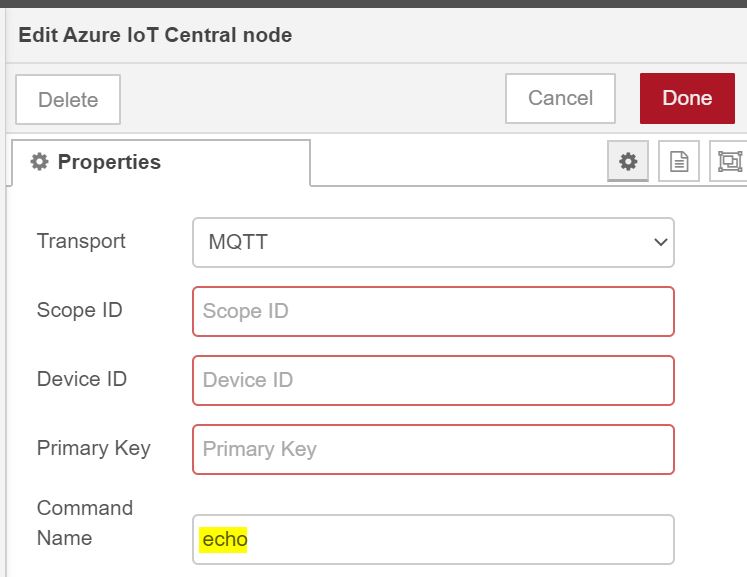
Commands
Commands from IoT Central (up to 5 ) to the device. For this scenario you have to use the method name used in IoT Central, when you have defined or imported the model. You fill the properties tab of the connector with the same command name, then define a Javascript function with the same name in your Node Red flow, as in following pictures.
Here is the 'echo' command:
Here the Javascript node in the flow:
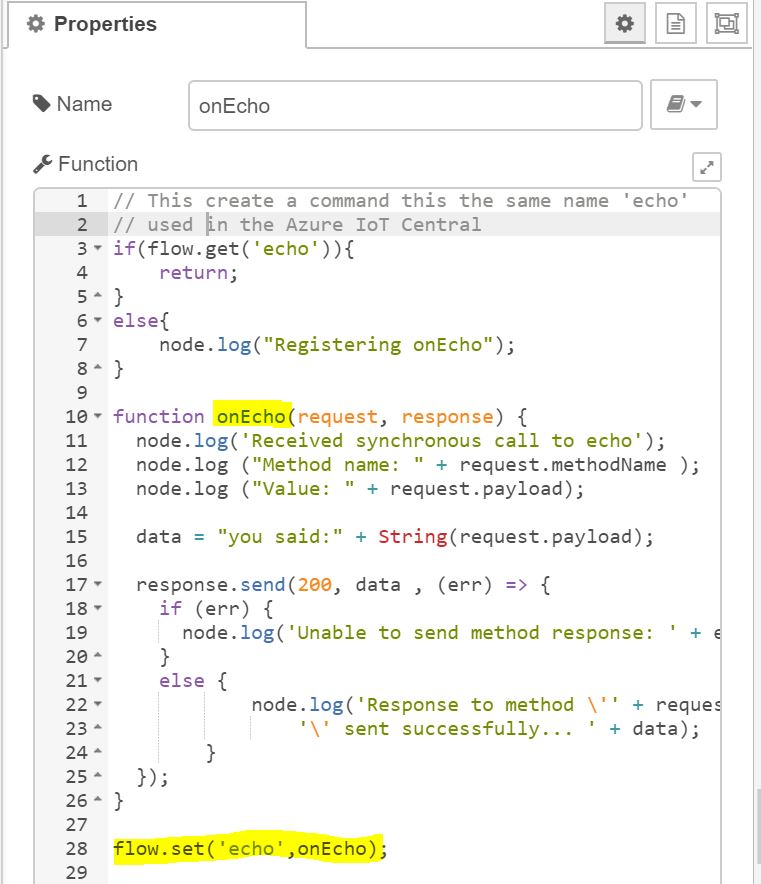
The Javascript function must be registered at the flow context and invoked before calling the connector. In the sample a simple inject is used to register the function, but you can do in other ways.
Here a template of Javascript code:
// This script create a command with the same name 'echo'
// used in Azure IoT Central model of the device.
if(flow.get('echo')){
    return;
}

function onEcho(request, response) {
  node.log('Received synchronous call to echo');
  node.log ("Method name: " + request.methodName );
  node.log ("Value: " + request.payload);

  data = "you said:" + String(request.payload);

  response.send(200, data , (err) => {
    if (err) {
      node.log('Unable to send method response: ' + err.toString());
    }
    else {
            node.log('Response to method \'' + request.methodName + '\' sent successfully... ' + data);
        }
  });
}

flow.set('echo',onEcho);
Reported and Desired properties
The connector support desired properties (Cloud (W) -> device(R)) and reported properties (Device(W) -> Cloud (R)).
To react to a desired properties you have to register a Javascript function at the flow level and invoke it before using the connector, this because the connector expected that function already registered.
Here we are registering the Javscript function using a simple inject node, but you can use other ways.
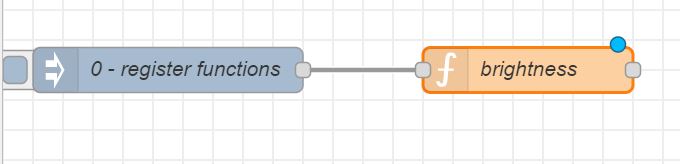
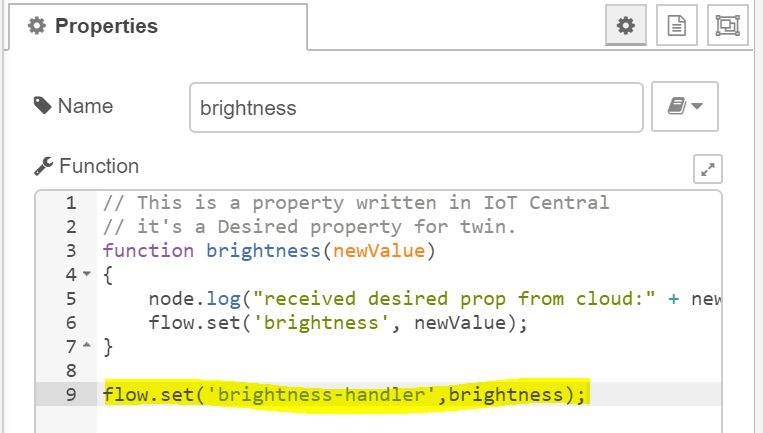
This is a sample Javascript code used for the brightness properties, the value of the property is stored using the flow context.
Important: the name of the handler of the desired property must be in the format as propertyname-handler as in the code below.
// This is a property set in IoT Central.
// It's a desired property for the device twin.
function brightness(newValue)
{
    node.log("received desired prop from cloud:" + newValue);
    flow.set('brightness', newValue);
}

flow.set('brightness-handler',brightness);
If you want to send a reported property create a json object that contain "reported.properties" field as follow.
{
    "reported.properties": {
        "status": true,
        "nonexists": true,
        "climate": {
            "minTemperature": "68",
            "maxTemperature": "76"
        }
    }
}
Install
npm install node-red-contrib-azure-iot-centralAuthenticating using SAS
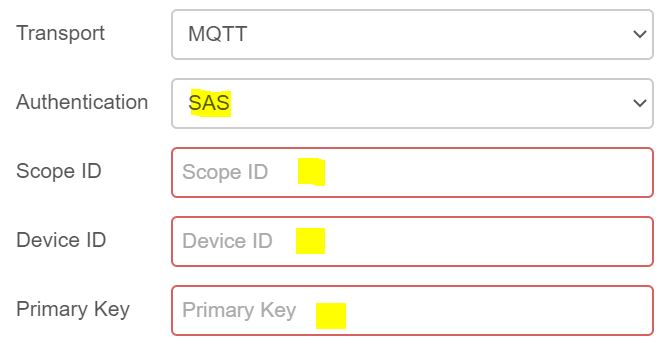
To use SAS simply go the IoT Central and get the connection details (Id scope, device id and primary key) as below:
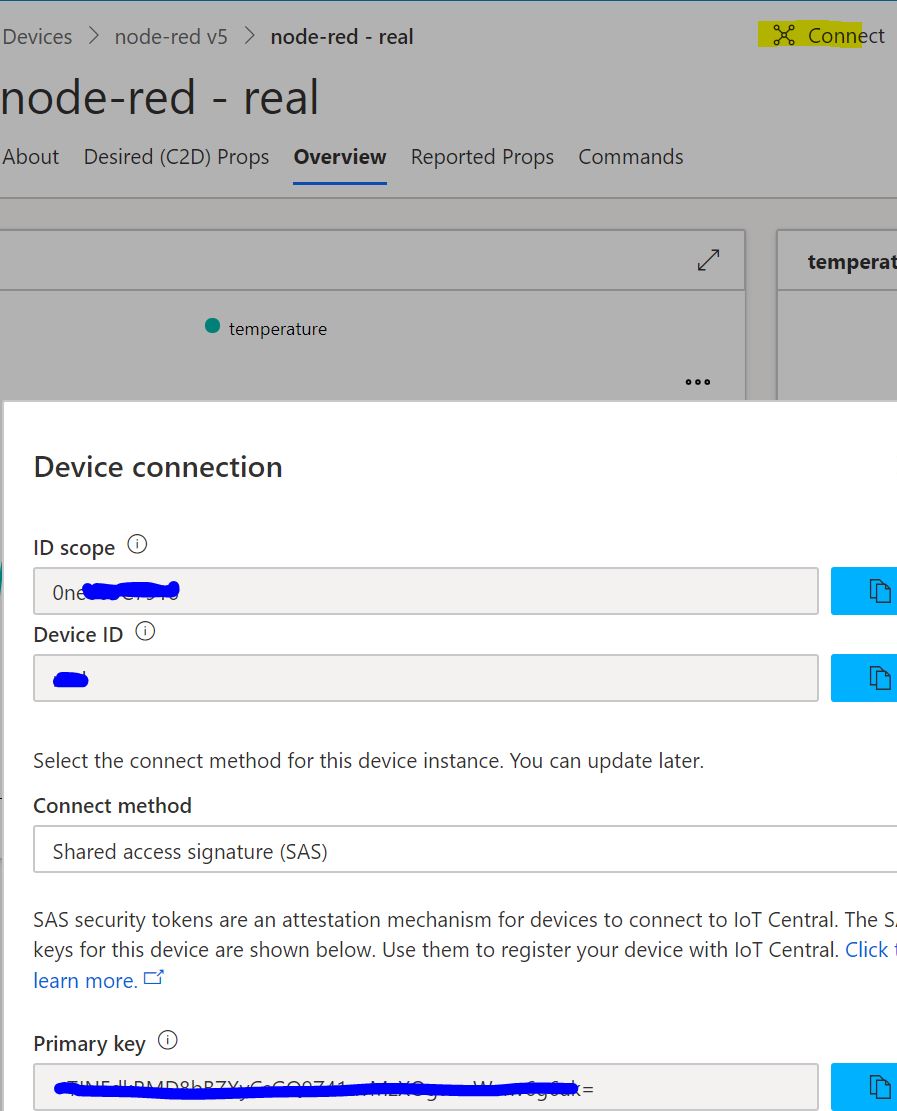
Now paste those values in the properties pane of the IoT Central Node:
Authenticating using X.509 certificates
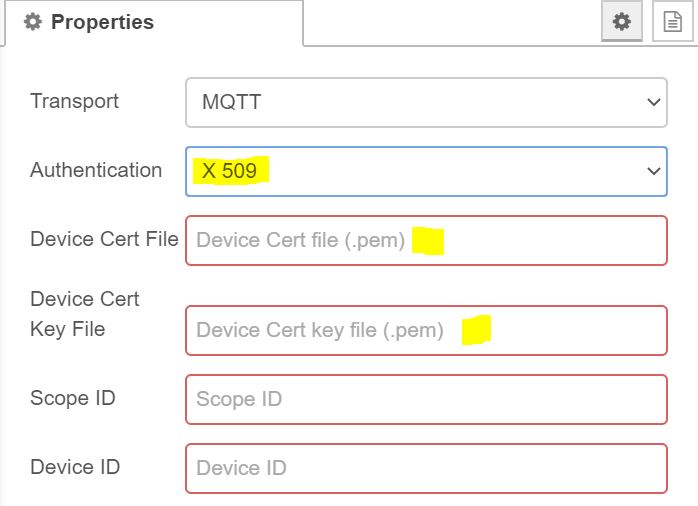
This connector support the use of X.509 certificates. To use those, you first have to add CA Root Certificcate to Azure IoT Central. Please go here for more details. For a full sample on how to generate a sample CA Root Certificate, Leaf Certificate and a device certificate, you can visit this link where you can also find a sample python code to test it. Once you have configurated the IoT Cental and have the subject-cert.pem (your device certificate) and the subject-private-key.pem (private key), you can reference them in propoterty pane:
Credits
This connector has been written starting using this sample code.