centric
v0.13.1
Published
A programmable automation server

Readme
Centric Server
A programmable automation server


Installation
Install centric
$ npm install -g centricOption 1 - Use centic scaffold
centric scaffold will create a basic centric project with examples that you can modify to suit your needs.
- Run the below command in the folder you want to create the project.
$ centric scaffold- After that, start the server using the command:
$ centric startAnd your done!
Option 2 - Create the files yourself
Folder Structure for a centric project.
    .
    ├── services               # Service Files
    ├── tasks                  # Task Files
    ├── config.js              # Configuration file
Services
The services folder contains all your projects service files. A service file has the following signature.
module.exports = async function ({ config }) {
  // Service Logic goes here...
  const testLogging = function () {
    console.log('this is a test')
  }

  return { testLogging }
}
Services are useful for any logic you wish to share between tasks (like a database connection).
Creating a new task
Create a new file in the tasks folder that matches the following signature.
The name of the task in the centric web interface is equivalent to the name of the task file name.
module.exports = {
  description: 'task description', // Viewable in the web UI
  locks: null,
  defaultData: function () {
    // Return the default data for the task.
    // This will be the default "taskData" in the run method.
    return {}
  },
  run: async function ({ config, services, opData, saveOpData, taskData, saveTaskData, logInfo, logWarning, logError, isCancelled }) {
    // Run method is called when the task is executed.
    // Logic for the task goes here.
  }
}
The run method provides following listed parameters:
| Argument | Description | | --- | --- | | config | configuration exported from config.js | | services | object containing all exported values from all service files | | opData | Current running task's operation-data. | | saveOpData | Method to be called to save the curremt operation data. | | taskData | Task data of the current running task. | | saveTaskData | Method to be called to save the current running task data. | | logInfo | logInfo is method to log the info entry showing information log of the operation. | | logWarning | logWarning is method to log the warnings entry showing warnings of the operation. | | logError | logError is method to log the errors entry showing errors of the operation. | | isCancelled | Method to check whether the task is active for running or has been cancelled. |
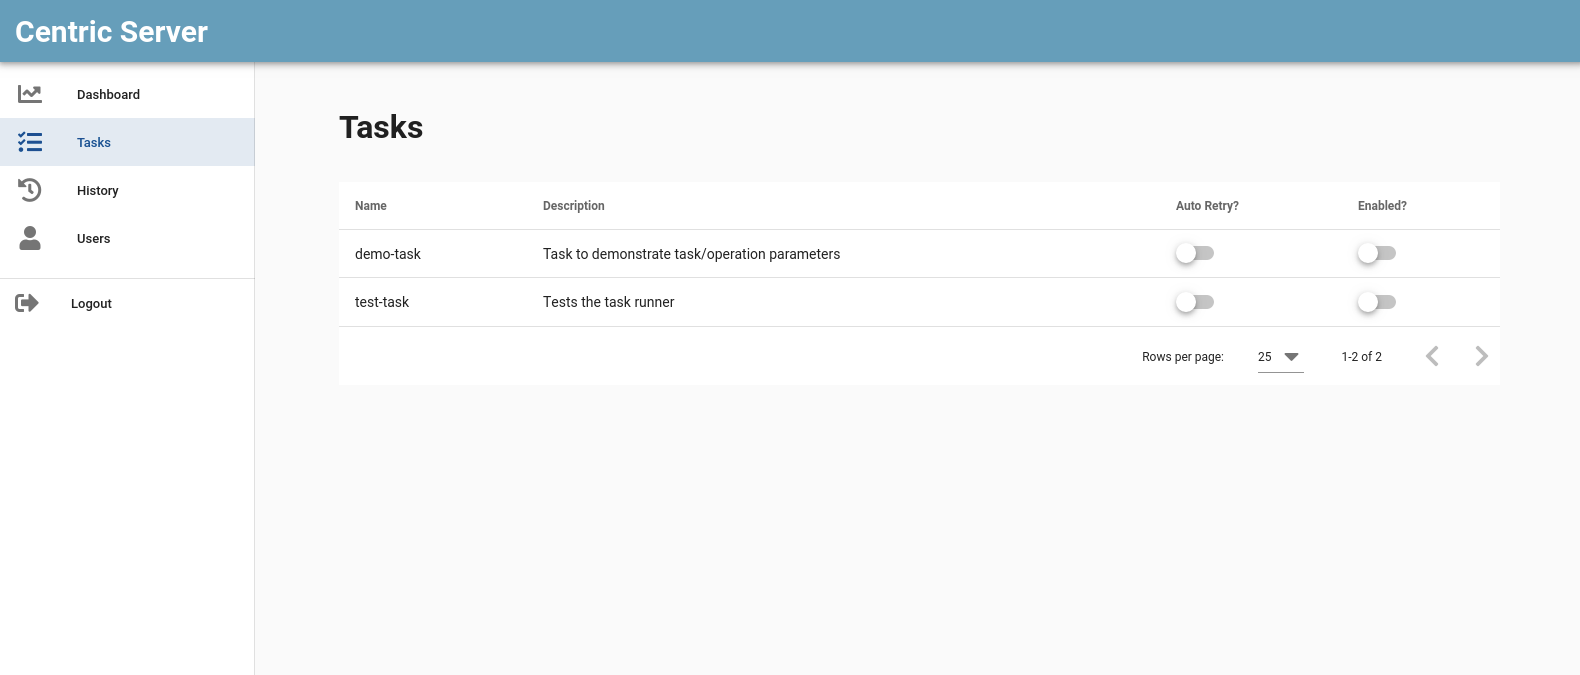
The screen-shot below shows the list of tasks under the tasks folder.
Schedule a task
Go to the tasks list page and click over the task item for which need to schedule a task and follow the following steps:
Enable the task
Click the Create Schedule button
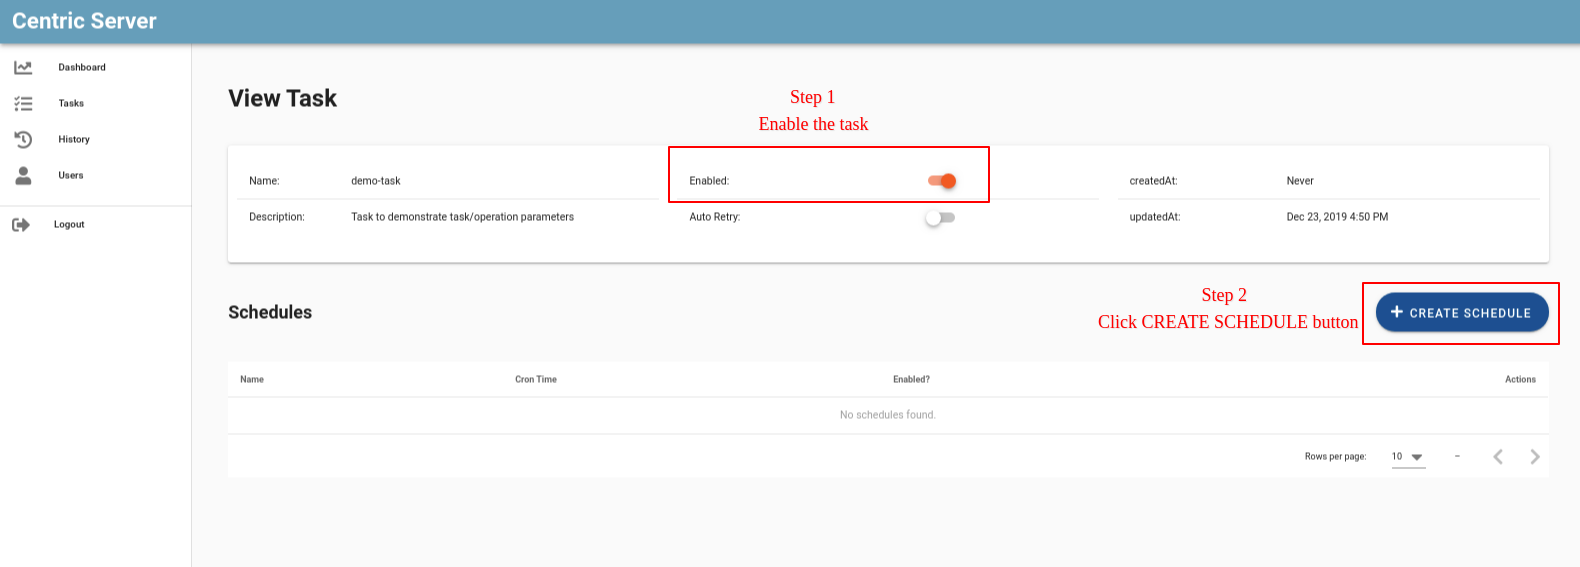
- Create Schdule form page will be displayed.
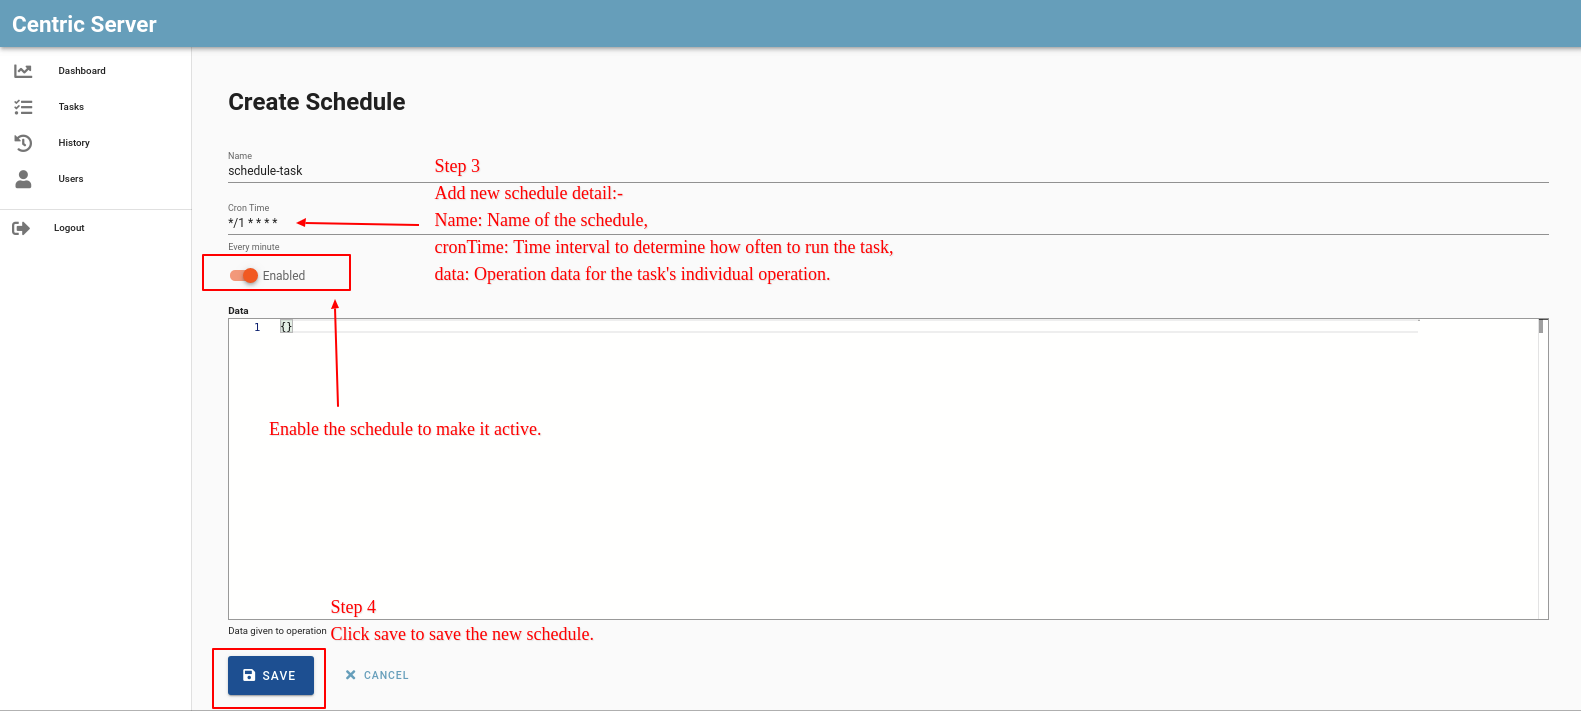
Add new schedule:
| Field | Description | | --- | --- | | Name | Name of the schedule | | cronTime | Time interval to determine how often to run the task | | enabled? | Enable or disable this schedule | | data | Set the tasks operation data when started with this schedule |
- Click the Save button.
Creating a new user
Select Users menu from home page, users list page looks like
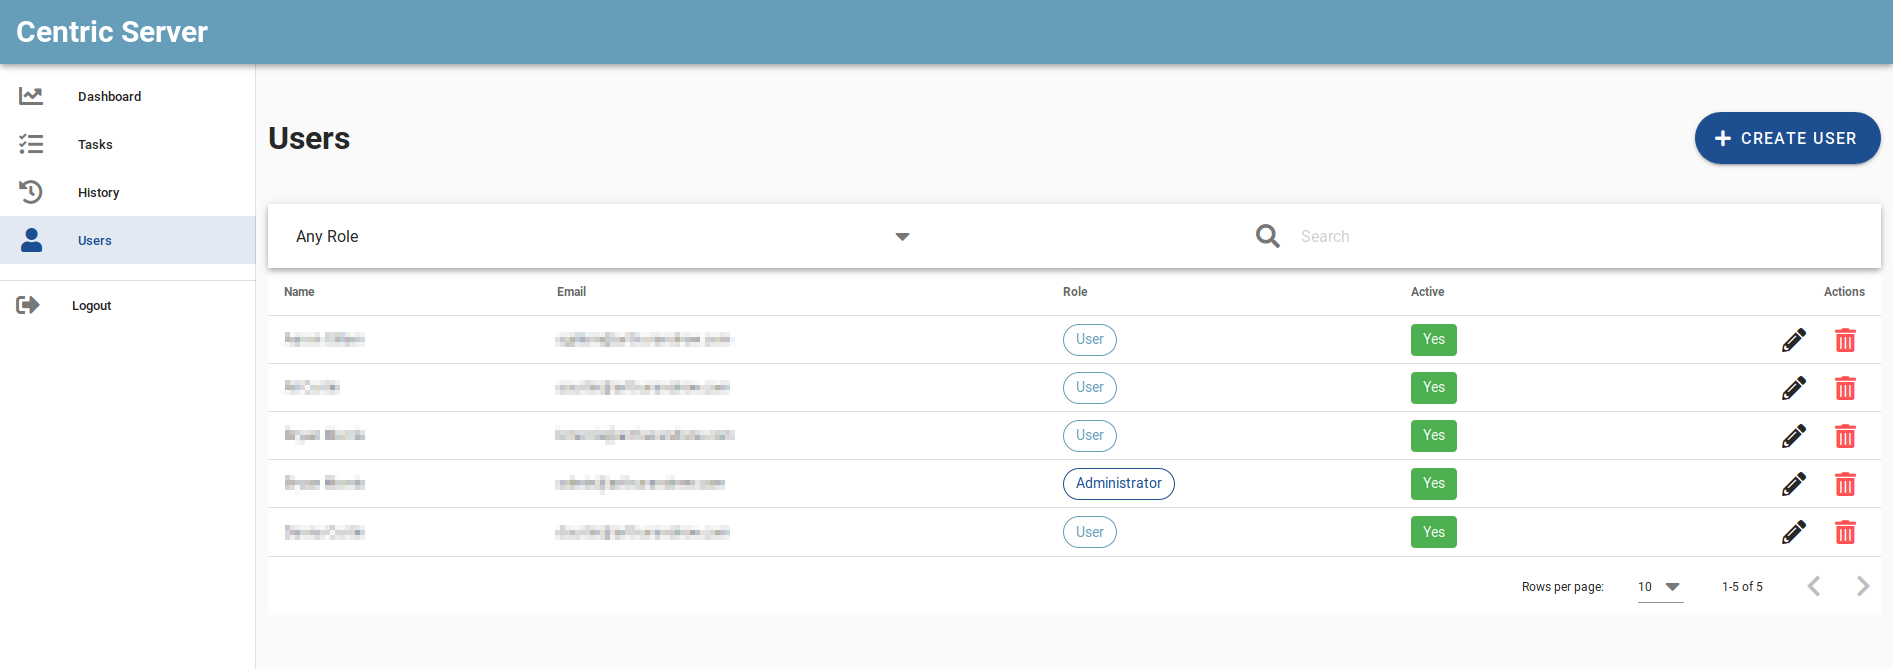
To create new user click over "CREATE USER" button and add the detail of the user to be created.
Task History
The task processed are listed in the history menu under sidemenu list.
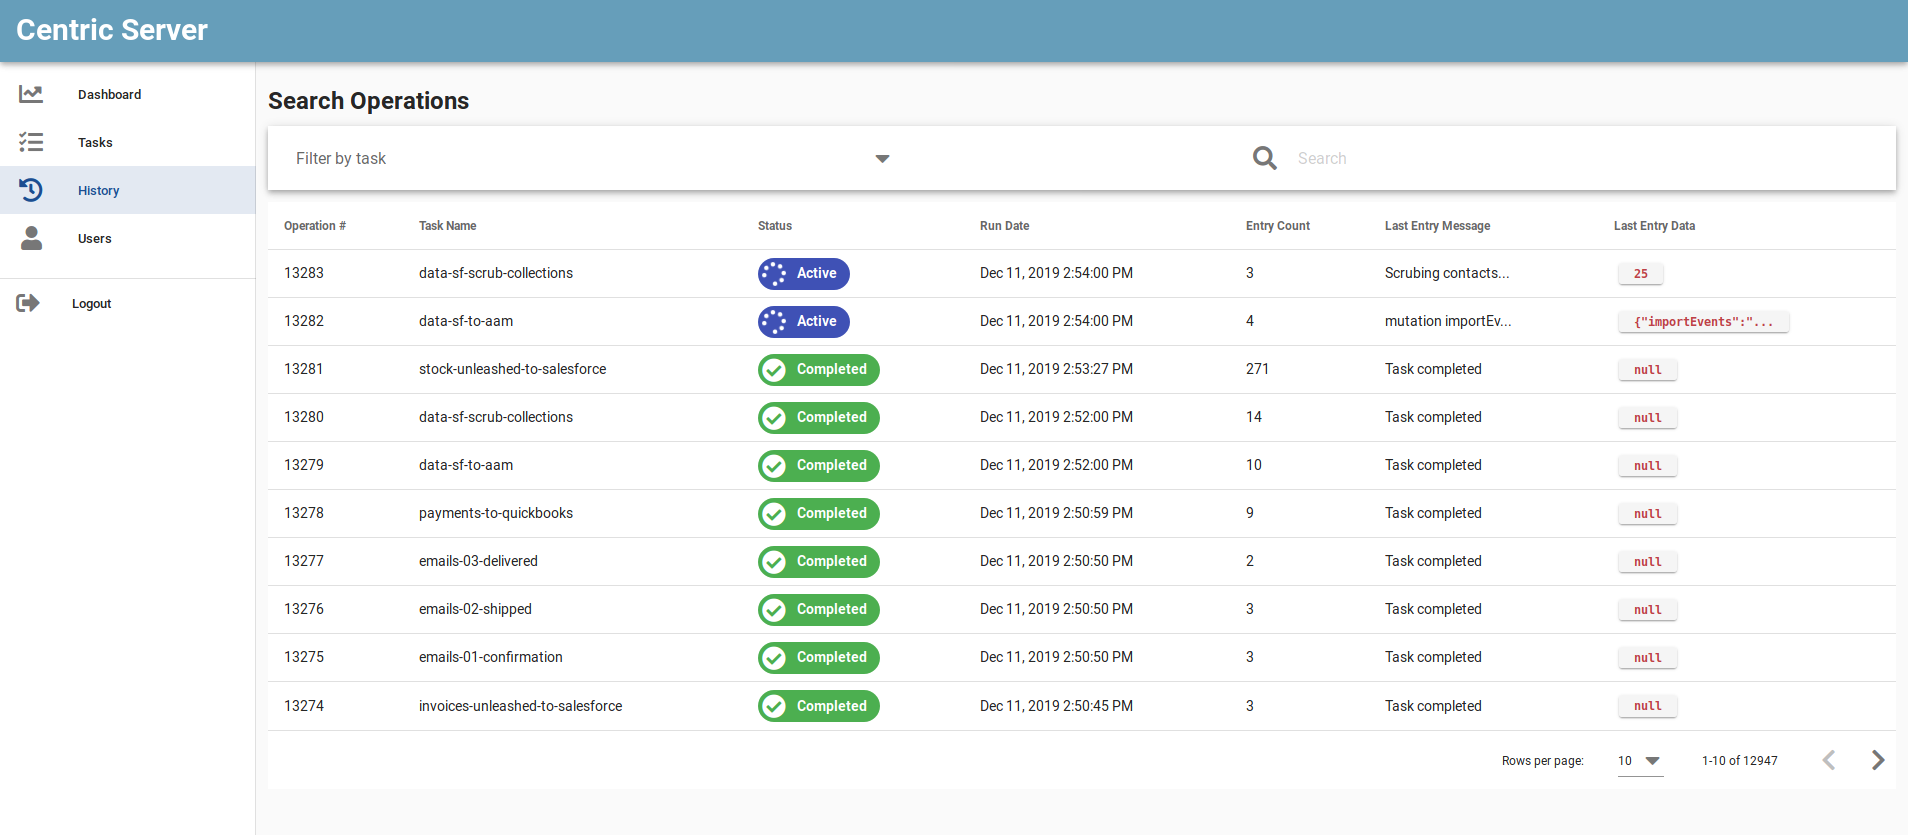
- It provides the list of task operations processed with following details.
- Operation Number.
- Task name of respective operation.
- Status of the operation (i.e) Completed, Terminated, Active, Failed, Cancelled.
- Run date of the operation.
- Entry count: The number of logs written while the processing of the task operation.
- Last entry message and data.
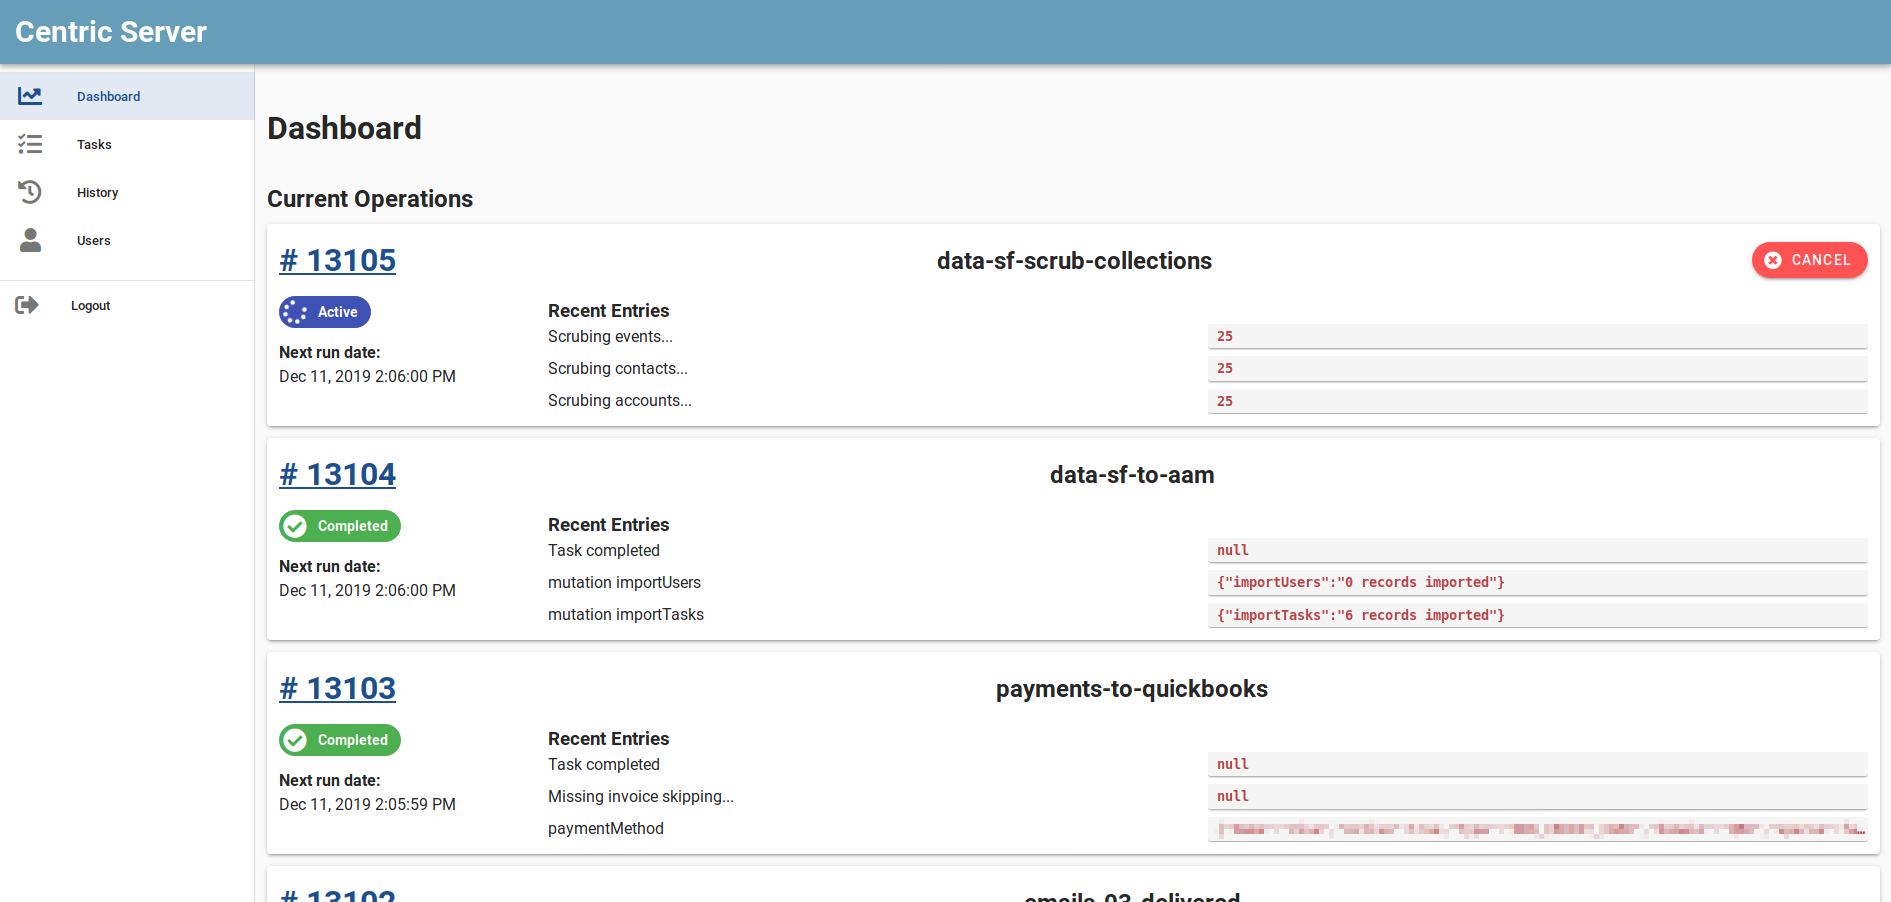
Dashboard
The dashboard page provides the list of currently running task detail.