
cesium-draw-js
v1.0.2
Published
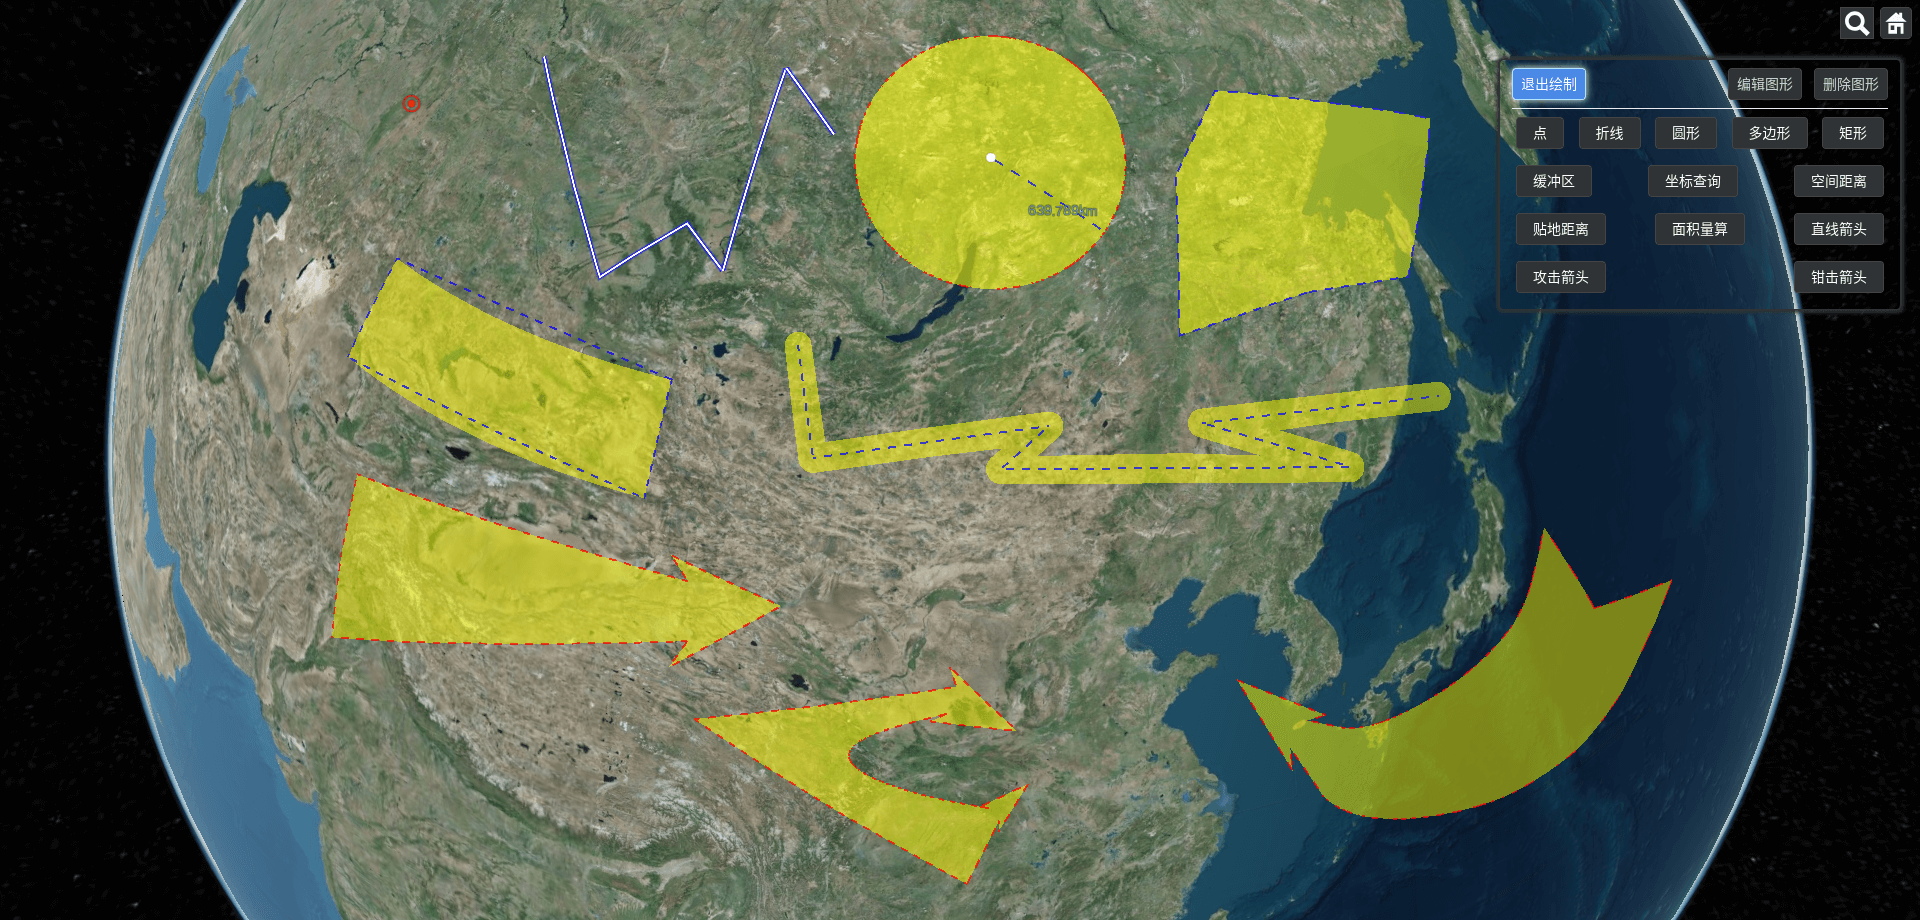
### 绘制图形如下
Maintainers
 youjihou
Readme
基于 draw-helper1.6 封装的 cesium 绘制方法
绘制图形如下
基础图形如下图,坐标查询,空间距离,贴地距离和面积量算等实时计算功能不保存图形数据
使用如下
- 安装 cesium-draw-js 包
npm i cesium-draw-js- 引入 tooltip 和 确认取消弹框
绘制时添加的操作提示需要在页面中添加如下 dom
<!-- 绘制时的提示框,内部样式自己定义 -->
<div id="mouse-tooltip" />
<!-- 绘制停止时的确认取消框,样式自己定义,确认和取消方法引用参考第7点 -->
<div id="drawPopConfirmLayer" />- 引入 turf.min.js 文件
缓冲区和面积量算需要引入 turf.min.js 文件,如果不用到这两个绘制功能,不需要引入
<script
    type="text/javascript"
    src="/node_modules/cesium-draw-js/dist/turf.min.js"
></script>- 引入绘制方法
以绘制折线为例,执行以下代码就可以在你的 cesium 地图上开始绘制你的线条了
import { DrawFunc } from 'cesium-draw-js';
import type { LineOptions } from 'cesium-draw-js';

const viewer: Viewer = undefined; //  自己的 cesium.viewer
const options: LineOptions = {}; // 参数配置,可以更改线条的宽度,材料等
const drawGraph = new DrawFunc.DrawGraphLine(viewer, options);
drawGraph.startDraw();- 所有绘制方法的 options 参数
所有绘制方法 options 参数都有 3 个公共参数,分别为 layerId、dragIconLight 和 dragIcon
|                          |          | options                                                                                             |
| ------------------------ | -------- | --------------------------------------------------------------------------------------------------- |
| DrawGraphPoint           | 点       |                                                                                                     |
| DrawGraphLine            | 折线     | polylineWidth、material                                                                             |
| DrawGraphCircle          | 圆形     | material、radiusLineMaterial、fill、outline、outlineWidth、outlineColor、lineWidth、outlineMaterial |
| DrawGraphPolygon         | 多边形   | material、outlineMaterial、fill、outlineWidth、outline                                              |
| DrawGraphRectangle       | 矩形     | material、outlineMaterial、fill、outlineWidth、outline                                              |
| DrawGraphBuffer          | 缓冲区   | material、lineMaterial、lineWidth、radius、line、fill                                               |
| DrawGraphStraightArrow   | 直线箭头 | material、outlineMaterial、fill、outlineWidth、outline                                              |
| DrawGraphAttactArrow     | 攻击箭头 | material、outlineMaterial、fill、outlineWidth、outline                                              |
| DrawGraphPincerArrow     | 钳击箭头 | material、outlineMaterial、fill、outlineWidth、outline                                              |
| DrawGraphPosMeasure      | 坐标查询 |                                                                                                     |
| DrawGraphSpaceDisMeasure | 空间距离 | polylineWidth、material                                                                             |
| DrawGraphStickDisMeasure | 贴地距离 | polylineWidth、material                                                                             |
| DrawGraphAreaMeasure     | 面积量算 | material、outlineMaterial、fill、outlineWidth、outline                                              |
options 参数介绍
| 参数名 | 类型 | 描述 | | -------------- | ------- | -------------------------------------------------- | | layerId | string | 识别参数,放到 entity 中跟其它非绘制 entity 做区分 | | dragIconLight | string | 鼠标点击处绘制的点的图片 | | dragIcon | string | 图形线条中心的点的图片 | | fill | boolean | 是否显示实体及其子项 | | outline | boolean | 指定图形是否带有轮廓 | | outlineWidth | number | 指定图形轮廓宽度属性 | | outlineColor | Color | 指定图形轮廓 Color 属性 | | extrudedHeight | number | 指定多边形的拉伸面相对于椭圆体表面的高度 | | polylineWidth | string | 单纯线条图形的线条宽度 | | radius | string | 缓冲区半径 | | line | boolean | 是否显示线条 | | lineWidth | string | 普通线条宽度 |
绘制方法的内部执行方法
DrawGraphBuffer 由于需要支持实时设置缓存区半径参数,所以添加了 dialogVisible 和 saveConfig 两个方法,如果不想实时更改缓冲区半径,可以将 dialogVisible 自定义为 DrawGraphBuffer 中的 saveConfig
| | 描述 | options | | ------------- | ------------------------------------------------------------------------------------------------------ | ------- | | startDraw | 开始绘制 | | | reEnterModify | 重新进入编辑 | | | drawOldData | 取消修改,绘制修改前数据并清除所有监听 | | | clearDrawing | 清除绘制数据并清除所有监听 | | | saveDraw | 保存绘制的图形,返回保存的数据并清除所有监听 | | | dialogVisible | DrawGraphBuffer 特有,右键结束绘制时调用,需要自定义方法,主要是希望打开一个 dialog 支持输入缓存区半径 | | | saveConfig | DrawGraphBuffer 特有,右键结束绘制时需要填入缓存区半径,保存缓冲区半径后调用 saveConfig 并结束绘制 | radius | | clearHandler | 清除所有 handler 监听 | | | clear | 清除所有绘制相关 | |
编辑和删除
编辑和删除通过暴露的方法就可以实现,根据个人情况开发,可以参考下面的写法
/**
 * let layerId = 'xxx' //你自己设定的layerId
 * let viewer = new Viewer() // viewer 是你的 cesium 上的 viewer 应用
 * let drawGraph = new DrawGraphLine(viewer,{})  // drawGraph 是你的绘制 class
 */
// 给绘制的图形绑定点击事件
function bindGloveEvent() {
    handler = new ScreenSpaceEventHandler(viewer.scene.canvas)
    handler.setInputAction((movement: any) => {
        const pick = viewer.scene.pick(movement.position)
        if (defined(pick)) {
            const obj = pick?.id
            if (!obj || !obj.layerId || flag.value === OPERATE_STATUS.NONE)
                return

            if (flag.value === OPERATE_STATUS.EDIT) // 编辑状态
                enterDrawEditing(obj.timeStampId, obj.drawType)
            else if (flag.value === OPERATE_STATUS.DELETE) // 删除状态
                clearEntityById(obj.timeStampId)
        }
    }, ScreenSpaceEventType.LEFT_CLICK)
}
function clearEntityById(timeStampId: number) {
    const entityList = viewer.entities.values
    if (!entityList || entityList.length < 1)
        return

    for (let i = 0; i < entityList.length; i++) {
        const entity: DrawEntity = entityList[i]
        if (entity.layerId === layerId && entity.timeStampId === timeStampId) {
            viewer.entities.remove(entity)
            i--
        }
    }
}
function enterDrawEditing(timeStampId: number, drawType: string) {
    // 先移除entity
    clearEntityById(timeStampId)
    drawGraph?.reEnterModify(drawedShape[timeStampId], timeStampId)
}