
cx-switch
v0.1.17
Published
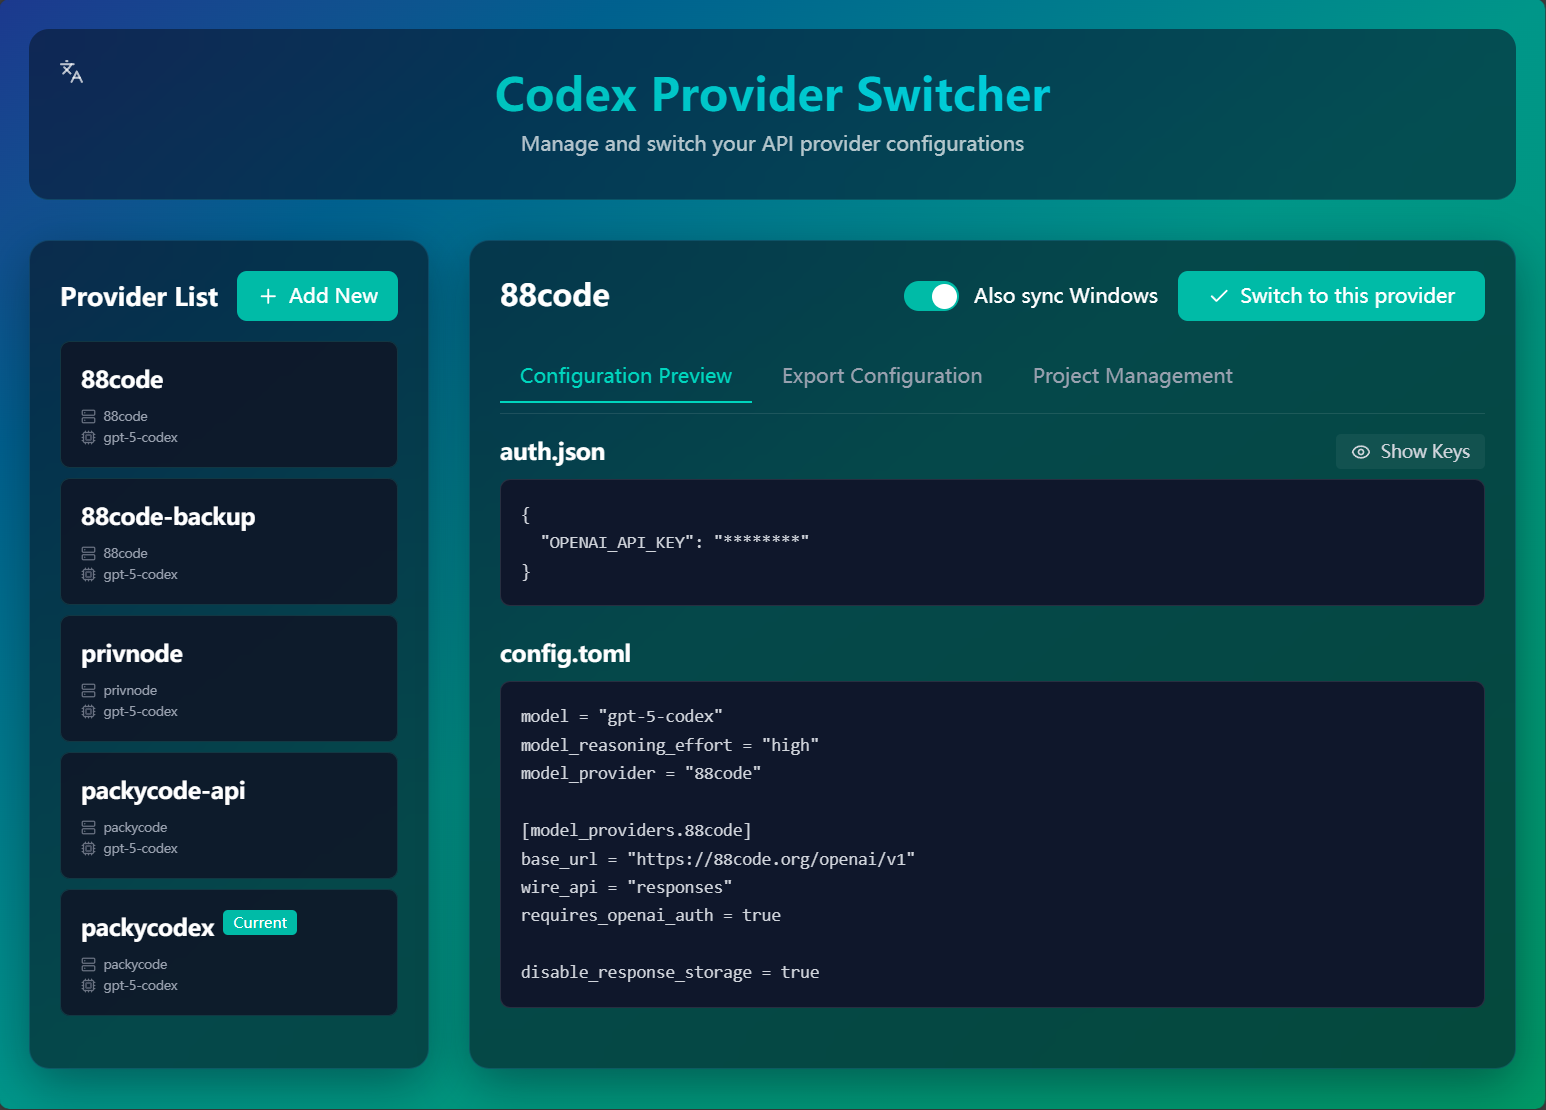
A beautiful web UI for managing and switching Codex API provider configurations
Maintainers
 supadaddy
Readme
CX Switch
A beautiful web UI for managing and switching Codex API provider configurations.
Features
- 🪟 Windows/WSL Sync: Optional toggle keeps Windows and WSL configs in sync when switching
- 🎨 Modern Interface: Beautiful, intuitive web UI with glass-morphism design
- 🔐 Secure Storage: Keys stored safely in
~/.cx-switch/(not affected by npm updates) - 🔑 Key Masking: Sensitive information hidden by default with toggle visibility
- 🌍 Multi-language: Support for English, 中文, and Español
- ⚡ Fast Switching: One-click switching between providers
- 📦 Easy Management: Add, edit, and delete configurations effortlessly
- 🔄 Export: Export to
~/.codexdirectory or clipboard - 🎯 Project Trust: Manage project-specific trust levels
- 🚀 Quick Start: Simple CLI command to launch
Installation
Global Installation (Recommended)
npm install -g cx-switchRun Directly with npx
npx cx-switchLocal Development
git clone https://github.com/mahaoyang/cx-switch.git
cd cx-switch
npm install
npm run dev
Usage
After installation, simply run:
cx-switch
# or use the shorter command
cx
This will:
- Start the local server on port 3000
- Automatically open your browser
- You can start managing your Codex configurations!
Adding a Provider
- Click "Add New" button
- Fill in your API details:
- API Base URL: e.g.,
https://api.openai.com/v1 - API Key: Your OpenAI API key (sk-...)
- Model: e.g.,
gpt-5.1-codex-max,claude-3-opus - Reasoning Effort: low, medium, high, or xhigh (optional)
- API Base URL: e.g.,
- Configure advanced options (optional):
- Custom provider settings
- Additional auth fields
- Project trust levels
- Click "Save"
Switching Providers
- Select a provider from the left sidebar
- Click "Switch to this provider" button
- The active provider will be marked with "Current"
Switching automatically writes auth.json and config.toml into your ~/.codex directory under the current user. When running on Windows or inside WSL, a tooltip-enabled toggle appears next to the button so you can also sync the other side (Windows ↔ WSL) in one go.
Exporting Configuration
Go to the "Export Configuration" tab and choose:
- Export to ~/.codex directory: Directly writes files to your Codex directory
- Copy auth.json: Copies auth.json content to clipboard
- Copy config.toml: Copies config.toml content to clipboard
Data Storage
Your configurations are stored in ~/.cx-switch/:
~/.cx-switch/
├── providers.json         # Your provider configurations
├── active-provider.json   # Currently active provider
└── global-config.json     # Global settings
Important Notes:
- ✅ This directory is separate from the npm package
- ✅ Your data is safe during npm updates
- ✅ API keys stored locally, never sent to any server
- 📦 You can backup this directory to preserve your configurations
Configuration Examples
auth.json
{
  "OPENAI_API_KEY": "sk-your-api-key-here"
}
config.toml
model = "gpt-5.1-codex-max"
model_reasoning_effort = "xhigh"

# Custom provider configuration
model_provider = "azure"

[model_providers.azure]
base_url = "https://your-resource.openai.azure.com/v1"
wire_api = "responses"
requires_openai_auth = true

# Project trust levels
[projects."/home/user/workspace/my-project"]
trust_level = "trusted"
Tech Stack
- Vue 3: Progressive JavaScript framework
- Vite: Next generation frontend tooling
- Tailwind CSS 4: Utility-first CSS framework
- Lucide Icons: Beautiful icon set
- vue-i18n: Internationalization
Development
# Install dependencies
npm install

# Start development server
npm run dev

# Build for production
npm run build

# Run CLI locally
npm start
Browser Support
- Modern browsers (Chrome, Firefox, Safari, Edge)
- File System Access API support (for directory export)
- Clipboard API support (for copy functions)
Contributing
Contributions are welcome! Please feel free to submit a Pull Request.
License
MIT License