
directus-extension-push-notification
v0.4.6
Published
Complete push notification system for Directus with multi-device support, delivery tracking, 46 languages, and service worker integration
Downloads
69
Maintainers
 sidartaveloso
Readme

![]()
⚠️ BETA VERSION WARNING
This extension is currently in BETA. While stable for testing and development, it's highly recommended to backup your database before installing or updating to any beta version. Breaking changes may occur between beta releases.
Installation • Quick Start • FAQ • API Docs • Troubleshooting
✨ Features
- 🔔 Multi-device support - One user can have multiple active subscriptions (Desktop, Mobile, Tablet)
- 📊 Granular delivery tracking - Track status per device (queued → sending → sent → delivered → read)
- 🔌 Native Directus architecture - Uses native collections and fields (no custom UI needed)
- 🌐 Multi-channel ready - Schema supports push, email, SMS, and in-app (currently push implemented)
- 🔄 Automatic subscription management - Auto-subscribe on login, soft delete on unregister
- ⚡ Service Worker integration - Browser notifications with delivery confirmation
- 🔐 VAPID support - Full Voluntary Application Server Identification
- 📝 TypeScript support - Fully typed codebase with strict checks
- 🧪 Tested - E2E tests with Playwright
📦 Installation
💡 No external services needed! This extension works out-of-the-box. You don't need Firebase, FCM, Google Cloud, or any third-party accounts. Just install, generate VAPID keys, and go.
🔒 Security Notice
⚠️ IMPORTANT: This project uses VAPID keys for push notifications.
Always generate your own unique keys:
npx web-push generate-vapid-keysKeep your PUSH_PRIVATE_VAPID_KEY secret! Never commit it to Git or share it publicly.
See SECURITY.md for complete security guidelines.
Via NPM/PNPM/Yarn
pnpm add directus-extension-push-notificationVia Directus Marketplace
Install directly from your Directus instance Extensions panel.
⚠️ Important: This extension runs outside the sandbox (requires full system access for push notifications, service workers, and auto-setup). To see it in the Marketplace, you must set
MARKETPLACE_TRUST=allin your Directus environment variables. Learn more about extension trust levels.
⚙️ Configuration
Required: VAPID Keys (2 minutes)
What they are: Security keys that authenticate your push notifications. Think of them like a password between your server and browsers.
How to generate:
npx web-push generate-vapid-keysAdd to your .env:
# Required: VAPID keys for push notifications
PUSH_PUBLIC_VAPID_KEY=your_public_key_here
PUSH_PRIVATE_VAPID_KEY=your_private_key_here
⚠️ Keep PUSH_PRIVATE_VAPID_KEY secret! Never commit it to Git or expose it in client code.
Optional: VAPID Subject (Production only)
What it is: Identifies your server to push services (like showing caller ID).
When to set: Optional! If not set, the extension uses PUBLIC_URL automatically.
Automatic fallback behavior:
- Uses
PUSH_VAPID_SUBJECTif you set it (highest priority) - Falls back to
PUBLIC_URLifPUSH_VAPID_SUBJECTis not set - Converts
http://URLs tomailto:[email protected](development safe mode)
How to set:
# Option 1: Explicit subject (production)
PUSH_VAPID_SUBJECT=https://yourdomain.com
# or
PUSH_VAPID_SUBJECT=mailto:[email protected]

# Option 2: Let it use PUBLIC_URL (recommended)
PUBLIC_URL=https://yourdomain.com  # Extension uses this automatically
For development? Nothing to do! With PUBLIC_URL=http://localhost:8055, the extension auto-converts to mailto:[email protected].
🚀 Quick Start
Step 1: Install the Extension
pnpm add directus-extension-push-notificationRestart Directus. The extension automatically creates all needed collections and fields.
Step 2: Configure VAPID Keys
Generate your keys (takes 2 seconds):
npx web-push generate-vapid-keysYou'll see something like:
=======================================
Public Key:  BPT864f6ph9v...
Private Key: xJQ5l1xcpN79...
=======================================
Add both to your Directus .env file:
PUSH_PUBLIC_VAPID_KEY=BPT864f6ph9v...
PUSH_PRIVATE_VAPID_KEY=xJQ5l1xcpN79...
Restart Directus again.
Step 3: Enable Push for a User
- Log into Directus admin panel
- Go to User Directory → select a user
- Scroll down and toggle
push_enabledto ON - Save
Step 4: Test It!
Option A: From Directus Admin (easiest)
- Go to Content → User Notification
- Click Create Item (+)
- Fill in:
- User: Select the user from Step 3
- Channel:
push - Title:
Hello! - Body:
Your first notification
- Click Save
Option B: Via API
curl -X POST https://your-directus.com/items/user_notification \
  -H "Authorization: Bearer YOUR_TOKEN" \
  -H "Content-Type: application/json" \
  -d '{
    "user": "user-uuid-here",
    "channel": "push",
    "title": "Hello!",
    "body": "Your first notification"
  }'
Step 5: See the Results
The notification should appear instantly on all devices where the user is logged in.
Check delivery status:
- Go to Content → Push Delivery
- You'll see a record for each device
- Status shows:
queued→sent→delivered
That's it! 🎉 Your push notifications are working.
What Just Happened?
The extension automatically:
- ✅ Found all active subscriptions for that user
- ✅ Created delivery records for each device
- ✅ Sent push notifications to browsers
- ✅ Tracked delivery status per device
No Firebase setup, no complex configuration, no external services needed!
🌐 Browser Support
- ✅ Chrome/Edge 42+
- ✅ Firefox 44+
- ✅ Safari 16+ (macOS 13+, iOS 16.4+)
- ✅ Opera 37+
Note: Push notifications require HTTPS in production (except localhost for development).
📡 API Endpoints
All endpoints are available under /push-notification/ prefix.
Register Subscription
POST /push-notification/register
Register or update a device subscription for push notifications.
Headers:
Authorization: Bearer <access_token>
Content-Type: application/json
Request Body:
{
  "subscription": {
    "endpoint": "https://fcm.googleapis.com/fcm/send/...",
    "keys": {
      "p256dh": "...",
      "auth": "..."
    }
  }
}
Response: 201 Created
Unregister Subscription
POST /push-notification/unregister
Performs a soft delete (sets is_active: false) to preserve delivery history.
Request Body: Same as register
Response: 200 OK
📨 Creating Notifications (Examples)
Basic Notification
curl -X POST https://your-directus.com/items/user_notification \
  -H "Authorization: Bearer YOUR_TOKEN" \
  -H "Content-Type: application/json" \
  -d '{
    "user": "USER_UUID",
    "channel": "push",
    "title": "New message",
    "body": "You have a new message from John"
  }'
With Action URL (Deep Linking)
When the user clicks the notification, they are redirected to the specified URL:
curl -X POST https://your-directus.com/items/user_notification \
  -H "Authorization: Bearer YOUR_TOKEN" \
  -H "Content-Type: application/json" \
  -d '{
    "user": "USER_UUID",
    "channel": "push",
    "title": "Order shipped!",
    "body": "Your order #1234 has been shipped",
    "action_url": "https://myapp.com/orders/1234",
    "priority": "high"
  }'
With Custom Icon (Directus File)
Upload an image to Directus Files first, then reference its UUID:
curl -X POST https://your-directus.com/items/user_notification \
  -H "Authorization: Bearer YOUR_TOKEN" \
  -H "Content-Type: application/json" \
  -d '{
    "user": "USER_UUID",
    "channel": "push",
    "title": "Welcome!",
    "body": "Thanks for joining our platform",
    "icon": "FILE_UUID_FROM_DIRECTUS_FILES"
  }'
The extension automatically resolves the file ID to /assets/{FILE_UUID} for the push notification icon.
With i18n Translations
Send a notification that adapts to the user's language. The system resolves the language automatically based on the user's language field in Directus:
curl -X POST https://your-directus.com/items/user_notification \
  -H "Authorization: Bearer YOUR_TOKEN" \
  -H "Content-Type: application/json" \
  -d '{
    "user": "USER_UUID",
    "channel": "push",
    "title": "New update",
    "body": "A new version is available",
    "translations": [
      {
        "languages_code": "pt-BR",
        "title": "Nova atualização",
        "body": "Uma nova versão está disponível"
      },
      {
        "languages_code": "es-ES",
        "title": "Nueva actualización",
        "body": "Una nueva versión está disponible"
      }
    ]
  }'
How it works:
- If user's language is
pt-BR→ receives "Nova atualização" - If user's language is
es-ES→ receives "Nueva actualización" - Any other language → falls back to the base
title/body("New update")
Full Example (All Fields)
curl -X POST https://your-directus.com/items/user_notification \
  -H "Authorization: Bearer YOUR_TOKEN" \
  -H "Content-Type: application/json" \
  -d '{
    "user": "USER_UUID",
    "channel": "push",
    "title": "Flash Sale!",
    "body": "50% off all items for the next 2 hours",
    "priority": "urgent",
    "action_url": "https://myapp.com/sales/flash",
    "icon": "FILE_UUID",
    "data": {
      "sale_id": "SALE_123",
      "discount": 50,
      "category": "all"
    },
    "date_expires": "2026-03-01T00:00:00Z",
    "translations": [
      {
        "languages_code": "pt-BR",
        "title": "Promoção Relâmpago!",
        "body": "50% de desconto em todos os itens pelas próximas 2 horas"
      }
    ]
  }'
JavaScript/TypeScript Example
// Using fetch
const response = await fetch(
  "https://your-directus.com/items/user_notification",
  {
    method: "POST",
    headers: {
      "Content-Type": "application/json",
      Authorization: `Bearer ${accessToken}`,
    },
    body: JSON.stringify({
      user: userId,
      channel: "push",
      title: "Task assigned",
      body: "You've been assigned to task #42",
      action_url: "/tasks/42",
      priority: "high",
    }),
  },
);
// Using Directus SDK
import { createDirectus, rest, createItem } from "@directus/sdk";
const client = createDirectus("https://your-directus.com").with(rest());
await client.request(
createItem("user_notification", {
user: userId,
channel: "push",
title: "Task assigned",
body: "You've been assigned to task #42",
action_url: "/tasks/42",
priority: "high",
}),
);Available Fields
| Field | Type | Required | Default | Description |
| -------------- | --------- | -------- | -------- | --------------------------------------------------------- |
| user | UUID | ✅ | | Recipient user ID |
| channel | enum | ✅ | | push, email, sms, or in_app |
| title | string | ✅ | | Notification title (supports i18n via translations) |
| body | string | ✅ | | Notification body text (supports i18n via translations) |
| priority | enum | | normal | low, normal, high, urgent |
| action_url | string | | null | URL to open on notification click |
| icon | UUID | | null | Directus file ID for notification icon |
| icon_url | string | | null | External icon URL (alternative to icon) |
| data | JSON | | null | Additional payload data for the app |
| date_expires | timestamp | | null | When the notification expires |
| translations | array | | [] | i18n translations (languages_code, title, body) |
❓ Frequently Asked Questions
Do I need a Firebase/FCM account or Google Cloud project?
No! You don't need to create any Firebase or Google Cloud account.
The extension works directly with the browser's built-in Push API. When you see endpoints like fcm.googleapis.com in subscriptions, that's the browser automatically using Google's push service (Chrome/Edge use FCM, Firefox uses Mozilla Push, Safari uses APNs). This happens behind the scenes - you don't configure it.
You only need:
- ✅ VAPID keys (generated locally with one command)
- ✅ A Directus instance with HTTPS in production
What are VAPID keys and why do I need them?
VAPID (Voluntary Application Server Identification) keys are like a password between your Directus server and the browser's push service. They prove that push notifications are really coming from your server.
Think of it like this:
- Your server needs to "sign" push notifications with a private key
- Browsers verify this signature using your public key
- This prevents anyone else from sending fake notifications to your users
How to get them:
npx web-push generate-vapid-keysThis creates a key pair in 2 seconds. Copy both keys to your .env file and you're done.
How do users subscribe to notifications?
Automatic! When a logged-in user:
- Has
push_enabled: truein their profile - Opens your Directus admin panel
The extension automatically:
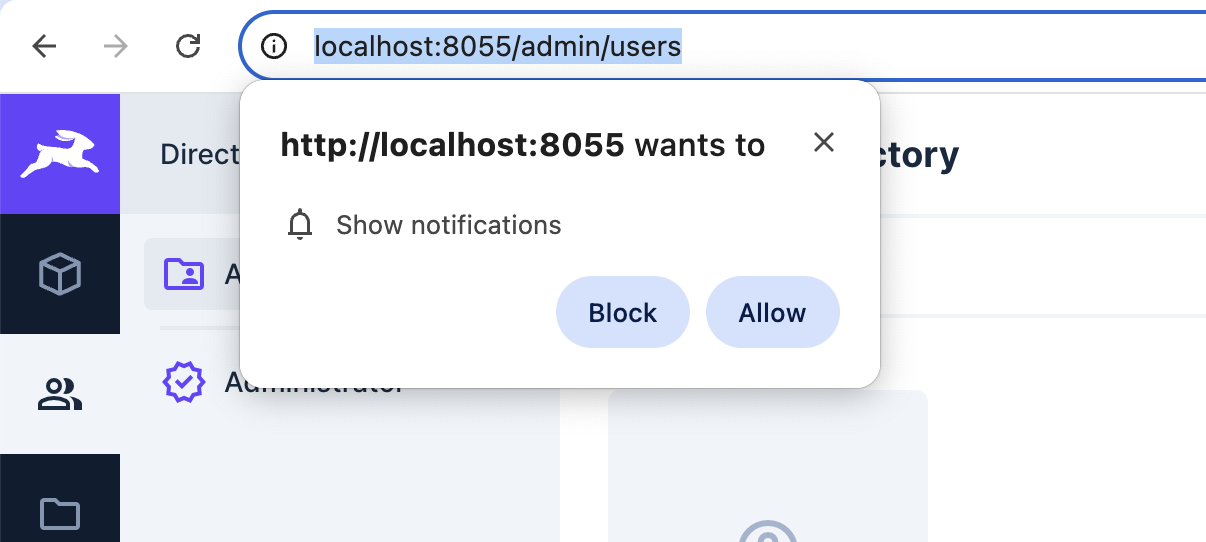
- Asks for browser notification permission (one-time popup)
- Registers their device
- They start receiving notifications immediately
Users can toggle push_enabled on/off anytime in their User Settings.
Can I test this locally without HTTPS?
Yes! localhost is exempt from the HTTPS requirement. Development works fine with http://localhost:8055.
Production requires HTTPS (security requirement from browsers, not from us).
Will notifications work on mobile?
Yes! The extension supports:
- 📱 iOS 16.4+ (Safari)
- 📱 Android (Chrome, Firefox, Edge)
- 💻 Desktop (all major browsers)
Each device gets tracked separately, so one user on desktop + mobile = 2 subscriptions = 2 deliveries.
What happens if I delete a notification?
Deleting from user_notification doesn't affect already-sent push notifications (they're already on the user's device).
Delivery tracking in push_delivery is preserved for history/analytics even if you delete the original notification.
🔧 Troubleshooting
Notifications not being delivered
- Check VAPID keys: Ensure
PUSH_PUBLIC_VAPID_KEYandPUSH_PRIVATE_VAPID_KEYmatch and are correctly set - Check user permissions: User must have
push_enabled: true - Check subscriptions: User must have at least one active subscription (
is_active: true) - Check browser console: Look for service worker errors
- Check delivery records: Look at
push_deliverycollection for error details
VAPID Subject Error
Error: Vapid subject is not an https: or mailto: URLSolution: Set PUSH_VAPID_SUBJECT or use PUBLIC_URL with https://. For development with http://localhost, the extension auto-converts to mailto:.
Service Worker Not Registering
- Ensure you're accessing via HTTPS (or localhost for dev)
- Check browser console for errors
- Verify service worker file is accessible at
/push-notification-sw/sw.js
Subscription Failing
- Verify browser supports push notifications (see Browser Support)
- Check if user granted notification permissions
- Ensure VAPID public key matches between client and server
💡 How It Works
Collections Created
The extension automatically creates:
push_subscription - Stores device subscriptions
- One user can have multiple devices
- Tracks endpoint, keys, user agent, device name
is_activeflag for soft deletes
user_notification - Notification messages
- Supports multiple channels (push, email, SMS, in-app)
- Includes title, body, icon, action URL, priority
- Can target specific users
push_delivery - Delivery tracking
- One record per notification-device pair
- Tracks status, attempts, errors, timestamps
- Enables retry logic and delivery confirmation
directus_users.push_enabled - User preference toggle
📖 For detailed schemas, see Architecture Documentation
📊 Understanding Delivery Status
When you send a notification, it goes through these states. You can check the Push Delivery collection in Directus to see where each notification is:
Delivery Status Lifecycle
stateDiagram-v2
    [*] --> queued: Notification created

    queued --> sending: Hook processes subscription
    sending --> sent: Successfully sent to Push Service
    sending --> failed: Error during send

    sent --> delivered: Service Worker confirms
    sent --> failed: Delivery timeout/error

    delivered --> read: User clicks notification
    delivered --> [*]: User dismisses

    failed --> sending: Retry (if attempts < max)
    failed --> [*]: Max retries reached

    read --> [*]: Tracking complete

    note right of queued
        Initial state when
        push_delivery created
    end note

    note right of sent
        Push Service (FCM/APNs)
        accepted the notification
    end note

    note right of delivered
        Service Worker on device
        received and showed notification
    end note

    note right of failed
        Check error_code and
        error_message for details
    end note
�🔌 Client Integration Example
Here's a basic example of how to integrate push notifications in your web application:
// Request notification permission
const permission = await Notification.requestPermission();

if (permission === "granted") {
  // Register service worker from extension endpoint
  const registration = await navigator.serviceWorker.register(
    "/extensions/push-notification-sw/sw.js",
  );

  // Subscribe to push notifications
  const subscription = await registration.pushManager.subscribe({
    userVisibleOnly: true,
    applicationServerKey: "YOUR_VAPID_PUBLIC_KEY",
  });

  // Send subscription to Directus
  await fetch("https://your-directus-instance.com/push-notification/register", {
    method: "POST",
    headers: {
      "Content-Type": "application/json",
      Authorization: "Bearer YOUR_ACCESS_TOKEN",
    },
    body: JSON.stringify({ subscription }),
  });
}
📋 Requirements
- Directus: 10.1.7 or higher recommended (tested on 11.15.1)
- Node.js: 18+ recommended
- Valid VAPID key pair: Generate with
npx web-push generate-vapid-keys - HTTPS: Required in production (localhost exempt for development)
- Marketplace Trust: Set
MARKETPLACE_TRUST=allto install from Directus Marketplace (extension runs outside sandbox for full push notification support)
🔒 Security Best Practices
- VAPID Keys: Keep your
PUSH_PRIVATE_VAPID_KEYsecret and never expose it client-side - HTTPS: Always use HTTPS in production for secure push delivery
- Permissions: Configure Directus roles to control who can send notifications
- Rate Limiting: Consider implementing rate limits on notification creation
- User Consent: Always request user permission before subscribing to push notifications
🤝 Development
Interested in contributing? Check out our Contributing Guide for:
- Local development setup with Docker
- Testing instructions (E2E with Playwright)
- Code standards and linting
- Release process
Running Tests
E2E Tests (Playwright):
# Run all E2E tests (auto-generates VAPID keys, builds, and runs tests)
pnpm test:e2e

# Run with UI
pnpm test:e2e:ui

# Debug mode
pnpm test:e2e:debug
Integration Tests (Vitest):
# Generate VAPID keys first (one time)
pnpm generate:vapid

# Run integration tests
pnpm test:integration:ci
The test commands automatically:
- Generate fresh VAPID keys (
.env.testfile) - Build the extension
- Start Docker containers with test keys
- Run tests
- Clean up containers
Note: The .env.test file is auto-generated and git-ignored. Never commit VAPID keys!
📄 License
MIT License - see LICENSE file for details.
💬 Support & Community
- Issues: GitHub Issues
- Discussions: GitHub Discussions
- Marketplace: Directus Marketplace
🙏 Acknowledgments
Built with:
Made with ❤️ by Devix Tecnologia