
inklet
v0.1.2
Published
Turn images into interactive ASCII art
Maintainers
 zixihong
Readme
Inklet
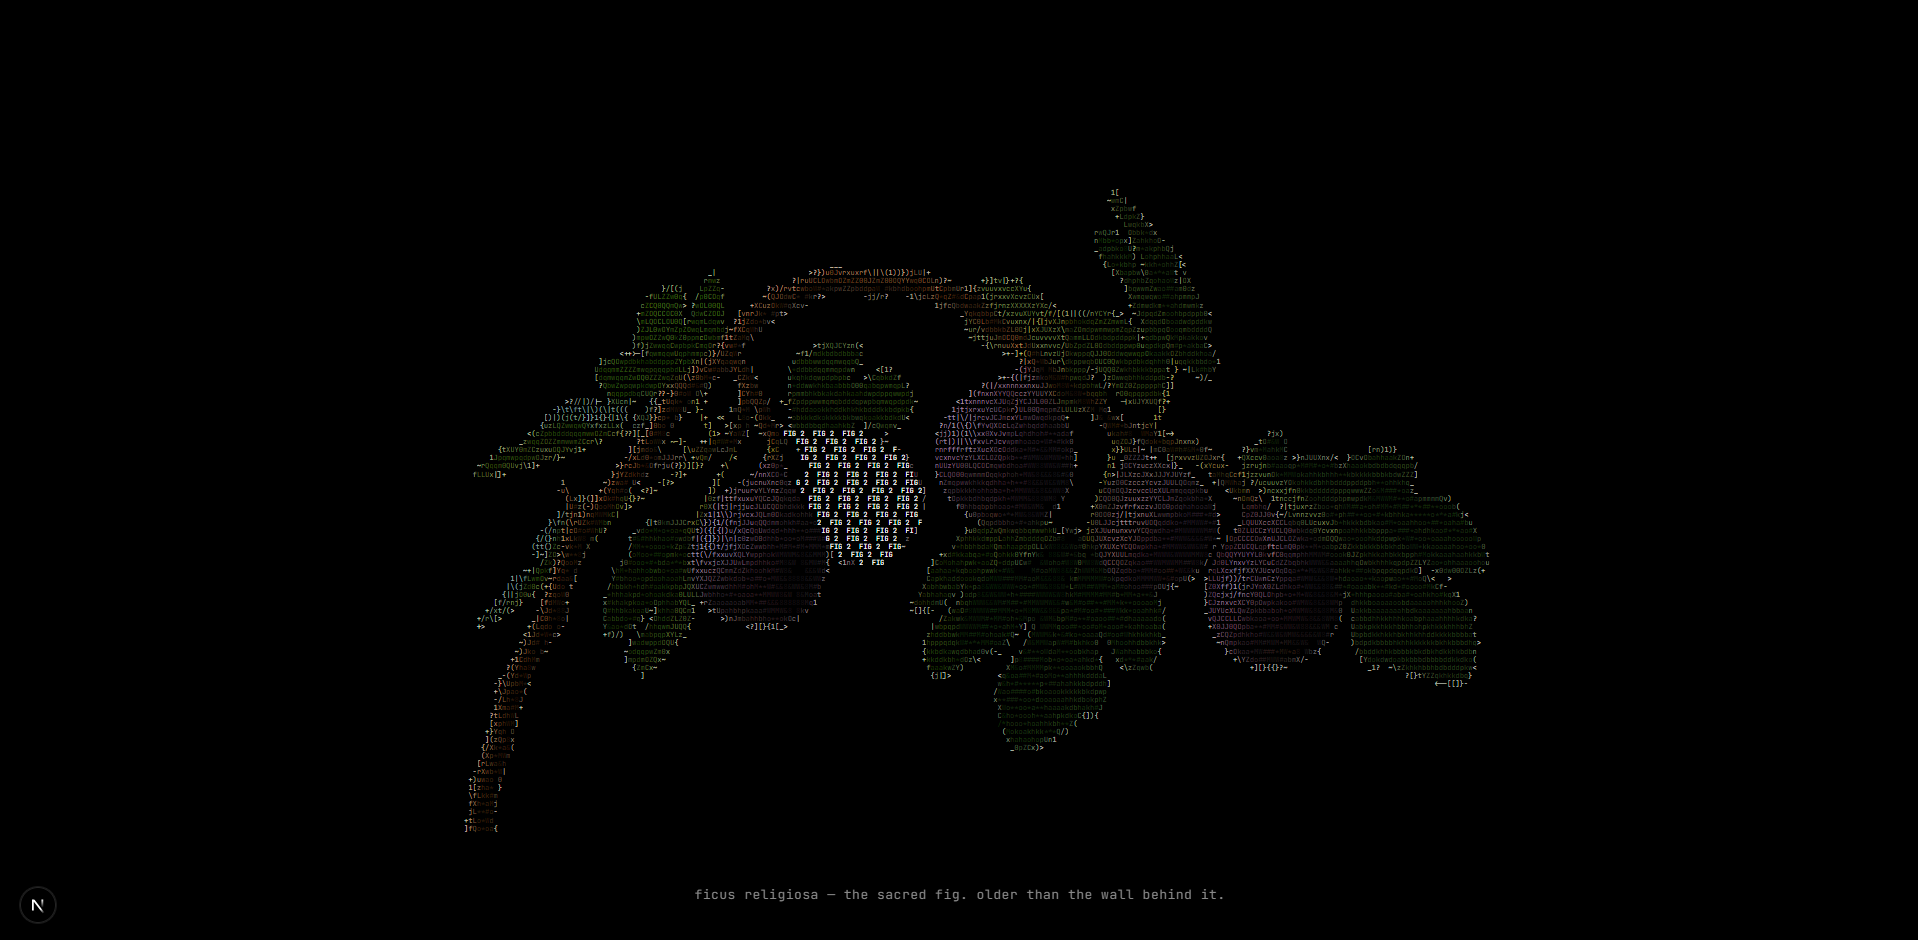
Ship interactive ASCII art, fast. Convert an image from the CLI, paint regions over it in a pastel visual editor with live preview, and drop the JSON into React — every region becomes clickable, hoverable, and independently styleable. Perfect for ASCII hero sections, clickable diagrams, interactive portraits, or anywhere a static <pre> block isn't enough.
Install
npm install inkletRequires Node.js >= 18.3.0. React >= 18 is an optional peer dependency (only needed if you use inklet/react).
What you get
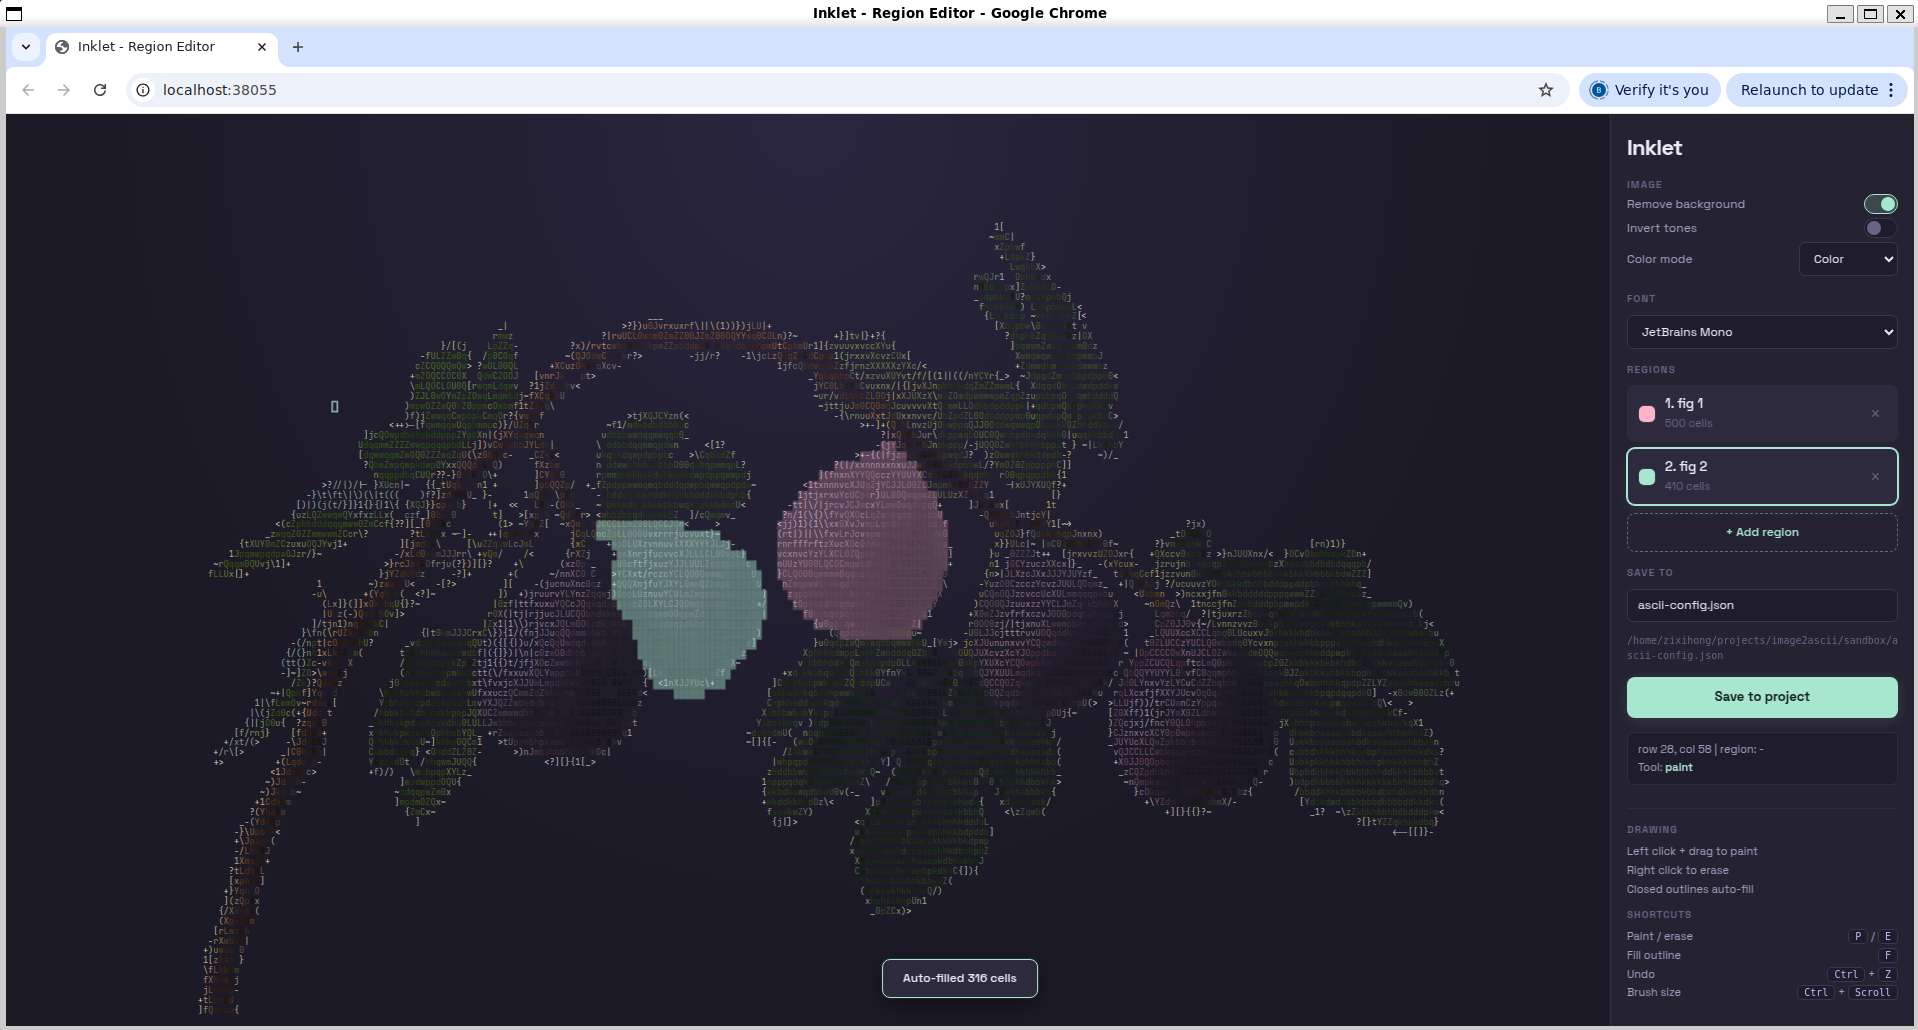
- A visual region editor — pastel UI in your browser, live preview, six monospace fonts to try, auto-fill for closed outlines, undo, brush resize with Ctrl+scroll. This is where most of the work happens.
- A React component — drop in the config, get hover effects, click handlers, per-region styling, and
onCharacterHover/onCharacterClickfor character-level control - A CLI for the image → ASCII conversion step, with live toggles for background removal, tone inversion, and color mode
- Full-color output as a bonus — every character keeps the original pixel's color, and the palette is deduplicated so the JSON stays compact (run-length encoded regions + palette indexing)
Quick Start
1. Convert an image
npx inklet photo.png -w 200This opens the visual editor in your browser.
2. Tweak settings in the editor
The sidebar has live toggles for:
- Remove background — strips bright/dark pixels so only the subject remains
- Invert tones — flips the luminance-to-character mapping
- Color mode — switch between color, grayscale, and mono
- Font — pick from JetBrains Mono, Fira Code, IBM Plex Mono, Roboto Mono, Inconsolata, or Courier Prime
Changes re-render instantly. No need to re-run the CLI.
3. Paint regions
Click + Add region, give it a label (e.g. "Logo", "Face"), then left-click and drag to paint characters into that region. Right-click to erase. Draw a closed outline and Inklet auto-fills the interior. These regions are what make the ASCII art interactive later.
4. Export
Click Save to project. You get an ascii-config.json file in your output directory.
5. Render in React
import { AsciiImage } from 'inklet/react'
import config from './ascii-config.json'

function Hero() {
  return (
    <AsciiImage
      config={config}
      fontSize="8px"
      regionHoverEffect={{ colorBoost: 1.5, underline: true }}
      onRegionClick={(id, region) => console.log(region.label)}
    />
  )
}
Vite users: Vite's built-in JSON plugin generates named exports for every top-level key of an imported JSON file, which can fail or balloon build output on large configs (multi-MB ASCII data). If you hit that, you have two clean options:
Option 1 — tell Vite to skip named-export transformation. In
vite.config.ts:export default defineConfig({ json: { stringify: true }, })With
stringify: true, the JSON is inlined as a single string and parsed once at runtime — no per-key named exports, much smaller bundle.Option 2 — serve the config as a static asset. Drop
ascii-config.jsonintopublic/and fetch it at runtime:const [config, setConfig] = useState(null) useEffect(() => { fetch('/ascii-config.json').then(r => r.json()).then(setConfig) }, []) if (!config) return null return <AsciiImage config={config} />Next.js, Webpack, CRA, Parcel, esbuild, and Rollup all return JSON imports as a plain default export, so
import config from './ascii-config.json'just works on those without any config tweaks.
CLI Reference
inklet <input> [options]| Option | Description | Default |
|---|---|---|
| -w, --width <n> | Number of output columns | 120 |
| -o, --output <path> | Write raw ASCII data JSON to file | — |
| -d, --output-dir <dir> | Directory for output files | cwd |
| --chars <ramp> | Custom character density ramp | 70-char detailed |
| --color-mode <mode> | color, grayscale, or none | color |
| --invert | Invert luminance mapping | false |
| --remove-bg | Remove bright/dark background pixels | false |
| --aspect <n> | Character aspect ratio (height/width) | 1.8 |
| -s, --save | Save ascii-config.json directly, skip editor | false |
| -p, --print | Print colored ASCII to terminal (ANSI) | false |
Examples
# Open the editor at 80 columns, output to src/assets/
inklet photo.png -w 80 -d src/assets

# Preview in terminal
inklet photo.png -w 60 --print

# Batch export, no editor
inklet photo.png -w 120 --remove-bg --save

# Terminal preview + save raw data
inklet photo.png --print -o ascii-data.json
Editor
The editor launches automatically when you run inklet without --save or --print. It's a local web UI served from a temporary HTTP server with a soft pastel theme designed to stay out of your way.
Note: the editor loads its display fonts from Google Fonts, so the first launch needs an internet connection. Subsequent loads use the browser cache, and missing fonts fall back to your system monospace.
Image controls
The Image section in the sidebar has live toggles:
- Remove background — strips bright/dark pixels so only the subject remains
- Invert tones — flips the luminance-to-character mapping
- Color mode — color, grayscale, or mono
Each change re-renders the ASCII art server-side using the original image, so what you see is what you export.
Font
Pick the monospace font used to render the ASCII grid. Different fonts have different glyph aspect ratios — narrower fonts like Inconsolata preserve more vertical detail, wider fonts like JetBrains Mono (the default) feel more spacious. Try a few; it changes the whole look.
Region painting
Regions let you mark areas of the ASCII art as interactive. In your app, you can attach hover effects and click handlers to each region.
Workflow: click + Add region, name it, then drag on the grid. Draw a closed outline and Inklet auto-fills the interior — the fill even patches small gaps in your outline. Repeat for each interactive area.
| Action | Control | |---|---| | Paint | Left-click + drag | | Erase | Right-click + drag | | Switch to paint tool | P | | Switch to erase tool | E | | Fill closed outline | F | | Brush size | Ctrl+scroll, or [ / ] | | Undo | Ctrl+Z | | Select region | Click its card in the sidebar | | Delete region | Click the × on its card |
The cursor crosshair on the grid shows the current brush footprint, sized to match what you'll actually paint.
Export
Click Save to project. The save path is editable in the sidebar — by default it writes ascii-config.json to the directory you ran inklet from (or the -d directory if you passed one). The file contains both the ASCII data and the region definitions.
Output Format
The exported ascii-config.json:
{
  "data": {
    "cols": 100,
    "rows": 56,
    "chars": "  ..::##@@%% ...",
    "palette": ["#1a1a1a", "#ff3300", "#2b5e8c"],
    "colorIndices": [0, 0, 1, 1, 2, 2, 0, 0]
  },
  "regionConfig": {
    "regions": [
      {
        "id": "region-1",
        "label": "Face",
        "runs": [[10, 20, 35], [11, 19, 36]]
      }
    ]
  }
}
data
| Field | Description |
|---|---|
| cols / rows | Grid dimensions |
| chars | Flat row-major string of ASCII characters. Character at row r, column c is chars[r * cols + c]. |
| palette | Deduplicated hex color array |
| colorIndices | Per-character index into palette. Color of character i is palette[colorIndices[i]]. |
regionConfig.regions
Each region has:
| Field | Description |
|---|---|
| id | Unique identifier (e.g. "region-1") |
| label | Human-readable name from the editor |
| runs | Run-length encoded cells: [row, startCol, endCol] per run |
React Component
import { AsciiImage } from 'inklet/react'Props
| Prop | Type | Description |
|---|---|---|
| config | AsciiConfig | The imported ascii-config.json |
| data | AsciiData | Alternative to config — just the ASCII data, no regions |
| fontSize | string \| number | Font size (default '10px') |
| lineHeight | number | Line height multiplier (default 1.15) |
| backgroundColor | string | Background color (default 'transparent') |
| colorBoost | number | Brightness multiplier for all colors (default 1.0) |
| className | string | CSS class on the outer <pre> |
| style | CSSProperties | Inline styles on the outer <pre> |
Region hover effects
| Prop | Type | Description |
|---|---|---|
| regionHoverEffect | RegionHoverEffect | Default hover effect for all regions |
| regionEffects | Record<string, RegionHoverEffect> | Per-region overrides, keyed by region ID |
RegionHoverEffect options:
| Field | Description |
|---|---|
| color | Override color on hover (e.g. '#00ff00') |
| colorBoost | Brightness multiplier on hover (overrides color) |
| underline | Add underline decoration |
| label | Replace characters with repeating label text |
Callbacks
| Prop | Type | Description |
|---|---|---|
| onRegionClick | (id, region) => void | Fires when a region is clicked |
| onRegionHover | (id \| null, region) => void | Fires on region enter/leave |
| onCharacterClick | (info: CharInfo) => void | Fires on any character click |
| onCharacterHover | (info \| null) => void | Fires on any character hover |
CharInfo gives you { row, col, char, color, region } for the exact character under the cursor.
Example with all features
<AsciiImage
  config={config}
  fontSize="8px"
  colorBoost={1.2}
  regionHoverEffect={{ colorBoost: 1.8, underline: true }}
  regionEffects={{
    'region-1': { label: 'CLICK ME ', color: '#ff0' },
    'region-2': { colorBoost: 2.0 },
  }}
  onRegionClick={(id, region) => {
    console.log(`Clicked: ${region.label}`)
  }}
  onRegionHover={(id, region) => {
    setTooltip(region?.label ?? null)
  }}
  onCharacterClick={(info) => {
    console.log(`${info.char} at (${info.row}, ${info.col})`)
  }}
/>
Library API
Use Inklet programmatically without the CLI:
import { generateAscii, buildRegionMap, segmentRegions } from 'inklet'generateAscii(input, options?)
Convert an image to ASCII data.
const data = await generateAscii('photo.png', {
  width: 100,
  colorMode: 'color',
  removeBackground: true,
})
Returns an AsciiData object.
segmentRegions(data, options?)
Auto-detect regions by color similarity using flood fill.
const { regionMap, regions } = segmentRegions(data, {
  similarity: 0.15,
  minSize: 20,
})
buildRegionMap(data, regionConfig)
Expand a regionConfig (from the editor JSON) into a flat region map.
import config from './ascii-config.json'
const { regionMap, regions } = buildRegionMap(config.data, config.regionConfig)
// regionMap[i] = "region-1" | null
Character ramps
import { RAMP_DETAILED, RAMP_SIMPLE, RAMP_BLOCKS } from 'inklet'| Ramp | Characters | Use case |
|---|---|---|
| RAMP_DETAILED | 70 chars: $@B%8&WM#*oahk... | High detail (default) |
| RAMP_SIMPLE | 10 chars: .:-=+*#%@ | Low resolution |
| RAMP_BLOCKS | 5 chars: ░▒▓█ | Block/pixel style |
Pass a custom ramp string to generateAscii({ characterSet: '...' }) or --chars on the CLI.
How It Works
Image loading — Sharp reads the image and resizes it to the target column count. Row count is derived from the image aspect ratio and the character aspect ratio (monospace characters are taller than wide).
Pixel mapping — each pixel's luminance (
0.299R + 0.587G + 0.114B) maps to a character from the density ramp. Dark pixels get dense characters (@,#), light pixels get sparse ones (.,Color extraction — each pixel's RGB value is converted to hex. The full color array is deduplicated into a compact palette with an index array.
Region editing — the visual editor renders the ASCII grid and lets you paint named regions over it. Regions are stored as run-length encoded cell ranges.
React rendering — the
<AsciiImage>component groups consecutive same-color, same-region characters into single<span>elements (reducing DOM nodes by ~10x), applies hover effects via inline styles with CSS transitions, and fires callbacks based on region membership.
Why Inklet exists
Other tools turn images into ASCII. Inklet turns them into UI — regions you can hover, click, and react to in the browser. The missing piece has always been labeling which characters mean what, and that's a job AI can't do reliably. Inklet's visual editor makes the human step take a minute instead of a weekend.
License
MIT