
lam-cli
v2.0.17
Published
Localhost Apps Manager - A local reverse proxy and domain manager
Maintainers
 megh
meghReadme
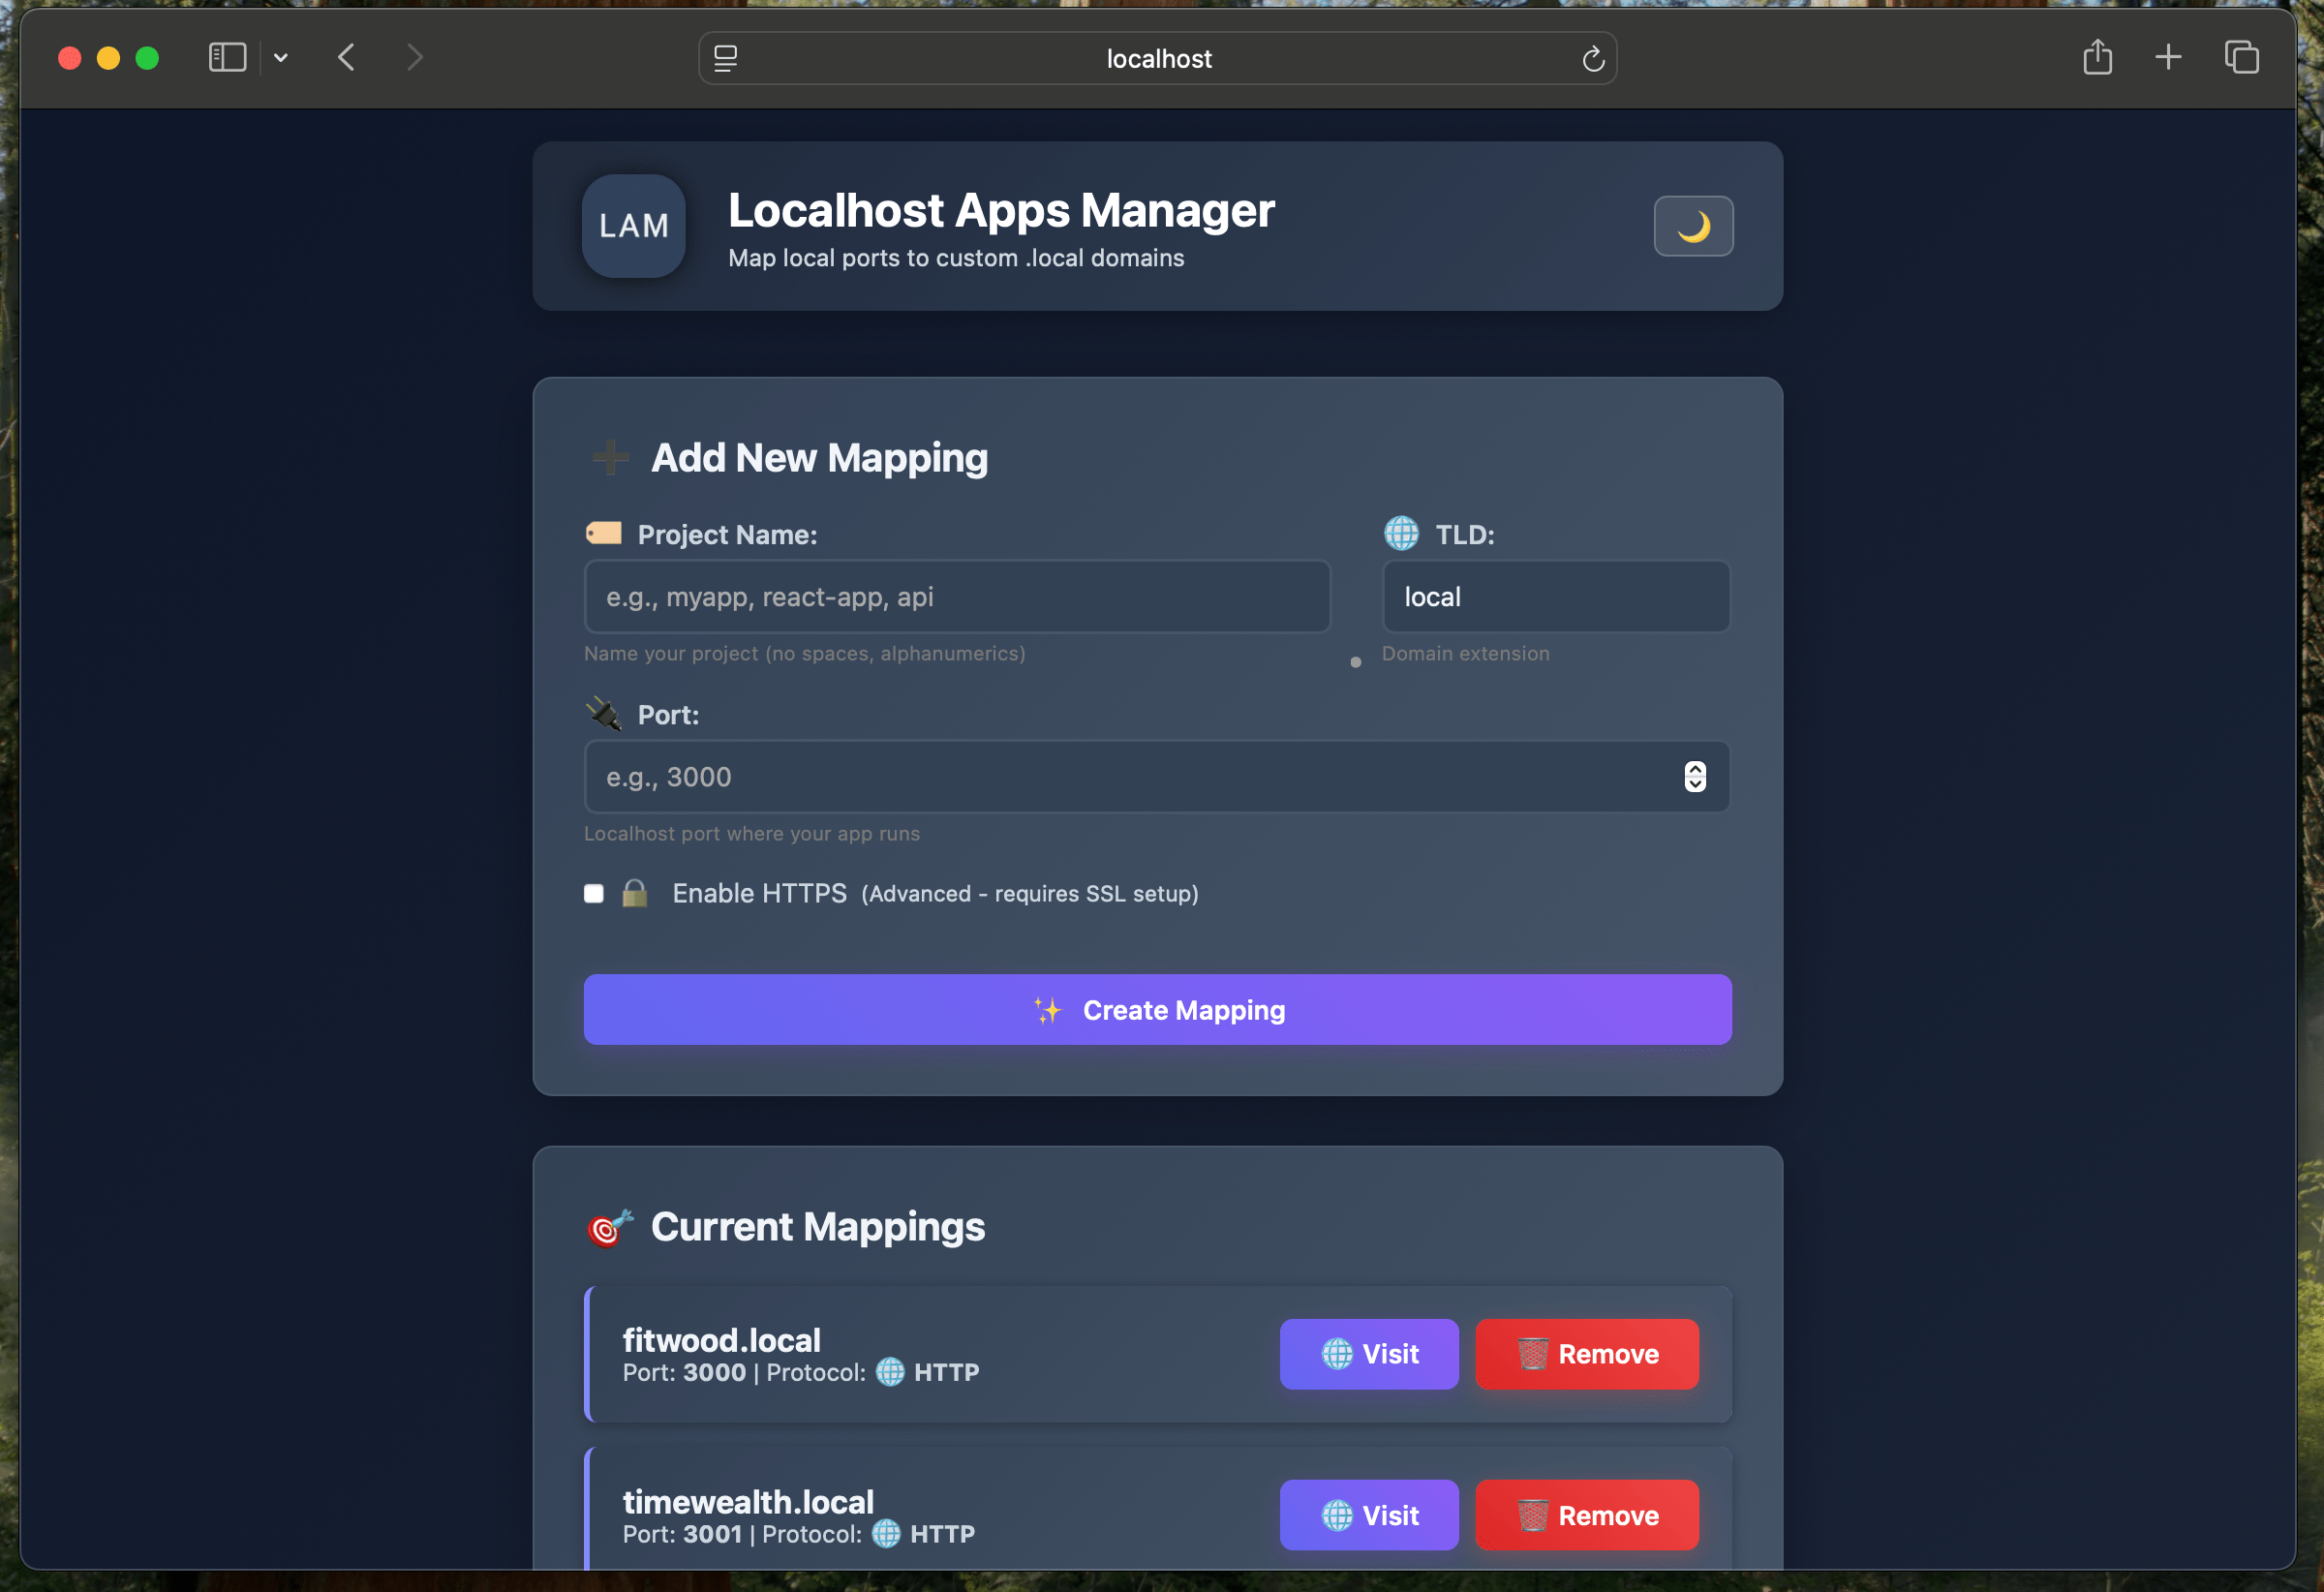
🧠 LAM - Localhost Apps Manager


A fast, modern local reverse proxy that maps custom domains to localhost ports with built-in DNS resolution and a beautiful web dashboard.
Supports any TLD (.local, .dev, .test, .app, .staging, etc.) for
flexible development environments.
Features
- Universal Domain Mapping: Map any localhost port to custom domains with
any TLD (
.local,.dev,.test,.app, etc.) - Built-in DNS Server: Zero-configuration DNS resolution for all configured domains
- Modern Web Dashboard: Beautiful interface with light/dark theme toggle and modal dialogs
- HTTP Proxy Mode: Full WebSocket and HMR support for modern development frameworks
- Automatic Server Detection: Discovers unmapped development servers with one-click mapping and kill options
- Custom Modal Dialogs: Elegant replacement for browser prompts with keyboard shortcuts
- Process Management: Kill server processes directly from the UI with confirmation (both from mappings and unmapped servers)
- REST API: Programmatic registration and management for CI/CD integration
- Persistent Storage: JSON-based configuration with real-time synchronization
- System Service: Auto-start on boot with proper permissions for production deployments
- HTTPS/SSL Support: Automatic certificate generation and management per domain
Quick Start
Installation
Install LAM globally:
npm install -g lam-cli@latestRunning the Server
Start LAM:
sudo lam-cli startThat's it! LAM is now running at http://localhost:80 and you can start
using .local domains for your development projects.
Access LAM
- Dashboard:
http://localhost:80 - API:
http://localhost:80/api/register
Register apps
curl -X POST http://localhost:80/api/register \
  -H "Content-Type: application/json" \
  -d '{"project":"myapp","port":3000}'
Access apps
http://myapp.local→http://localhost:3000
LAM will start on http://localhost:80 (or configured port)
3. Access the Web Dashboard
Open http://localhost:80 in your browser to manage your mappings.
Option 2: Easy Startup (Recommended)
1. Install Dependencies
npm install2. Start LAM with Auto-Setup
npm run start:serviceThis script automatically:
- Installs dependencies if needed
- Handles sudo privileges for port binding and hosts file access
- Starts LAM with proper configuration
3. Access the Web Dashboard
Open http://localhost:80 in your browser to manage your mappings.
API Endpoints
Register a New Mapping
POST /api/register
Content-Type: application/json

{
  "project": "myapp",
  "port": 3000,
  "https": false
}
Response:
{
  "domain": "myapp.local",
  "url": "http://myapp.local",
  "port": 3000,
  "https": false
}
Get All Mappings
GET /api/mappingsRemove a Mapping
DELETE /api/mappings/myapp.localKill a Server Process
DELETE /api/servers/:pidKills a server process by its PID. Useful for stopping development servers.
Example:
DELETE /api/servers/1234Configuration
Edit ~/.lam/config.json to customize:
{
  "httpPort": 80,
  "httpsPort": 443,
  "storagePath": "~/.lam/mappings.json",
  "certsPath": "~/.lam/certs",
  "hostsFile": "/etc/hosts",
  "enableHttps": false,
  "autoUpdateHosts": true
}
Architecture
LAM features a modular, single-proxy architecture that provides superior performance and maintainability:
Core Components
- HTTP Proxy: High-performance HTTP proxy supporting any TLD with full WebSocket proxying for HMR
- DNS Server: Built-in mDNS responder providing zero-configuration DNS resolution
- Certificate Manager: Automatic SSL certificate generation and management per domain
- Server Scanner: Local development server discovery and process management
- Mappings Manager: JSON-based configuration storage with real-time synchronization
- HTTPS Proxy: SSL/TLS proxy server with SNI support for secure connections
Project Structure
lam/
├── server.js                 # Modular entry point coordinating all services
├── src/
│   ├── config.js             # Configuration management singleton
│   ├── dns-server.js         # mDNS responder for domain resolution
│   ├── http-server.js        # HTTP proxy with WebSocket support
│   ├── https-server.js       # HTTPS proxy with SNI certificate handling
│   ├── certificate-manager.js # SSL certificate generation & management
│   ├── mappings-manager.js   # Domain-mapping storage & API
│   └── server-scanner.js     # Local server discovery & process management
├── package.json
├── bin/
│   └── lam.js                # CLI installer (npx lam-cli)
├── scripts/                  # Service management scripts
└── public/                   # Web dashboard assets
Next.js Integration
Use the Next.js LAM Plugin for automatic integration:
npm install --save-dev nextjs-lam-plugin// next.config.js
const { withLam } = require("nextjs-lam-plugin");
module.exports = withLam({
reactStrictMode: true,
});The plugin automatically:
- Registers your Next.js dev server with LAM
- Enables proxy mode for HMR support
- Configures allowed origins for hot reloading
Features
- Automatic Certificate Generation: SSL certificates are generated on-demand for each domain
- Per-Domain Certificates: Each mapping gets its own unique certificate
- Modern Encryption: 2048-bit RSA keys with SHA-256 signing
- Browser Compatible: Works with all modern browsers (may show security warnings for self-signed certs)
- Wildcard Support: Automatically includes wildcard subjects for subdomains
HTTPS/SSL Support
LAM provides automatic SSL certificate generation for secure HTTPS connections. Each domain gets its own self-signed certificate, compatible with modern browsers.
HTTPS is enabled by default. Access your apps securely:
- Create a mapping
- LAM generates a certificate automatically
- Access securely at
https://yourdomain.local
Manual Certificate Management
Use the web interface or API to manage certificates:
# Generate certificate
curl -X POST https://localhost:443/api/certificates/myapp.local

# Check certificate status
curl https://localhost:443/api/certificates/myapp.local

# Delete certificate
curl -X DELETE https://localhost:443/api/certificates/myapp.local
Certificate Locations
Certificates are stored in ~/.lam/certs/:
~/.lam/certs/
├── myapp.local/
│   ├── key.pem      # Private key
│   └── cert.pem     # Certificate
└── api.dev/
    ├── key.pem
    └── cert.pem
Local CA and Trusted Certificates
LAM uses a local Certificate Authority (CA) to sign SSL certificates, allowing browsers to trust HTTPS connections without security warnings.
Download the CA Certificate
# Download CA certificate over HTTP (recommended for initial setup)
curl -o lam-ca-cert.pem http://localhost/api/ca
Install CA Certificate
macOS:
sudo security add-trusted-cert -d -r trustRoot -k /Library/Keychains/System.keychain lam-ca-cert.pemLinux (Ubuntu/Debian):
sudo cp lam-ca-cert.pem /usr/local/share/ca-certificates/
sudo update-ca-certificates
Windows (PowerShell as Administrator):
certutil -addstore "Root" lam-ca-cert.pemChrome/Edge:
- Open Settings → Privacy and security → Manage certificates
- Import
lam-ca-cert.pemto Trusted Root Certification Authorities
Verification
After installation:
https://yourdomain.localloads without warnings- Certificate shows as "Valid" in browser inspector
- All LAM certificates are signed by "LAM Local Development CA"
Security Notes
- Trusted certificates - no browser warnings for LAM domains
- Development only - not suitable for production
- Automatic renewal every 365 days for certificates, 10 years for CA
- Secure storage with proper file permissions
Trust Certificate Instructions
If you encounter "SSL certificate unknown" errors, LAM provides trust
installation guide at https://localhost/trust.
This page includes:
- Direct CA certificate download link
- Installation instructions for macOS, Windows, and Linux
- Step-by-step guidance for importing into system trust store
HTTPS Configuration
Edit ~/.lam/config.json:
{
  "enableHttps": true,
  "httpsPort": 443,
  "certsPath": "~/.lam/certs",
  "certsPath": "~/.lam/certs"
}
Troubleshooting
Port Already in Use
If port 80 is busy, change the httpPort in config.json.
Contributing
This is a development tool. Feel free to submit issues and pull requests.