
llm-lens
v0.1.6
Published
Local debugging proxy and web UI for inspecting LLM API traffic.

Maintainers
 onurpolattimur
Readme
LLM Lens




LLM Lens is a local debugging proxy and web UI for inspecting LLM API traffic. It is built for developers working with coding agents, SDKs, and agentic workflows who need to understand exactly what their tools send to and receive from model providers.
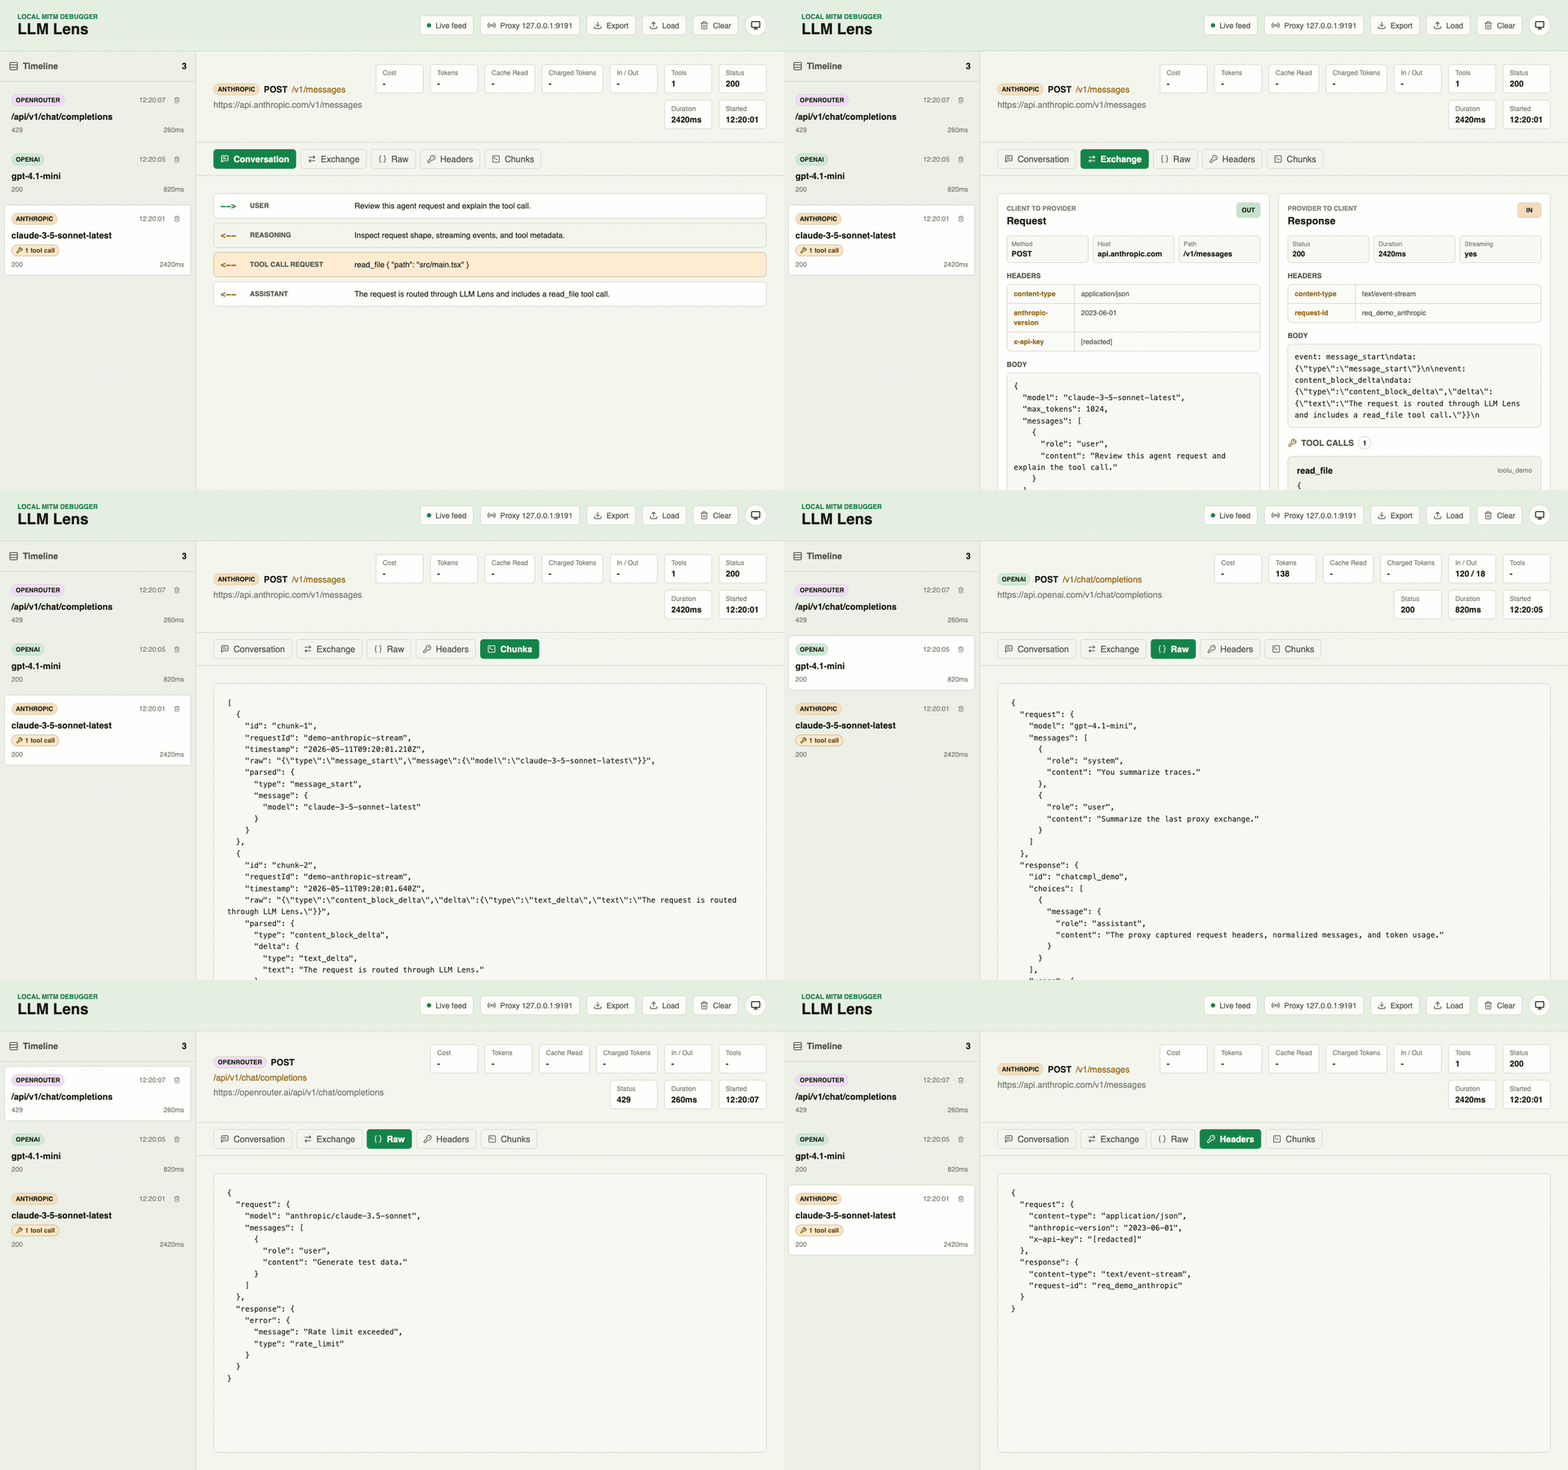
The project works like a local MITM proxy: start LLM Lens, point your tool at the local proxy, trust the generated local CA certificate, and watch requests and responses appear in the browser. Instead of showing only generic HTTP traffic, LLM Lens parses provider payloads into a normalized conversation trace with messages, tool calls, reasoning blocks, streaming chunks, headers, latency, and token usage when the provider returns it.
Features
- Local HTTP/HTTPS proxy for LLM provider traffic.
- Live web UI with a request timeline and detailed request/response views.
- Normalized conversation view for prompts, assistant output, tool calls, and reasoning content.
- Raw JSON, headers, exchange, and streaming chunk views for low-level debugging.
- Session export and import for sharing reproducible debugging traces.
- Header redaction for sensitive values such as
Authorization,x-api-key, cookies, and proxy credentials. - Configurable provider host allowlist for custom or self-hosted LLM-compatible endpoints.
Supported Providers
LLM Lens captures these provider hosts by default:
- Anthropic:
api.anthropic.com - OpenAI:
api.openai.com - OpenRouter:
openrouter.ai - Google Gemini:
generativelanguage.googleapis.com
You can add more hosts with LLM_LENS_ADDITIONAL_PROVIDER_URLS or the
--additional-provider-urls CLI flag. Extra hosts are captured as unknown
unless their payload shape matches a parser that LLM Lens already
understands.
Quick Start
Install the local CA certificate into your system trust store:
npx llm-lens cert installRun your agent through LLM Lens. The proxy, API, and web UI start automatically:
npx llm-lens opencode
npx llm-lens claude
Or start the inspector without launching an agent:
npx llm-lens startDefault local endpoints:
- Web UI:
http://127.0.0.1:5270 - API/WebSocket:
http://127.0.0.1:9292 - Proxy:
http://127.0.0.1:9191
Inspect Agent Traffic
Run the tool or coding agent you want to inspect with proxy environment variables pointing at LLM Lens:
export HTTPS_PROXY=http://127.0.0.1:9191
export HTTP_PROXY=http://127.0.0.1:9191
export NO_PROXY=localhost,127.0.0.1
export NODE_EXTRA_CA_CERTS="$HOME/.llm-lens/certs/certs/ca.pem"
export SSL_CERT_FILE="$HOME/.llm-lens/certs/certs/ca.pem"
export REQUESTS_CA_BUNDLE="$HOME/.llm-lens/certs/certs/ca.pem"
For a single command:
HTTPS_PROXY=http://127.0.0.1:9191 \
HTTP_PROXY=http://127.0.0.1:9191 \
NODE_EXTRA_CA_CERTS="$HOME/.llm-lens/certs/certs/ca.pem" \
SSL_CERT_FILE="$HOME/.llm-lens/certs/certs/ca.pem" \
your-agent-command
Or let the CLI set those variables for the child process:
npx llm-lens opencode
npx llm-lens claude
When LLM Lens launches an interactive agent, the agent owns the terminal after
startup. Background proxy and inspector logs are written to a session log under
$HOME/.llm-lens/logs so they do not overwrite terminal UIs such as opencode.
Use --verbose or LLM_LENS_VERBOSE=1 to also mirror those background logs to
the terminal:
npx llm-lens --verbose opencodePut LLM Lens options before the agent command. Arguments after the agent command are passed to the agent:
npx llm-lens --proxy-port 9191 opencode --helpNO_PROXY is useful for tools that honor it. Claude Code currently does not
support NO_PROXY, so keep it for other tools in the same shell but do not rely
on it for Claude Code proxy bypass behavior.
CLI
Run an agent command through LLM Lens:
npx llm-lens opencode
npx llm-lens claude
npx llm-lens run opencode
npx llm-lens run claude
Start LLM Lens:
npx llm-lens start
npx llm-lens start --proxy-port 9191 --api-port 9292 --ui-port 5270
npx llm-lens start --additional-provider-urls api.example.com,https://llm.internal.test
When the built web UI is served, the CLI opens it in the default browser automatically.
Manage certificates:
npx llm-lens cert generate
npx llm-lens cert status
npx llm-lens cert install
npx llm-lens cert uninstall
cert install creates the local CA when needed and installs it into the system
trust store. On macOS and Linux it may ask for your password through sudo.
cert uninstall removes the certificate from the system trust store, but local
certificate files remain under the LLM Lens home directory.
Configuration
LLM Lens reads .env.local and .env from the directory where the command
is started. CLI flags override environment values.
LLM_LENS_PROXY_PORT=9191
LLM_LENS_API_PORT=9292
LLM_LENS_UI_PORT=5270
LLM_LENS_HOST=127.0.0.1
LLM_LENS_HOME="$HOME/.llm-lens"
LLM_LENS_ADDITIONAL_PROVIDER_URLS=api.example.com,llm.internal.test
LLM_LENS_VERBOSE=0
LLM_LENS_ADDITIONAL_PROVIDER_URLS accepts comma-separated or
whitespace-separated hosts and URLs.
Privacy and Security
LLM Lens is designed to run locally. By default it binds to 127.0.0.1,
captures only known LLM provider hosts, and redacts common secret-bearing headers
before showing them in the UI.
Captured request and response bodies may still contain prompts, completions, tool outputs, user data, or other sensitive information. Treat exported sessions as sensitive debugging artifacts.
The generated CA private key is stored locally under:
$HOME/.llm-lens/certs/keys/ca.private.keyOnly trust the generated CA on machines where you intend to inspect local traffic.
Development
Prerequisites
- Node.js 20 or newer
- npm
Run From Source
Install dependencies:
npm installStart the backend proxy/API and the Vite web UI. The web UI opens automatically:
npm run devDevelopment endpoints use the same defaults as the packaged CLI:
- Web UI:
http://127.0.0.1:5270 - API/WebSocket:
http://127.0.0.1:9292 - Proxy:
http://127.0.0.1:9191
Run only one side of the app when needed:
npm run dev:backend
npm run dev:frontend
Manual Certificate Workflow
The development server generates the local CA automatically when the proxy starts. If you want to manage certificates manually from a source checkout, build the CLI once and run the certificate commands directly:
npm run build
node backend/dist/cli/index.js cert generate
node backend/dist/cli/index.js cert status
node backend/dist/cli/index.js cert install
node backend/dist/cli/index.js cert uninstall
The CA certificate is written to:
$HOME/.llm-lens/certs/certs/ca.pemIf automatic installation is not appropriate for your machine, import that certificate manually:
- macOS: open Keychain Access, import
ca.peminto the System keychain, then set the certificate to Always Trust for SSL. - Windows: open Manage Computer Certificates, import
ca.peminto Trusted Root Certification Authorities, then restart the inspected process. - Debian/Ubuntu: copy
ca.pemto/usr/local/share/ca-certificates/llm-lens-ca.crt, then runsudo update-ca-certificates. - Fedora/RHEL: run
sudo trust anchor ca.pem, thensudo update-ca-trust extract.
Some runtimes do not use the system trust store. For those, pass the CA file to the process explicitly:
export NODE_EXTRA_CA_CERTS="$HOME/.llm-lens/certs/certs/ca.pem"
export SSL_CERT_FILE="$HOME/.llm-lens/certs/certs/ca.pem"
export REQUESTS_CA_BUNDLE="$HOME/.llm-lens/certs/certs/ca.pem"
Build and Check
npm run typecheck
npm run build
For local package testing from another directory:
npm run build
npx /path/to/llm-lens start
npx /path/to/llm-lens opencode
/path/to/llm-lens is a placeholder for the actual checkout directory, not
the literal word path.