
n8n-chat-with-buttons
v1.0.0
Published
n8n embeddable chat widget with interactive button support for AI chatbots. Enhanced version with button rendering for better UX in conversational workflows.
Maintainers
 mehrdafon
Readme
n8n Chat Widget with Interactive Buttons 🤖# n8n Chat
This is an embeddable Chat widget for n8n. It allows the execution of AI-Powered Workflows through a Chat window.
An enhanced version of the n8n chat widget that supports interactive buttons for better conversational UX in AI chatbots.
Windowed Example
✨ Features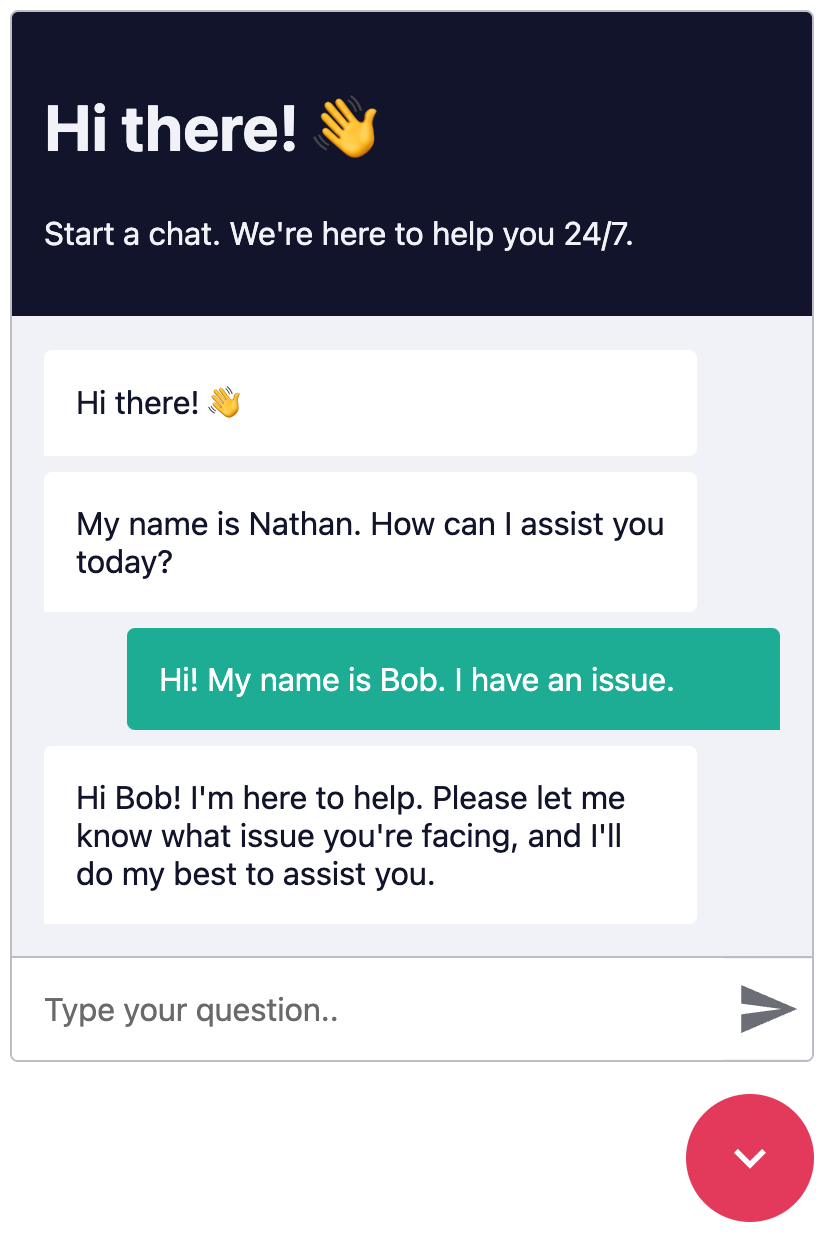
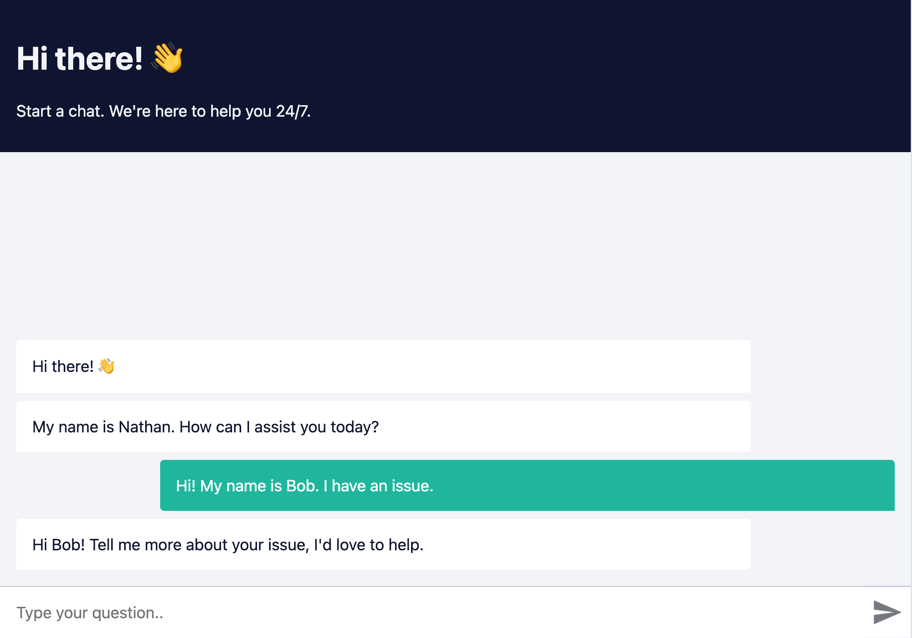
🎯 Interactive Buttons: Display clickable button options in chat responsesFullscreen Example
💬 Standard n8n Chat: All original n8n chat widget features
🎨 Customizable: Theme, colors, and styling options
📱 Responsive: Works on desktop and mobile## Prerequisites
🚀 Easy Integration: CDN or npm installCreate a n8n workflow which you want to execute via chat. The workflow has to be triggered using a Chat Trigger node.
🔌 Webhook Ready: Connect directly to n8n workflows
Open the Chat Trigger node and add your domain to the Allowed Origins (CORS) field. This makes sure that only requests from your domain are accepted.
🆕 What's New: Button Feature
This package adds support for interactive buttons in chatbot responses. Instead of users typing answers, they can click buttons for:
Yes/No questionsTo use streaming responses, you need to enable the Streaming response response mode in the Chat Trigger node.
Multiple choice optionsSee example workflow with streaming
Guided workflows
Quick actions> Make sure the workflow is Active.
Button Format### How it works
Each Chat request is sent to the n8n Webhook endpoint, which then sends back a response.
In your n8n workflow, return responses with this format to render buttons:
Each request is accompanied by an action query parameter, where action can be one of:
```- loadPreviousSession - When the user opens the Chatbot again and the previous chat session should be loaded
Your message text here- sendMessage - When the user sends a message
```buttons## Installation
{
"title": "Optional title for buttons",Open the Webhook node and replace YOUR_PRODUCTION_WEBHOOK_URL with your production URL. This is the URL that the Chat widget will use to send requests to.
"options": [
{"label": "Option 1", "value": "VALUE_1"},### a. CDN Embed

{"label": "Option 2", "value": "VALUE_2"}Add the following code to your HTML page.
]
}```html
```
	import { createChat } from 'https://cdn.jsdelivr.net/npm/@n8n/chat/dist/chat.bundle.es.js';

**Example Response:**

```	createChat({

Welcome! How can I help you today?		webhookUrl: 'YOUR_PRODUCTION_WEBHOOK_URL'

	});

\`\`\`buttons</script>

{```

  "title": "Choose a topic:",

  "options": [### b. Import Embed

    {"label": "🧮 Calculate", "value": "CALC"},Install and save n8n Chat as a production dependency.

    {"label": "📚 Information", "value": "INFO"},

    {"label": "💬 Other", "value": "OTHER"}```sh

  ]npm install @n8n/chat

}```

\`\`\`

```Import the CSS and use the `createChat` function to initialize your Chat window.


When a user clicks a button, the `value` is sent back to your webhook as the next message.```ts

import '@n8n/chat/style.css';

## 📦 Installationimport { createChat } from '@n8n/chat';


### Option 1: CDN (Easiest)createChat({

	webhookUrl: 'YOUR_PRODUCTION_WEBHOOK_URL'

Add to your HTML:});
<!DOCTYPE html>##### Vue.js

<html>

<head>```html

  <!-- Load CSS --><script lang="ts" setup>

  <link rel="stylesheet" href="https://unpkg.com/[email protected]/dist/style.css">// App.vue

</head>import { onMounted } from 'vue';

<body>import '@n8n/chat/style.css';

  <!-- Your content -->import { createChat } from '@n8n/chat';


  <!-- Load the chat widget -->onMounted(() => {

  <script type="module">	createChat({

    import { createChat } from 'https://unpkg.com/[email protected]/dist/chat.bundle.es.js';		webhookUrl: 'YOUR_PRODUCTION_WEBHOOK_URL'

	});

    createChat({});

      webhookUrl: 'YOUR_N8N_WEBHOOK_URL',</script>

      initialMessages: ['Hello! How can I help you?'],<template>

      chatWindowConfig: {	<div></div>

        title: 'AI Assistant',</template>

        subtitle: 'Powered by n8n',```

      },

    });##### React

  </script>

</body>```tsx

</html>// App.tsx

```import { useEffect } from 'react';

import '@n8n/chat/style.css';

### Option 2: npm Installimport { createChat } from '@n8n/chat';


```bashexport const App = () => {

npm install n8n-chat-with-buttons	useEffect(() => {

```		createChat({

			webhookUrl: 'YOUR_PRODUCTION_WEBHOOK_URL'

Then in your JavaScript/TypeScript:		});

	}, []);

```javascript

import { createChat } from 'n8n-chat-with-buttons';	return (<div></div>);

import 'n8n-chat-with-buttons/dist/style.css';};
createChat({
webhookUrl: 'YOUR_N8N_WEBHOOK_URL',## Options
initialMessages: ['Hello! 👋'],The default options are:
chatWindowConfig: {
title: 'AI Assistant',```ts},createChat({
}); webhookUrl: '',
		method: 'POST',

### Option 3: UMD Bundle (Traditional Script Tag)		headers: {}

	},

```html	target: '#n8n-chat',

<link rel="stylesheet" href="https://unpkg.com/[email protected]/dist/style.css">	mode: 'window',

<script src="https://unpkg.com/[email protected]/dist/chat.bundle.umd.js"></script>	chatInputKey: 'chatInput',

	chatSessionKey: 'sessionId',

<script>	loadPreviousSession: true,

  // The UMD bundle exposes a global variable	metadata: {},

  window.n8nChat.createChat({	showWelcomeScreen: false,

    webhookUrl: 'YOUR_N8N_WEBHOOK_URL',	defaultLanguage: 'en',

    initialMessages: ['Hello! 👋'],	initialMessages: [

  });		'Hi there! 👋',

</script>		'My name is Nathan. How can I assist you today?'

```	],

	i18n: {

## 🔧 Configuration Options		en: {

			title: 'Hi there! 👋',

```javascript			subtitle: "Start a chat. We're here to help you 24/7.",

createChat({			footer: '',

  // Required: Your n8n webhook URL			getStarted: 'New Conversation',

  webhookUrl: 'https://your-n8n.com/webhook/your-id/chat',			inputPlaceholder: 'Type your question..',

  		},

  // Optional: Initial messages from the bot	},

  initialMessages: [	enableStreaming: false,

    'Hello! 👋',});

    'How can I help you today?'```

  ],

  ### `webhookUrl`

  // Optional: Chat window configuration- **Type**: `string`

  chatWindowConfig: {- **Required**: `true`

    title: 'AI Assistant',- **Examples**:

    subtitle: 'Powered by n8n',	- `https://yourname.app.n8n.cloud/webhook/513107b3-6f3a-4a1e-af21-659f0ed14183`

    welcomeMessage: 'Hi there! 👋',	- `http://localhost:5678/webhook/513107b3-6f3a-4a1e-af21-659f0ed14183`

  },- **Description**: The URL of the n8n Webhook endpoint. Should be the production URL.


  // Optional: Customize theme### `webhookConfig`

  theme: {- **Type**: `{ method: string, headers: Record<string, string> }`

    primaryColor: '#667eea',- **Default**: `{ method: 'POST', headers: {} }`

  },- **Description**: The configuration for the Webhook request.


  // Optional: Open chat by default (useful for testing)### `target`

  defaultOpen: false,- **Type**: `string`

});- **Default**: `'#n8n-chat'`

```- **Description**: The CSS selector of the element where the Chat window should be embedded.


## 🎯 n8n Workflow Setup### `mode`

- **Type**: `'window' | 'fullscreen'`

### 1. Create a Chat Workflow- **Default**: `'window'`

- **Description**: The render mode of the Chat window.

1. In n8n, create a new workflow  - In `window` mode, the Chat window will be embedded in the target element as a chat toggle button and a fixed size chat window.

2. Add a **Chat Trigger** node (or **Webhook** node)  - In `fullscreen` mode, the Chat will take up the entire width and height of its target container.

3. Set it to accept POST requests

4. Add your AI logic (OpenAI, Azure OpenAI, etc.)### `showWelcomeScreen`

- **Type**: `boolean`

### 2. Return Button Responses- **Default**: `false`

- **Description**: Whether to show the welcome screen when the Chat window is opened.

In your AI system prompt or response formatting, include:

### `chatInputKey`

```- **Type**: `string`

When you want users to make a choice, use this format:- **Default**: `'chatInput'`

- **Description**: The key to use for sending the chat input for the AI Agent node.

\`\`\`buttons

{### `chatSessionKey`

  "title": "Optional title",- **Type**: `string`

  "options": [- **Default**: `'sessionId'`

    {"label": "Button Text", "value": "BUTTON_VALUE"}- **Description**: The key to use for sending the chat history session ID for the AI Memory node.

  ]

}### `loadPreviousSession`

\`\`\`- **Type**: `boolean`

```- **Default**: `true`

- **Description**: Whether to load previous messages (chat context).

### 3. Handle Button Clicks

### `defaultLanguage`

When a user clicks a button, the `value` is sent as their next message. Handle it in your workflow:- **Type**: `string`

- **Default**: `'en'`

```javascript- **Description**: The default language of the Chat window. Currently only `en` is supported.

// In a Code node or Function node

const userMessage = $input.item.json.chatInput;### `i18n`

- **Type**: `{ [key: string]: Record<string, string> }`

if (userMessage === 'CALC') {- **Description**: The i18n configuration for the Chat window. Currently only `en` is supported.

  return { output: 'Starting calculation...' };

}### `initialMessages`

```- **Type**: `string[]`

- **Description**: The initial messages to be displayed in the Chat window.

## 📚 Complete Example

### `allowFileUploads`

See the working example in the repository:- **Type**: `Ref<boolean> | boolean`

- Sample n8n workflow with AI + buttons- **Default**: `false`

- [test-chatbot.html](./test-chatbot.html) - Test HTML page- **Description**: Whether to allow file uploads in the chat. If set to `true`, users will be able to upload files through the chat interface.


### Example Workflow Response:### `allowedFilesMimeTypes`

- **Type**: `Ref<string> | string`

```json- **Default**: `''`

{- **Description**: A comma-separated list of allowed MIME types for file uploads. Only applicable if `allowFileUploads` is set to `true`. If left empty, all file types are allowed. For example: `'image/*,application/pdf'`.

  "output": "I can help you calculate your contribution. Do you have children?\n\n```buttons\n{\n  \"options\": [\n    {\"label\": \"✅ Yes\", \"value\": \"HAS_CHILDREN\"},\n    {\"label\": \"❌ No\", \"value\": \"NO_CHILDREN\"}\n  ]\n}\n```"

}### enableStreaming

```- Type: boolean

- Default: false

## 🎨 Button Best Practices- Description: Whether to enable streaming responses from the n8n workflow. If set to `true`, the chat will display responses as they are being generated, providing a more interactive experience. For this to work the workflow must be configured as well to return streaming responses.


1. **Use Emojis**: Make buttons visually appealing (🧮 📚 ✅ ❌)## Customization

2. **Keep Labels Short**: 2-5 words maxThe Chat window is entirely customizable using CSS variables.

3. **Clear Values**: Use UPPERCASE_WITH_UNDERSCORES for values

4. **Limit Options**: 2-4 buttons work best```css

5. **Add Context**: Use `title` field when needed:root {

	--chat--color--primary: #e74266;

## 🐛 Troubleshooting	--chat--color--primary-shade-50: #db4061;

	--chat--color--primary--shade-100: #cf3c5c;

### CORS Errors	--chat--color--secondary: #20b69e;

If testing locally with `file://`, use a local server:	--chat--color-secondary-shade-50: #1ca08a;

```bash	--chat--color-white: #ffffff;

python -m http.server 8000	--chat--color-light: #f2f4f8;

# or	--chat--color-light-shade-50: #e6e9f1;

npx http-server	--chat--color-light-shade-100: #c2c5cc;

```	--chat--color-medium: #d2d4d9;

	--chat--color-dark: #101330;

### Buttons Not Rendering	--chat--color-disabled: #777980;

- Ensure the button format is exactly as shown (triple backticks with "buttons")	--chat--color-typing: #404040;

- Check that JSON inside is valid

- Verify your n8n workflow returns the correct format	--chat--spacing: 1rem;

	--chat--border-radius: 0.25rem;

### Widget Not Showing	--chat--transition-duration: 0.15s;

- Check browser console for errors

- Verify webhook URL is correct and accessible	--chat--window--width: 400px;

- Ensure CSS file is loaded before the script	--chat--window--height: 600px;

- Try using `defaultOpen: true` to see the widget immediately

	--chat--header-height: auto;

## 📄 License	--chat--header--padding: var(--chat--spacing);

	--chat--header--background: var(--chat--color-dark);

MIT	--chat--header--color: var(--chat--color-light);

	--chat--header--border-top: none;

## 🤝 Contributing	--chat--header--border-bottom: none;

	--chat--header--border-bottom: none;

This is a custom fork of `@n8n/chat` with button support. For issues or contributions, please visit:	--chat--header--border-bottom: none;

https://github.com/Simhateja17/buttons_v1	--chat--heading--font-size: 2em;

	--chat--header--color: var(--chat--color-light);

## 🙏 Credits	--chat--subtitle--font-size: inherit;

	--chat--subtitle--line-height: 1.8;

Based on the official [@n8n/chat](https://www.npmjs.com/package/@n8n/chat) package.

Enhanced with interactive button support by [@Simhateja17](https://github.com/Simhateja17).	--chat--textarea--height: 50px;


---	--chat--message--font-size: 1rem;

	--chat--message--padding: var(--chat--spacing);

**Need help?** Check out:	--chat--message--border-radius: var(--chat--border-radius);

- [n8n Documentation](https://docs.n8n.io)	--chat--message-line-height: 1.8;

- [GitHub Issues](https://github.com/Simhateja17/buttons_v1/issues)	--chat--message--bot--background: var(--chat--color-white);

	--chat--message--bot--color: var(--chat--color-dark);
	--chat--message--bot--border: none;
	--chat--message--user--background: var(--chat--color--secondary);
	--chat--message--user--color: var(--chat--color-white);
	--chat--message--user--border: none;
	--chat--message--pre--background: rgba(0, 0, 0, 0.05);

	--chat--toggle--background: var(--chat--color--primary);
	--chat--toggle--hover--background: var(--chat--color--primary-shade-50);
	--chat--toggle--active--background: var(--chat--color--primary--shade-100);
	--chat--toggle--color: var(--chat--color-white);
	--chat--toggle--size: 64px;
}
Caveats
Fullscreen mode
In fullscreen mode, the Chat window will take up the entire width and height of its target container. Make sure that the container has a set width and height.
html,
body,
#n8n-chat {
	width: 100%;
	height: 100%;
}
License
You can find the license information here