
nest-codes-generate
v1.0.2
Published
自定义扩展@nestjs/cli的功能包,可以直接输入表名生成对应的实体类、控制器、服务层等代码
Maintainers
 zyz199
Readme
关于本包的介绍
在使用 NestJs + Mysql 项目开发中,也许你会开启由实体类同步生成数据表的方式,这种方式不是不行,但是也面临找数据会被误删的风险。本包使用的是先创建数据库和数据表,运行命令根据数据表有选择的来反向生成对应的实体类、控制器、服务层,减少我们手动一个一个目录结构来创建的工作。
使用步骤
- 1、全局安装方式
npm install nest-codes-generate -g2、关于配置数据库连接信息
根目录下创建数据库连接信息
code-gen.yml文件
# 配置数据库连接信息
data_source:
  host: "localhost"
  port: 3306
  user: "root"
  password: "password"
  database: "nest-codes-generate"
# 配置字段收取及基础类(可选,如果没有配置的话,那么就是默认每个实体类都带了相同的字段)
data_config:
  collect: "id, created_at, updated_at, deleted_at"
base_name: "BaseEntity"- 4、使用方式
指令参数介绍
  code-gen <表名> [存放的目录(目录需要提前存在)]

  # 1.其中code-gen是指令前缀
  # 2.表名为必传,可以传多个表名, 用","隔开即可, <表名1,表名2>
  # 3.存放的目录为可选, 如果不传递该参数则默认存在到src目录下,如果指定存放目录,那么你要先创建对应目录
示例
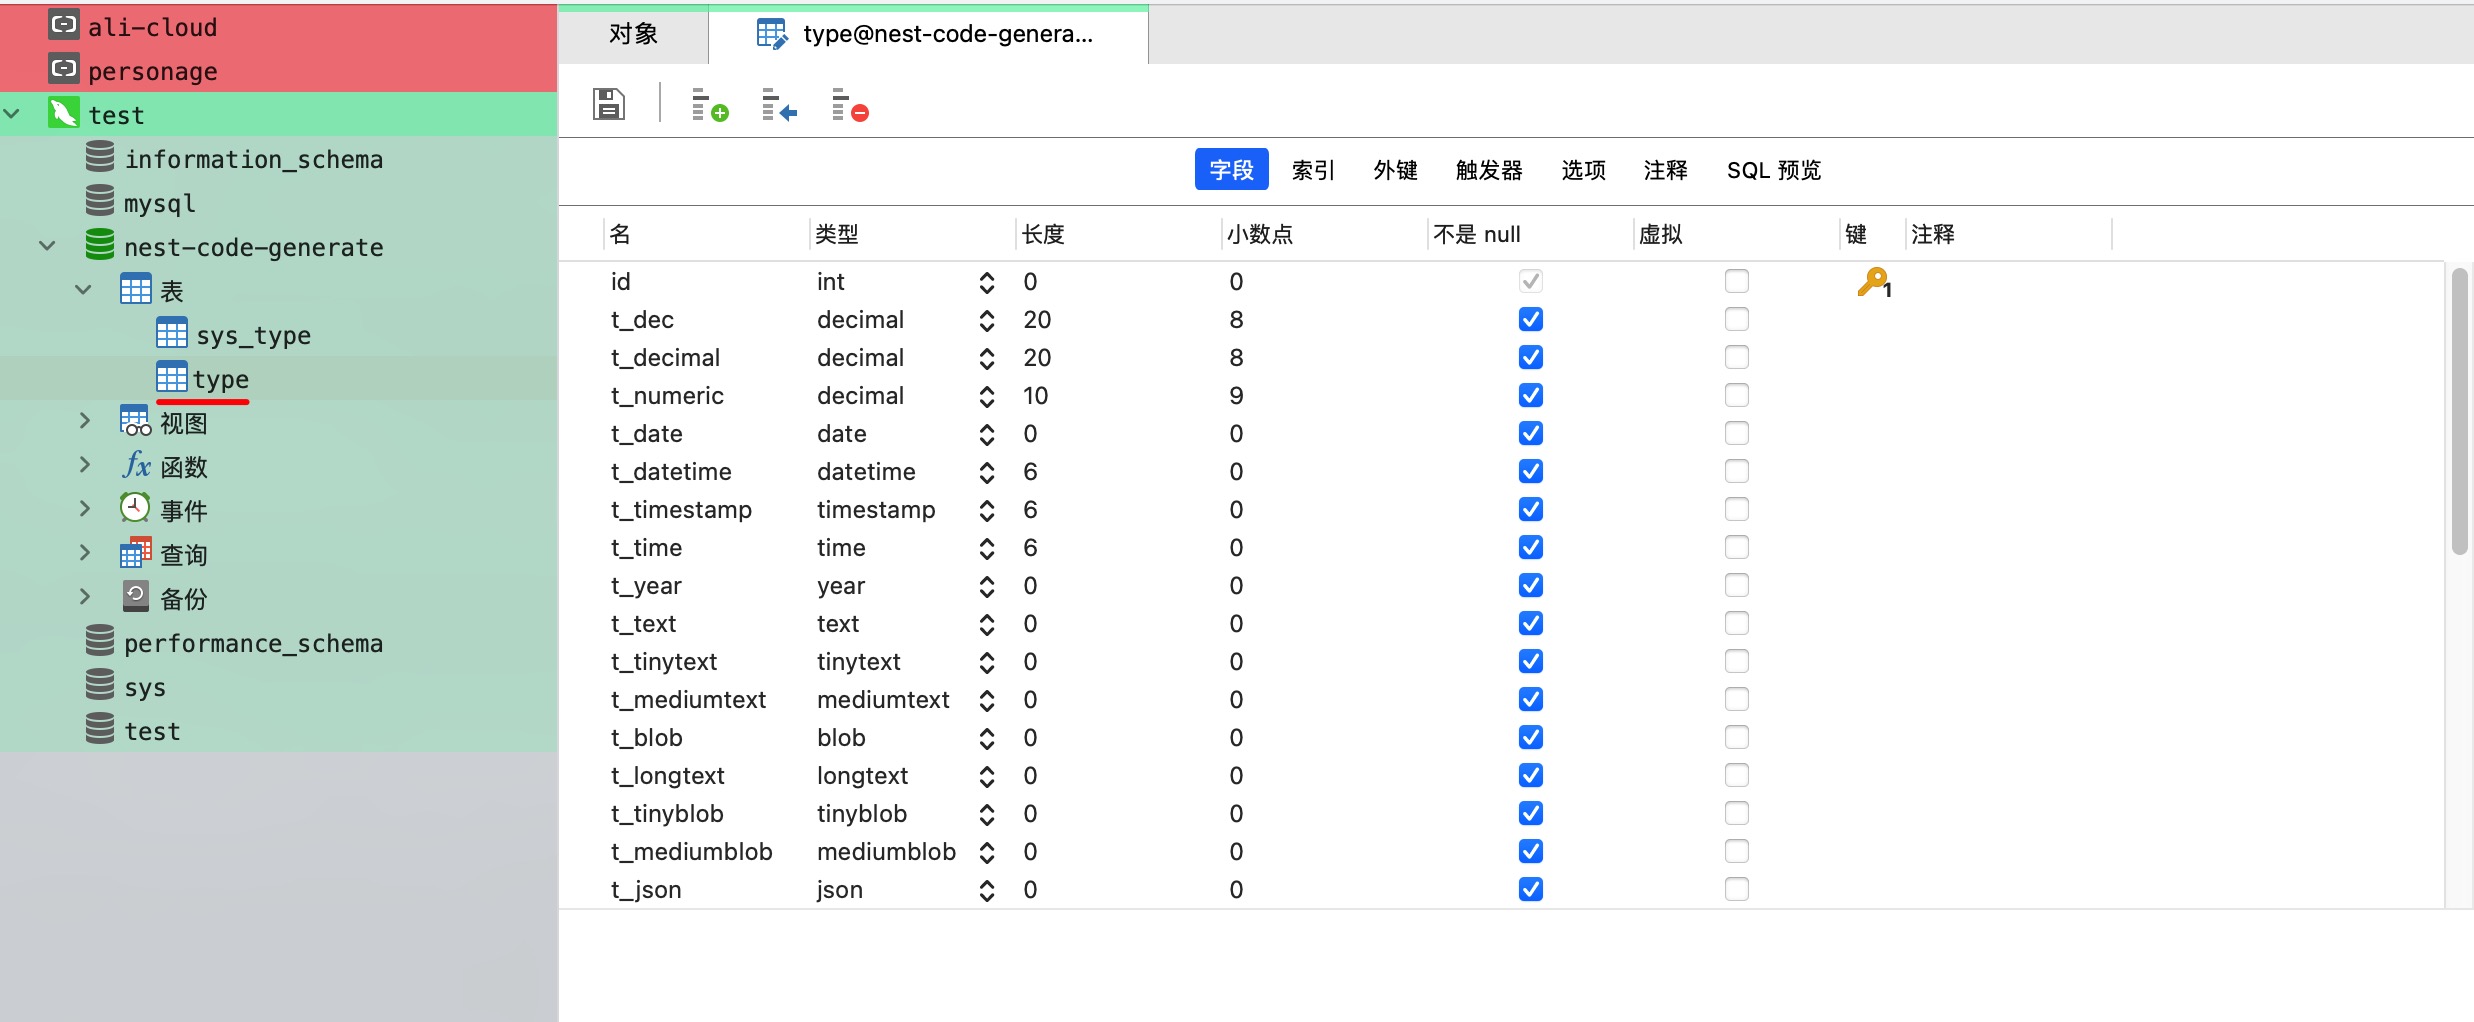
# 1.例如当前有一数据表, 名为type
# 2.项目结构:
├── src
  ├── demo
# 3.我们想将它挂载到src中的demo目录下
执行命令
code-gen type 或者 code-gen type src 进入配置选项如下图:
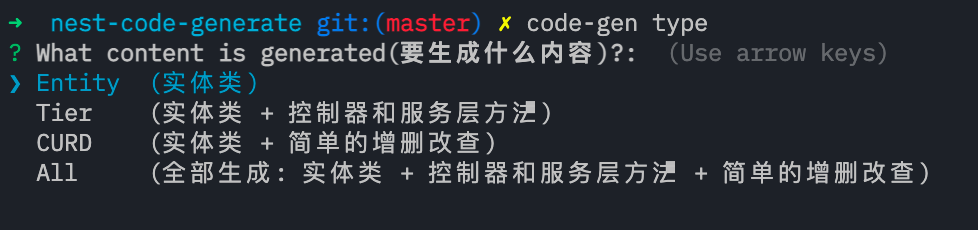
目录生成结构
# 选择Entity:
├── src
  ├── entities
  │   └── type.entity.ts

# 选择Tier
├── src
  ├── controllers
  │   ├── type.controller.spec.ts
  │   └── type.controller.ts
  ├── entities
  │   └── type.entity.ts
  ├── services
  │   ├── type.service.spec.ts
  │   └── type.service.ts

# 选择CURD: 目录结构与Tier一致, 内容增加简单的增删改查
# 选择All: 目前与CURD一致, 留作后期扩展使用
⚠️ 注意事项
1.路径问题
# 如果存放目录 不是唯一的, 例如下面的结构, lib和src文件夹下都存在一个demo文件夹, 此时如果想将生成内容放到src中的demo就有一点麻烦了, 不过好在, 存放路径支持"不完整路径", 请看下面的指令.
├── root
  ├── lib
  │   ├── demo
  ├── src
  │   └── demo

code-gen type src/demo
# 同样的如果是想存放到lib下面的demo文件夹可以执行下面的指令
code-gen type lib/demo