
next-s3-upload-host
v0.1.6
Published
The goal of this package is to make it as easy as possible to upload files from a Next.js app to S3.

Readme
Next.js S3 Upload
The goal of this package is to make it as easy as possible to upload files from a Next.js app to S3.
Installation
npm install next-s3-upload

# or

yarn add next-s3-upload
Configuration
Environment variables
We'll need to setup a couple environment variables for this package to work properly.
S3_UPLOAD_KEY=AAAAAAAAAAAAAAAAAAAA
S3_UPLOAD_SECRET=AAAAAAAAAAAAAAAAAAAAAAAAAAAAAAAAAAAAAAAA
S3_UPLOAD_BUCKET=name-of-s3-bucket
S3_UPLOAD_REGION=bucket-region-us-east-1
Next.js automatically supports loading environment variables from .env.local in the project's root. For development it's best to put these values into .env.local.
For production, you'll need to set these variables with your hosting provider. If you're using Vercel you can configure the build step to use these variables.
In the next sections we'll go over how to generate values for these variables.
S3 bucket
Create a new S3 bucket and store the name of the bucket as S3_UPLOAD_BUCKET and its region as S3_UPLOAD_REGION in your .env.local file.
Bucket permissions
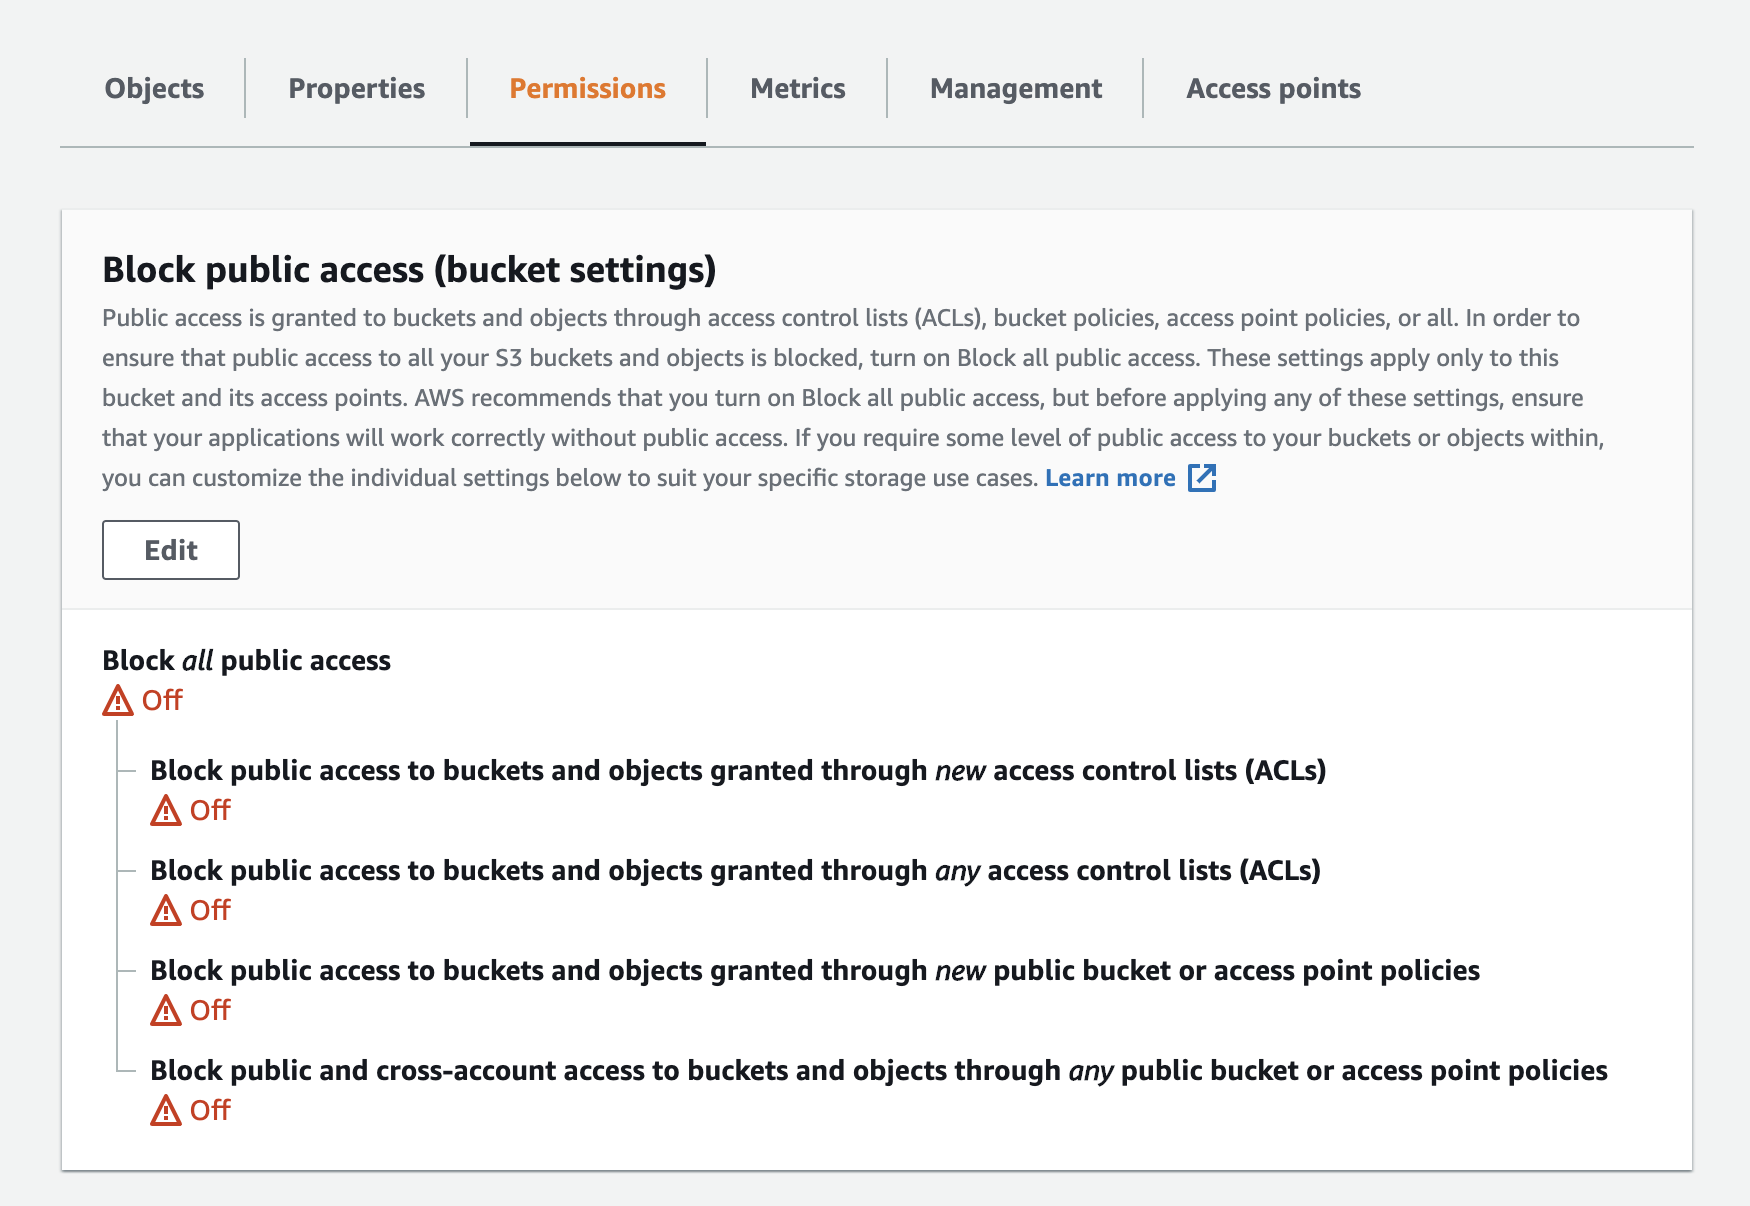
Once the bucket is created you'll need to go to the permissions tab and make sure that public access is not blocked.
You'll also need to add the following permissions in the CORS section.
[
  {
    "AllowedHeaders": ["*"],
    "AllowedMethods": ["PUT", "POST"],
    "AllowedOrigins": ["*"],
    "ExposeHeaders": ["ETag"]
  }
]
Here's what the CORS permissions will look like once you paste in the above JSON.

These settings are required so users can upload files to your bucket.
IAM user
Next, we'll need to create API keys that give your Next app access to AWS.
Go to the IAM section of AWS and add a new user with Programmatic access.
For the permissions step click Attach existing policies directly and then click the Create policy button.

When the policy editor opens, click on the JSON tab and paste in the following policy.
{
  "Version": "2012-10-17",
  "Statement": [
    {
      "Sid": "STSToken",
      "Effect": "Allow",
      "Action": "sts:GetFederationToken",
      "Resource": ["arn:aws:sts::ACCOUNT_ID:federated-user/S3UploadWebToken"]
    },
    {
      "Sid": "S3UploadAssets",
      "Effect": "Allow",
      "Action": "s3:*",
      "Resource": [
        "arn:aws:s3:::BUCKET_NAME",
        "arn:aws:s3:::BUCKET_NAME/*.jpg",
        "arn:aws:s3:::BUCKET_NAME/*.png",
        "arn:aws:s3:::BUCKET_NAME/*.gif",
        "==== ADD OTHER FORMATS HERE ====",
        "arn:aws:s3:::BUCKET_NAME/*.format"
      ]
    }
  ]
}
🚨 Important 🚨 Before saving the policy, you'll need to replace:
| | | | --------------- | ------------------------------------------------------------------------------------------------------------------------ | | ACCOUNT_ID | Your AWS account ID. You can get this number by clicking on your name in the header. It's the number next to My account. | | BUCKET_NAME | The name of the bucket you created in the previous step. |
Allowed file formats
In the above example we only allow jpg, png, and gif files to be uploaded. If you're planning to use next/image with files uploaded to S3 you'll want to make sure that only images are allowed to be uploaded. See this issue for more information.
If you're not using next/image, you can edit the above example and add additional file formats. For example, you can add arn:aws:s3:::BUCKET_NAME/* to allow any file to be uploaded.
IAM user cont.
Next, click review policy, and name the policy next-s3-upload. The name doesn't matter, so feel free to use anything you'd like. Follow any prompts and create the policy.
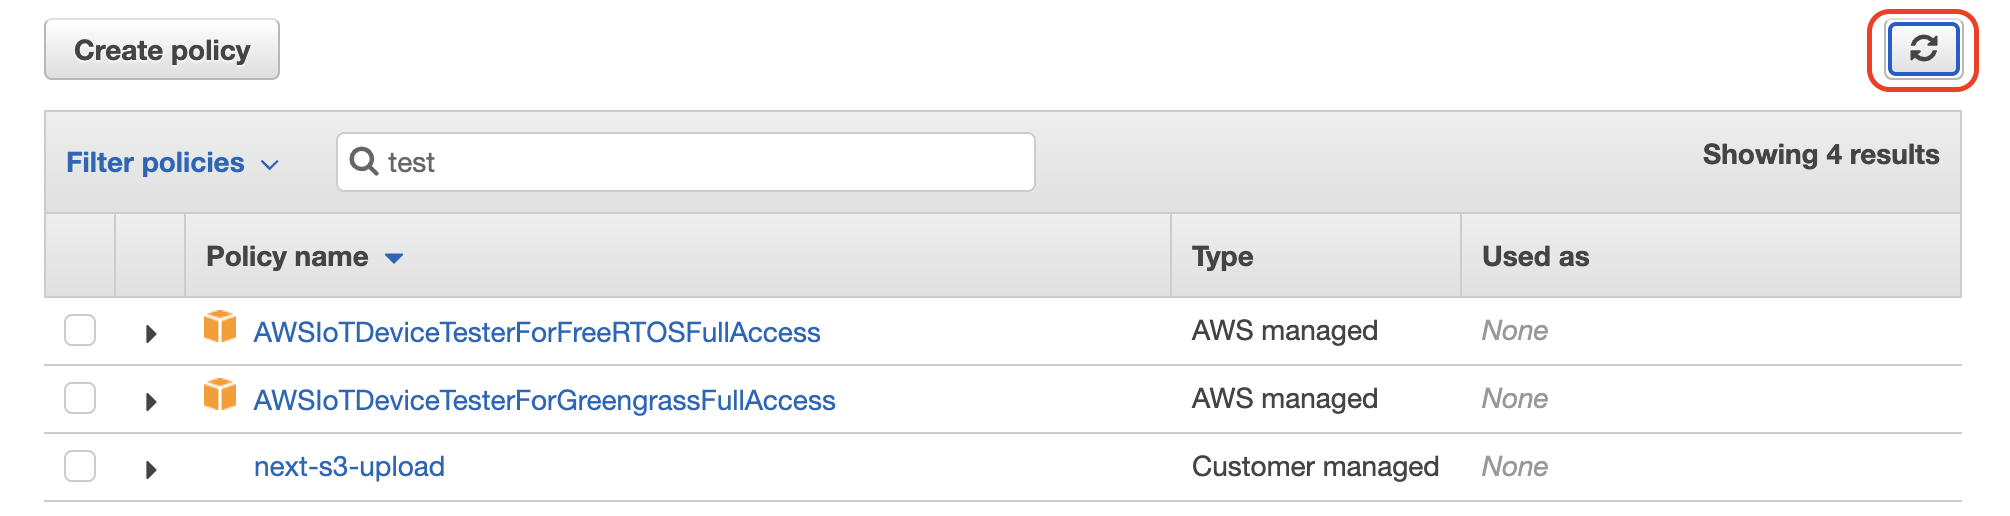
Now go back to the tab where you were adding a user. Search for the policy you created and select it. If the policy doesn't show up click the refresh button.
Select the policy and continue creating the user. You can just click through the next steps, there's no more configuration.
Once the user is created you'll see a screen with their API keys. Copy these keys to .env.local as S3_UPLOAD_KEY and S3_UPLOAD_SECRET.

That's it! We're done configuring AWS for uploads.
API Route
In order for our Next app to securely communicate with S3 we'll need to create an API route for pages/api/s3-upload.js.
// pages/api/s3-upload.js
export { APIRoute as default } from 'next-s3-upload';
That's it. This module's APIRoute takes care of all the communication with S3.
Usage
This package provides a useS3Upload hook that gives you all of the pieces needed to coordinate an upload from your application to S3.
Here's an example of the simplest file upload component.
import { useState } from 'react';
import { useS3Upload } from 'next-s3-upload';

export default function UploadTest() {
  let [imageUrl, setImageUrl] = useState();
  let { FileInput, openFileDialog, uploadToS3 } = useS3Upload();

  let handleFileChange = async file => {
    let { url } = await uploadToS3(file);
    setImageUrl(url);
  };

  return (
    <div>
      <FileInput onChange={handleFileChange} />

      <button onClick={openFileDialog}>Upload file</button>

      {imageUrl && <img src={imageUrl} />}
    </div>
  );
}
The useS3Upload hook returns three items needed to coordinate the upload.
| | |
| ------------------ | -------------------------------------------------------------------------------------------------------------------------------- |
| FileInput | A component that renders a hidden file input. It needs to be rendered on the page in order to coordinate file access. |
| openFileDialog | A function that opens the browser's select a file dialog. Once a file is selected the FileInput's onChange action will fire. |
| uploadToS3(file) | A function that will upload a File to your S3 bucket. |
Using next/image
Before we can use next/image, we'll need to configure our app to allow images sourced from our S3 bucket. We can do this by editing our next.config.js.
// next.config.js

module.exports = {
  images: {
    domains: [
      `${process.env.S3_UPLOAD_BUCKET}.s3.amazonaws.com`,
      `${process.env.S3_UPLOAD_BUCKET}.s3.${process.env.S3_UPLOAD_REGION}.amazonaws.com`,
    ],
  },
};
Next, we'll need to find the height and width of uploaded images. It's best to capture these dimensions during the upload process.
This package ships with a getImageData helper that gives you the height and width of an image file. Here's an example of its usage.
import { useState } from 'react';
import { useS3Upload, getImageData } from 'next-s3-upload';
import Image from 'next/image';

export default function UploadTest() {
  let [imageUrl, setImageUrl] = useState();
  let [height, setHeight] = useState();
  let [width, setWidth] = useState();
  let { FileInput, openFileDialog, uploadToS3 } = useS3Upload();

  let handleFileChange = async file => {
    let { url } = await uploadToS3(file);
    let { height, width } = await getImageData(file);
    setWidth(width);
    setHeight(height);
    setImageUrl(url);
  };

  return (
    <div>
      <FileInput onChange={handleFileChange} />

      <button onClick={openFileDialog}>Upload file</button>

      {imageUrl && (
        <div>
          <Image src={imageUrl} width={width} height={height} />
          <div>{imageUrl}</div>
          <div>
            {height}x{width}
          </div>
        </div>
      )}
    </div>
  );
}
These height and width values can be saved to your database alongside the URL of the image.
Configuring uploads
By default this addon will give every upload a unique key in your S3 bucket. If you would like to customize the key you can do so by configuring the APIRoute.
// pages/api/s3-upload.js
import { APIRoute } from 'next-s3-upload';

export default APIRoute.configure({
  key(req, filename) {
    return `my/uploads/path/${filename.toUpperCase()}`;
  },
});
The signature for the key function is: (req: NextApiRequest, filename: string) => string | Promise<string>
Multiple uploads
To support multiple file uploads in your project, you can wire up your own <input type="file"> and then you can loop over all the selected files and call uploadToS3 on each of them.
import { useState } from 'react';
import { useS3Upload } from 'next-s3-upload';

export default function UploadImages() {
  const [isUploadComplete, setIsUploadComplete] = useState(false);
  const { uploadToS3 } = useS3Upload();

  const handleFilesChange = async ({ target }) => {
    const urls = [];
    const files = Array.from(target.files);

    for (let index = 0; index < files.length; index++) {
      const file = files[index];
      const { url } = await uploadToS3(file);
      urls.push(url);
    }
    setIsUploadComplete(true);
    // You can do whatever you want to do with your uploaded files {urls}
  };

  return (
    <div>
      <input type="file" name="file" multiple onChange={handleFilesChange} />
      <br />
      {isUploadComplete && 'Done Uploading files to S3'}
    </div>
  );
}
Help and questions
This is a new project and I'd love to hear about your experience using it! If you run into any trouble or have any suggestions please open an issue or contact me on Twitter.