
rainbow-print
v1.0.1
Published
🌈 ranbow console.log
Maintainers
 licheung228
Readme
this doc tanslate by chatgpt
Rainbow🌈Print
🌈 Enhanced console.log⌨️
Features
rainbowPrint consists of two components: the Printer and the Styler.
Both components are encapsulated within rainbowPrint.
Overview
Printer
rainbowPrint.log is the enhanced version of console.log.
Styler
rainbowPrint[styleName] is used for style declarations. rainbowPrint comes with several built-in styles. You can also extend it using rainbowPrint.addStyle or rainbowPrint.addStyles.
console.color
You can globally register console.color in the entry file of your project for easier use. rainbow-print also provides excellent TypeScript type declaration support. More details.
Usage
Basic Usage
import rainbowPrint from 'rainbow-print'

rainbowPrint.log(rainbowPrint.green('green here >>>'), 'some thing here')
Effect:

Destructuring
You can also destructure the functions:
import rainbowPrint from 'rainbow-print'

const { red, log } = rainbowPrint
log(red('red here >>>'), 'some thing here')
Effect:

Custom Styles
If you want to create custom styles, you can use addStyles or addStyle to achieve this.
When you add new styles from any instance, they will inherit the previous styles.
import rainbowPrint from 'rainbow-print'
// Custom Style
const myRainbowPrint = rainbowPrint.addStyle('skyblue', {
color: '#fff',
'background-color': 'skyblue',
'font-size': '20px',
'font-weight': 'bold',
'border-radius': '10px',
padding: '10px',
margin: '10px',
})
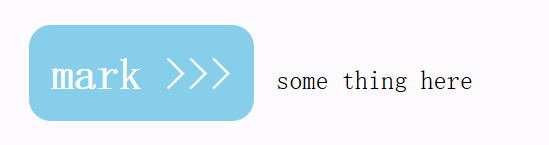
log(myRainbowPrint.skyblue('mark >>>'), 'some thing here')Effect:
Nesting
Nesting of stylers is allowed. For example:
import rainbowPrint from 'rainbow-print'

console.color = rainbowPrint.log

const rainbowPrint3 = rainbowPrint.addStyles({
  bold: {
    'font-weight': 'bold',
  },
  bgPink: {
    'background-color': 'pink',
  },
})
const { bold, bgPink, green } = rainbowPrint3
console.color(bold(green('here is bold green')))
console.color(bgPink(bold(green('here is bg-pink color-green font-bold'))))
Effect:

TypeScript Types
rainbowPrint is written in TypeScript and offers good code suggestions. The styles you add will also be suggested.
When you add new styles from any instance, they will inherit the previous styles.
import rainbowPrint from 'rainbow-print'
// Custom Style
const myRainbowPrint = rainbowPrint.addStyle('skyblue', {
color: '#fff',
'background-color': 'skyblue',
'font-size': '20px',
'font-weight': 'bold',
'border-radius': '10px',
padding: '10px',
margin: '10px',
})
log(myRainbowPrint.skyblue('mark >>>'), 'some thing here')
// Custom Multiple Styles
const myRainbowPrint2 = myRainbowPrint.addStyles({
orange: {
color: 'orange',
},
blue: {
color: 'blue',
},
})
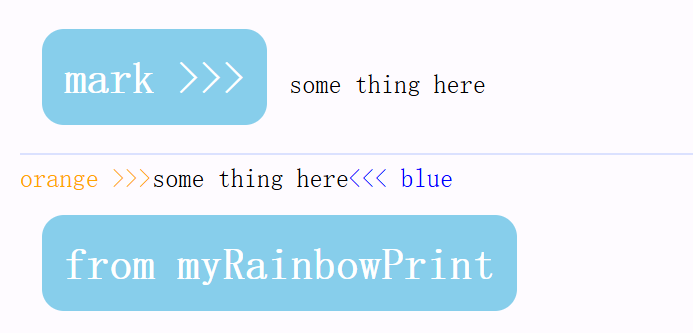
log(
myRainbowPrint2.orange('orange >>>'),
'some thing here',
myRainbowPrint2.blue('<<< blue'),
myRainbowPrint2.skyblue('from myRainbowPrint'), // Will inherit the previous style
)Effect:
console.color
You can globally register console.color in the entry file of your project for easier use. rainbow-print also provides excellent TypeScript type declaration support.
import rainbowPrint from 'rainbow-print'

console.color = rainbowPrint.log
Type Declaration
You need to create a type declaration file (ensure it’s included in your tsconfig). In the declaration file, import rainbow-print/color as follows:
global.d.ts
/// <reference types="rainbow-print/color" />