
react-find-component
v1.0.0
Published
[English](./README.md) | 简体中文

Maintainers
 mxsyx
mxsyxReadme
React-find
English | 简体中文
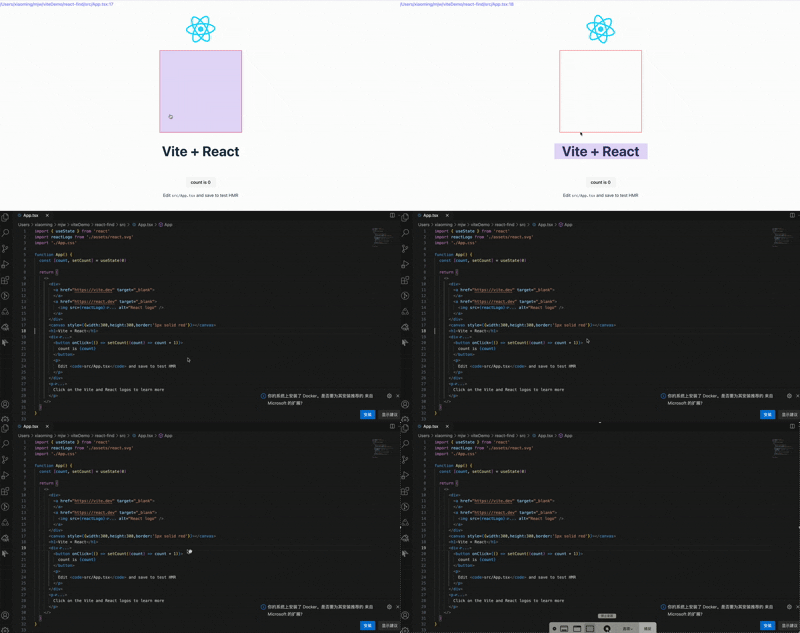
React-find 可以帮助您快速定位文件
演示
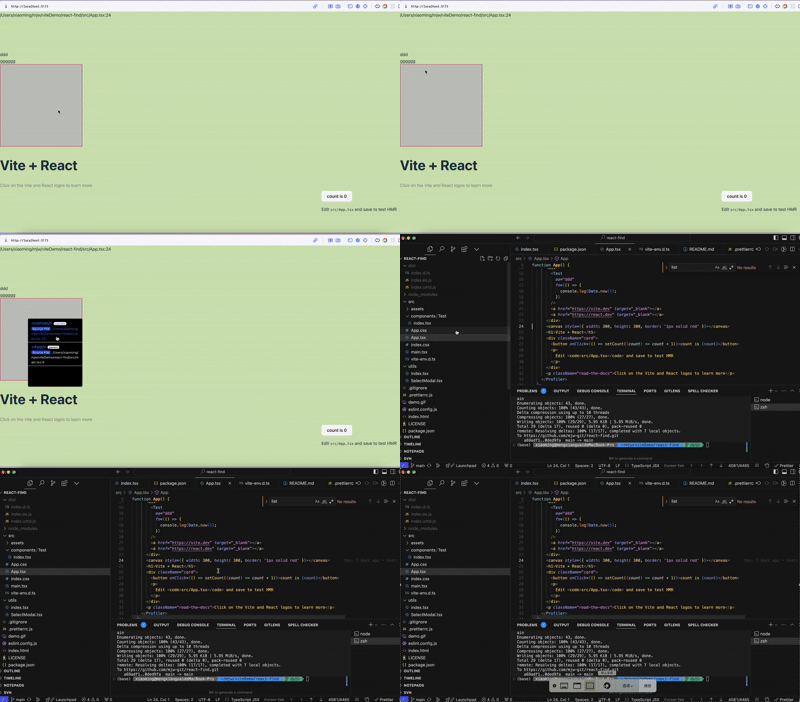
当然,您也可以使用右键菜单来查找当前节点及其父节点
安装
pnpm install react-find开始使用
如果您使用 React 19.x 或更高版本,您应该使用插件
在 Vite 中:
//vite.config.ts
import { defineConfig } from 'vite';
import react from '@vitejs/plugin-react';
// 添加类型声明以解决模块声明文件缺失问题
import { vitePluginReactSource } from 'react-find/vite';
// https://vite.dev/config/
export default defineConfig({
  define: {
    'process.env': process.env,
  },
  plugins: [vitePluginReactSource(), react()],
});
在 Webpack 中:
 {
        test: /\.(ts|tsx|js|jsx)$/,
        exclude: /node_modules/,
        use: [
          {
            loader: 'babel-loader',
            options: {
              presets: [
                '@babel/preset-env',
                '@babel/preset-react',
                '@babel/preset-typescript'
              ]
            }
          },{
            loader: require.resolve('react-find/webpack/webpack-react-source-loader')
          }
        ]
      },
在您的文件中添加脚本,如 pages/app.tsx:
import { init } from 'react-find/next';

init();
如果您使用的是 React 18.x,你不需要使用插件,但你需要引入react-find/next
import { init } from 'react-find/next';

init();
如果您使用 React 17.x 或更低版本,您无需使用插件,直接导入即可
import init from 'react-find';

init();
在 Next.js 中,使用 webpack-react-source-loader
/** @type {import('next').NextConfig} */
const nextConfig = {
  webpack: config => {
    config.module.rules.push({
      test: /\.(ts|tsx|js|jsx)$/,
      exclude: /node_modules/,
      use: [
        {
          loader: 'react-find/webpack/webpack-react-source-loader',
        },
      ],
    });

    return config;
  },
};

export default nextConfig;
Next.js + Turbopack
Next.js 15.3+(包括默认使用 Turbopack 的 Next.js 16)可使用专用入口:
import type { NextConfig } from 'next';

const nextConfig: NextConfig = {
  turbopack: {
    rules: {
      '*.tsx': {
        condition: {
          all: ['development', { not: 'foreign' }],
        },
        loaders: ['react-find/turbopack'],
      },
      '*.jsx': {
        condition: {
          all: ['development', { not: 'foreign' }],
        },
        loaders: ['react-find/turbopack'],
      },
    },
  },
};

export default nextConfig;
Next.js 13.0–15.2 使用旧配置名
experimental.turbo;这些版本不支持上面的高级condition时,可删除condition,loader 自身仍会排除node_modules和.next。
如果通过 link: 引用的 react-find 位于 Next.js monorepo 目录之外,还需要将 turbopack.root 设置为应用与 link 目标的共同父目录:
import { resolve } from 'node:path';

const nextConfig: NextConfig = {
  turbopack: {
    root: resolve(import.meta.dirname, '../../..'),
    // rules...
  },
};
您应该创建一个客户端组件来初始化它
"use client"

import { PropsWithChildren, useEffect } from "react"
import {init} from 'react-find/next'
const Profile=(props:PropsWithChildren)=>{
    useEffect(() => init({ editor: 'vscode' }), [])
    return <div>{props.children}</div>

}
export default Profile
然后在您的布局组件中使用它
export default function RootLayout({
  children,
}: Readonly<{
  children: React.ReactNode;
}>) {

  return (
    <html lang="en">
      <body
      >
        <Profile>
            {children}
        </Profile>

      </body>
    </html>
  );
}
然后按下 command(Mac)或 ctrl(Windows)并移动鼠标来尝试,点击块将带您到 IDE
您也可以右键单击来查找当前节点和父节点,这可以找到源文件。
配置快捷键
支持 alt、command、ctrl、shift,也支持组合键:
init({ shortcut: 'alt' });
init({ shortcut: 'command' });
init({ shortcut: 'ctrl' });
init({ shortcut: 'shift' });
init({ shortcut: ['command', 'shift'] });
数组中的按键需要同时按下。默认在 macOS 使用 command,其他系统使用 ctrl。
配置 IDE
VS Code 是默认 IDE,也可显式配置 VS Code 或 Trae:
init({ editor: 'vscode' });
init({ editor: 'trae' });    // Trae 国际版
init({ editor: 'trae-cn' }); // Trae 中国版
也可在 localStorage 中设置 react_find_editor 为 vscode、trae 或 trae-cn。旧的 protocol / react_find_protocol 配置仍然兼容,并可用于其他支持 VS Code 风格文件 URI 的编辑器:
init({ protocol: 'cursor' });支持 Remote SSH
如果您使用的是 Remote SSH,您可以使用以下配置
init({ editor: 'vscode', remoteServerName: 'your-server-name' });提示
- 它只在 process.env.NODE_ENV === 'development' 时工作
选项
| 名称 | 描述 | 类型 | 默认值 |
| ---------------- | ---------------------------------------------------------------------------------------------------- | -------- | -------------------- |
| editor | IDE | 'vscode' \| 'trae' \| 'trae-cn' | 'vscode' |
| protocol | 自定义 IDE URI 协议;设置后优先于 editor | string | - |
| shortcut | 激活快捷键;数组表示组合键 | ShortcutKey \| ShortcutKey[] | 'command'/'ctrl' |
| keyCode | 旧版快捷键配置,保留兼容 | string[] | - |
| remoteServerName | Remote server name | string | - |