
react-native-nmap
v0.0.66
Published
react-native bridge for naver map
Downloads
568

Readme
react-native-naver-map 
네이버맵의 리액트 네이티브 브릿지입니다.
설치
npm install react-native-nmap --save;- React Native 0.60+
$ cd ios/ && pod install- React Native <= 0.59
$ react-native link react-native-nmap
$ cd ios/ && pod install
ios의 경우
git-lfs설치가 필요합니다. 참고
안드로이드 추가 설정
네이버 맵 안드로이드 SDK 문서를 따라 API키와 레포지터리 경로를 추가합니다
/android/build.gradle 파일에 아래와 같이 레포지터리를 추가합니다
⚠️ Bintray 지원 중단에 의해 jfrog로 수정되었습니다
allprojects {
    repositories {
        google()
        jcenter()
        // 네이버 지도 저장소
        maven {
            url 'https://naver.jfrog.io/artifactory/maven/'
        }
    }
}/android/app/src/AndroidManifest.xml에 아래와 같이 추가하고 발급받은 클라이언트 아이디로 바꿔줍니다.
<manifest>
    <application>
        <meta-data
            android:name="com.naver.maps.map.CLIENT_ID"
            android:value="YOUR_CLIENT_ID_HERE" />
    </application>
</manifest>
IOS 추가 설정
네이버 맵 IOS SDK 문서를 따라 API키와 레포지터리 경로를 추가합니다.
info.plist에 아래와 같이 발급받은 클라이언트 아이디를 추가해줍니다.

<?xml version="1.0" encoding="UTF-8"?>
<!DOCTYPE plist PUBLIC "-//Apple//DTD PLIST 1.0//EN" "http://www.apple.com/DTDs/PropertyList-1.0.dtd">
<plist version="1.0">
<dict>
...
    <key>NMFClientId</key>
    <string>YOUR_CLIENT_ID_HERE</string>
...
<dict>
<plist>
예제
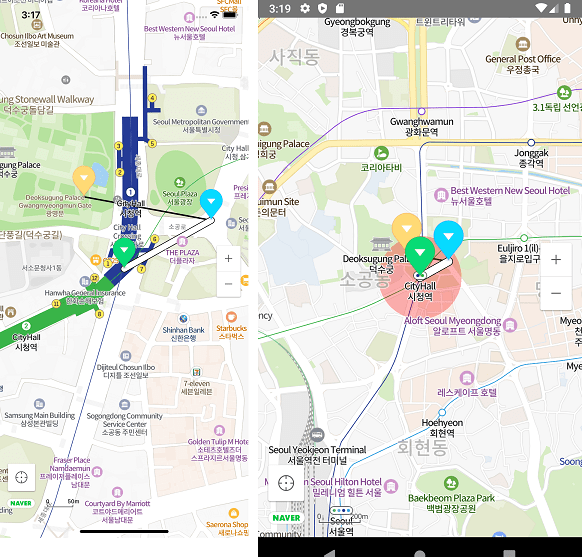
import NaverMapView, {Circle, Marker, Path, Polyline, Polygon} from "react-native-nmap";

function MyMap() {
    const P0 = {latitude: 37.564362, longitude: 126.977011};
    const P1 = {latitude: 37.565051, longitude: 126.978567};
    const P2 = {latitude: 37.565383, longitude: 126.976292};

    return <NaverMapView style={{width: '100%', height: '100%'}}
                         showsMyLocationButton={true}
                         center={{...P0, zoom: 16}}
                         onTouch={e => console.warn('onTouch', JSON.stringify(e.nativeEvent))}
                         onCameraChange={e => console.warn('onCameraChange', JSON.stringify(e))}
                         onMapClick={e => console.warn('onMapClick', JSON.stringify(e))}>
        <Marker coordinate={P0} onClick={() => console.warn('onClick! p0')}/>
        <Marker coordinate={P1} pinColor="blue" onClick={() => console.warn('onClick! p1')}/>
        <Marker coordinate={P2} pinColor="red" onClick={() => console.warn('onClick! p2')}/>
        <Path coordinates={[P0, P1]} onClick={() => console.warn('onClick! path')} width={10}/>
        <Polyline coordinates={[P1, P2]} onClick={() => console.warn('onClick! polyline')}/>
        <Circle coordinate={P0} color={"rgba(255,0,0,0.3)"} radius={200} onClick={() => console.warn('onClick! circle')}/>
        <Polygon coordinates={[P0, P1, P2]} color={`rgba(0, 0, 0, 0.5)`} onClick={() => console.warn('onClick! polygon')}/>
    </NaverMapView>
}
컴포넌트
타입스크립트 타입 정의가 포함되어 있어 타입스크립트 사용을 추천합니다.
기본 타입
export interface Coord {
    latitude: number;
    longitude: number;
}
export interface Region extends Coord {
    latitudeDelta: number;
    longitudeDelta: number;
}
export interface Rect {
    left?: number;
    top?: number;
    right?: number;
    bottom?: number;
}
NaverMapView
interface NaverMapViewProps {
    center?: Coord & {
        zoom?: number;
        tilt?: number;
        bearing?: number;
    };
    tilt?: number;
    bearing?: number;
    mapPadding?: Rect;
    logoMargin?: Rect;
    logoGravity?: Gravity;
    onInitialized?: Function;
    onCameraChange?: (event: {
        latitude: number;
        longitude: number;
        zoom: number;
    }) => void;
    onMapClick?: (event: {
        x: number;
        y: number;
        latitude: number;
        longitude: number;
    }) => void;
    onTouch?: () => void;
    showsMyLocationButton?: boolean;
    compass?: boolean;
    scaleBar?: boolean;
    zoomControl?: boolean;
    mapType?: MapType;
    minZoomLevel?: number;
    maxZoomLevel?: number;
    buildingHeight?: number;
    nightMode?: boolean;
    scrollGesturesEnabled?: boolean;
    zoomGesturesEnabled?: boolean;
    tiltGesturesEnabled?: boolean;
    rotateGesturesEnabled?: boolean;
    stopGesturesEnabled?: boolean;
    useTextureView?: boolean; // android only
}
/// component method
animateToCoordinate: (coord: Coord) => void;
animateToTwoCoordinates: (c1: Coord, c2: Coord) => void;
animateToCoordinates: (coords: Coord[], bounds?: {
    top: number;
    bottom: number;
    left: number;
    right: number;
}) => void;
animateToRegion: (region: Region) => void;
setLocationTrackingMode: (mode: number) => void;
setLayerGroupEnabled: (group: LayerGroup, enabled: boolean) => void;
showsMyLocationButton: (show: boolean) => void;
handleOnCameraChange: (event: React.SyntheticEvent<{}, {
    latitude: number;
    longitude: number;
    zoom: number;
}>) => void;
handleOnMapClick: (event: React.SyntheticEvent<{}, {
    x: number;
    y: number;
    latitude: number;
    longitude: number;
}>) => void;
Marker
interface MarkerProps {
    coordinate: Coord
    anchor?: { x: number, y: number }
    pinColor?: string
    alpha?: number
    rotation?: number
    flat?: boolean
    image?: ImageSourcePropType
    onClick?: () => void
    width?: number
    height?: number
    angle?: number
    hidden?: boolean
    zIndex?: number
    iconPerspectiveEnabled?: boolean
    isHideCollidedSymbols?: boolean
    isHideCollidedMarkers?: boolean
    isHideCollidedCaptions?: boolean;
    isForceShowIcon?: boolean;
    caption?: {
        text?: string;
        align?: Align;
        textSize?: number;
        color?: string;
        haloColor?: string;
        offset?: number;
        requestedWidth?: number;
        minZoom?: number;
        maxZoom?: number;
    };
    subCaption?: {
        text?: string;
        textSize?: number;
        color?: number;
        haloColor?: number;
        requestedWidth?: number;
        minZoom?: number;
        maxZoom?: number;
    };
}
안드로이드 플랫폼에서 마커내 커스텀 뷰를 지원합니다.
0.0.57<Marker coordinate={P5} width={96} height={96}> <View style={{backgroundColor: 'rgba(255,0,0,0.2)', borderRadius: 80}}> <View style={{backgroundColor: 'rgba(0,0,255,0.3)', borderWidth: 2, borderColor: 'black', flexDirection: 'row'}}> <Image source={require("./marker.png")} style={{ width: 32, height: 32, backgroundColor: 'rgba(0,0,0,0.2)', resizeMode: 'stretch', borderWidth: 2, borderColor: 'black'}} fadeDuration={0}/> <Text>Image</Text> </View> <ImageBackground source={require("./marker.png")} style={{width: 64, height: 64}}> <Text>image background</Text> </ImageBackground> </View> </Marker>
Polyline
interface PolylineProps {
    coordinates: Coord[]
    strokeWidth?: number
    strokeColor?: string
    onClick?: () => void
}
Path
interface PathProps {
    coordinates: Coord[]
    width?: number
    color?: string
    outlineWidth?: number
    passedColor?: string
    outlineColor?: string
    passedOutlineColor?: string
    pattern?: ImageSourcePropType
    patternInterval?: number
    onClick?: () => void
}
Circle
export interface CircleProps {
    coordinate: Coord[]
    radius?: number;
    color?: string;
    outlineWidth?: number;
    outlineColor?: string;
    zIndex?: number;
    onClick?: () => void
}
Polygon
export interface PolygonProps {
    coordinate: Coord[]
    outlineWidth?: number;
    outlineColor?: string
    color?: string;
    holes?: Coord[][];
    onClick?: () => void
}
LayerGroup
export declare enum LayerGroup {
    LAYER_GROUP_BUILDING = "building",
    LAYER_GROUP_TRANSIT = "transit",
    LAYER_GROUP_BICYCLE = "bike",
    LAYER_GROUP_TRAFFIC = "ctt",
    LAYER_GROUP_CADASTRAL = "landparcel",
    LAYER_GROUP_MOUNTAIN = "mountain"
}