
reactjs-onboarding
v2.1.0
Published
A node module that will help user create a tour of an application. Note: reactjs-onboarding is in development mode.


Readme
reactjs-onboarding
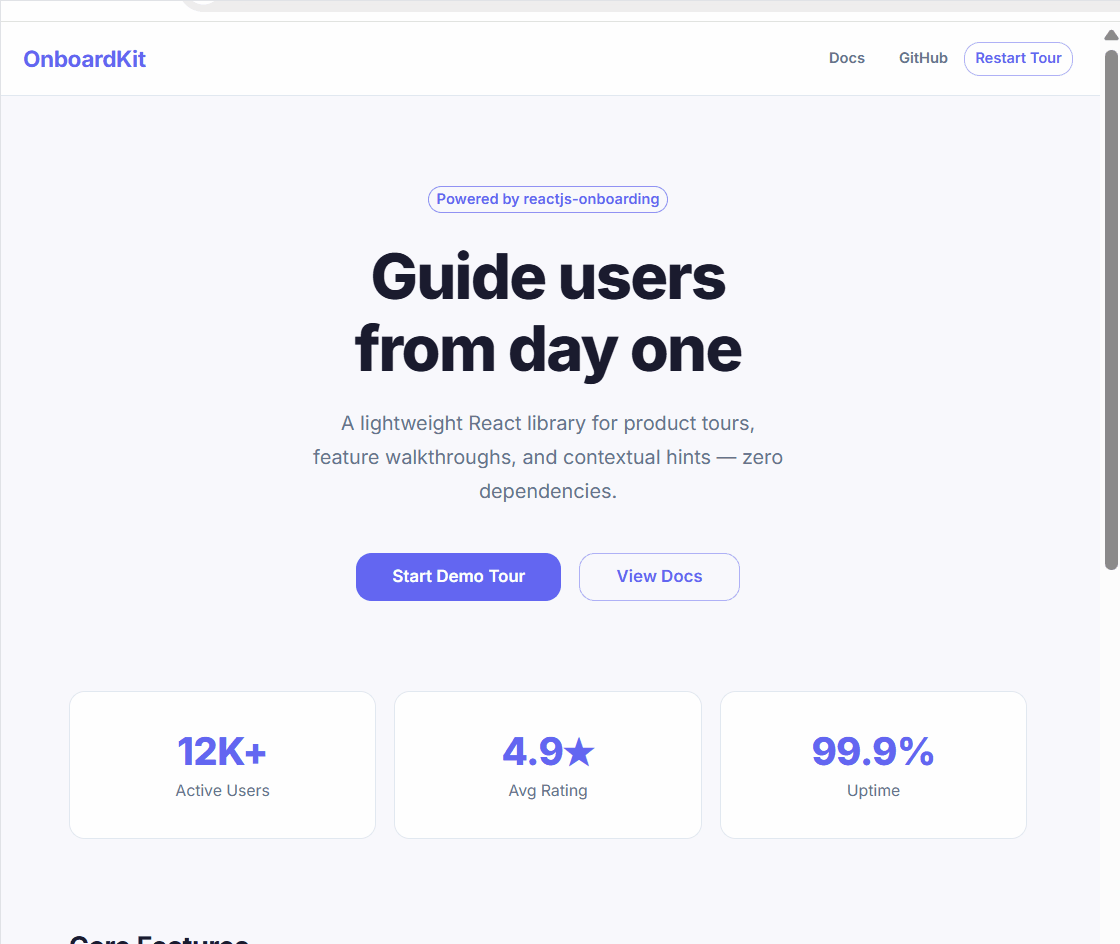
A lightweight, zero-dependency product tour library for React.

![]()
Features
- Auto-starts on first visit — no manual state management needed
- Persists completion in
localStorageper tour name - Scrolls off-screen elements into view automatically
- Smart tooltip placement (bottom → top → right → left)
- Keyboard navigation:
→/Enternext,←back,Escclose - Three targeting modes: element ID, DOM ref, or manual coordinates
- No external dependencies
Installation
npm install reactjs-onboardingUsage
1. Target by element ID
The simplest approach — add an id to any element and reference it by string.
import { Onboarding, OnboardingItem } from 'reactjs-onboarding';

function App() {
  return (
    <>
      <nav id="navbar">My App</nav>
      <main id="dashboard">Dashboard content</main>

      <Onboarding name="main-tour">
        <OnboardingItem elementID="navbar" message="This is the navigation bar." />
        <OnboardingItem elementID="dashboard" message="Here is your dashboard overview." />
      </Onboarding>
    </>
  );
}
2. Target by DOM ref
Pass a ref directly instead of a string ID.
import { useRef } from 'react';
import { Onboarding, OnboardingItem } from 'reactjs-onboarding';

function App() {
  const btnRef = useRef(null);

  return (
    <>
      <button ref={btnRef}>Settings</button>

      <Onboarding name="settings-tour">
        <OnboardingItem elementID={btnRef.current} message="Click here to open settings." />
      </Onboarding>
    </>
  );
}
3. Target by coordinates
Provide a manual bounding box { l, t, w, h } (left, top, width, height in px).
<Onboarding name="coord-tour">
  <OnboardingItem
    elementCoOrdinate={{ l: 100, t: 200, w: 150, h: 50 }}
    message="This area is important."
  />
</Onboarding>
4. Wrap with OnboardingTag
Wrap any element — no ID needed.
import { Onboarding, OnboardingTag } from 'reactjs-onboarding';

function App() {
  return (
    <Onboarding name="tag-tour">
      <OnboardingTag message="More options are here.">
        <button>⋮</button>
      </OnboardingTag>
    </Onboarding>
  );
}
Restarting a Tour
The tour auto-starts once and marks itself complete in localStorage. To replay it programmatically (e.g. a "Restart Tour" button):
import { Onboarding } from 'reactjs-onboarding';

<button onClick={() => Onboarding.reset()}>Restart Tour</button>
Props
<Onboarding>
| Prop | Type | Required | Description |
|------|------|----------|-------------|
| name | string | Yes | Unique tour identifier. Used as the localStorage key to track completion. |
<OnboardingItem>
| Prop | Type | Default | Description |
|------|------|---------|-------------|
| elementID | string \| HTMLElement | — | Target element by ID string or DOM reference. |
| elementCoOrdinate | { l, t, w, h } | — | Manual bounding box in pixels. Use when you can't add an ID. |
| message | string | — | Text shown in the tooltip for this step. |
| disableArrow | boolean | false | Hides the spotlight border around the target element. |
Provide either
elementIDorelementCoOrdinateper step, not both.
<OnboardingTag>
| Prop | Type | Description |
|------|------|-------------|
| message | string | Tooltip text for this step. |
| children | ReactNode | The element to wrap and highlight. |
Example App
A full working demo using React 19 and MUI 7 is in the example/ folder.
# Build the library first
npm run build

# Then run the example
cd example
npm install
npm run dev
Contributing
Pull requests are welcome. For major changes, please open an issue first to discuss what you would like to change.
License
MIT © HyperDart