
revolt-fx
v1.3.6
Published
Particle and Effect System for Pixi.js
Maintainers
 bma
bmaReadme
![]()
RevoltFX
Compatible with PixiJS 7.3.x and 8.x
Particle and effect system for PixiJS Create particle emitters and time based effect sequences. Emitters and sequences can be nested and spawned on different particle events.
Check out the examples
https://samples.revoltfx.electronauts.net
Github https://github.com/bma73/revolt-fx-examples
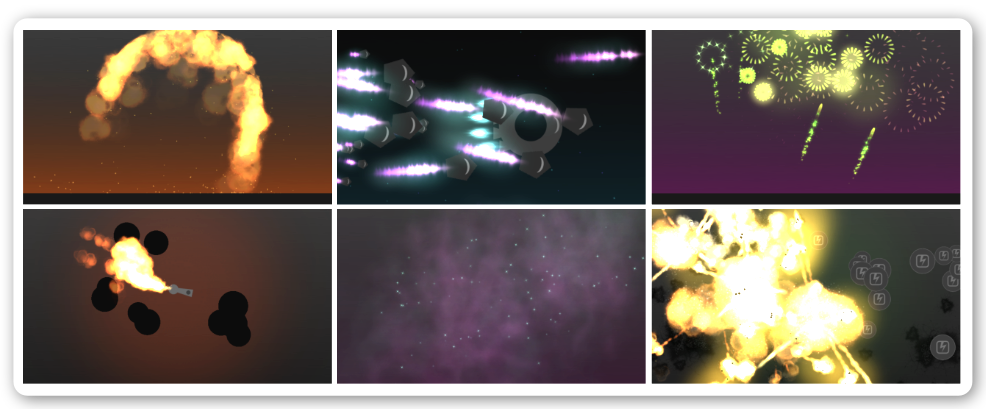
The system has already been stress tested in games like Battleboats.io and Jumbled.io
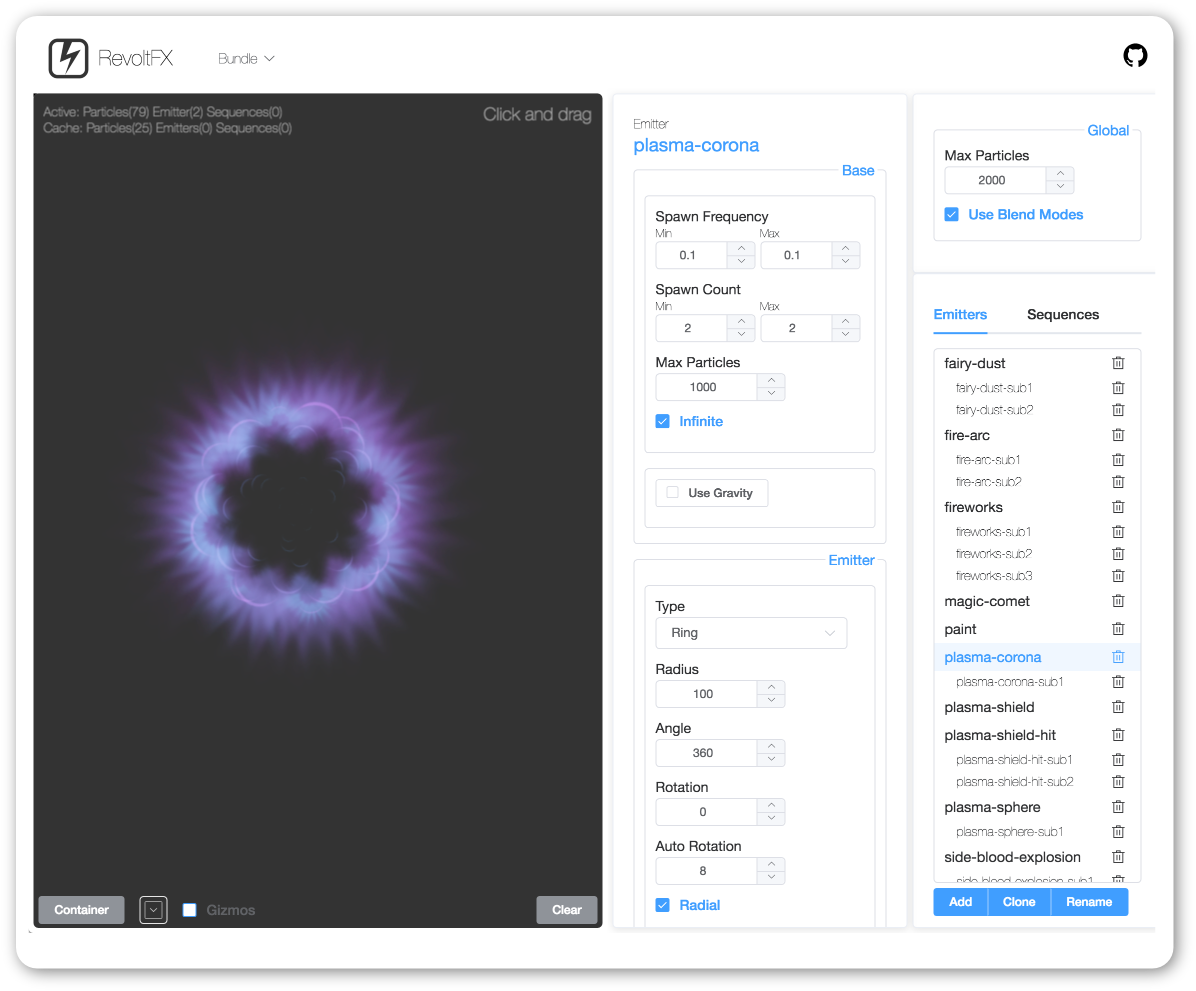
Editor
To easily create your own effects use the extensive RevoltFX online editor
https://editor.revoltfx.electronauts.net
Fork the editor on Github
https://github.com/bma73/revolt-fx-editor
Install
Via NPM
npm install revolt-fx --legacy-peer-depsimport {FX} from 'revolt-fx'
const fx = new FX()or via script tag
// Pixi 7.3.x
<script src="https://unpkg.com/[email protected]/dist/pixi.min.js"></script>
<script src="https://unpkg.com/revolt-fx/dist/revoltfx.min.js"></script>
// Pixi 8.x
<script src="https://unpkg.com/pixi.js/dist/pixi.min.js"></script>
<script src="https://unpkg.com/revolt-fx/dist/revoltfx.min.js"></script>const fx = new revolt.FX()Usage
Loading and initializing
There are different ways to load the needed assets:
Using PIXI Loader (Example)
//Create a RevoltFX instance
const fx = new revolt.FX(); //loaded via the script tag

//Load the assets using PIXI Assets loader
PIXI.Assets.add({ alias: 'fx_settings', src: 'assets/default-bundle.json' });
PIXI.Assets.add({ alias: 'fx_spritesheet', src: 'assets/revoltfx-spritesheet.json' });
PIXI.Assets.add({ alias: 'example_spritesheet', src: 'assets/rfx-examples.json' });

PIXI.Assets.load(['fx_settings', 'fx_spritesheet', 'example_spritesheet']).then(function (data) {
    //Init the bundle
    fx.initBundle(data.fx_settings);

    app.ticker.add(function () {
        //Update the RevoltFX instance
        fx.update();
    });

});
Using FX.loadBundleFiles (Example)
//Create a RevoltFX instance
    const fx = new revolt.FX(); //loaded via the script tag

    const rfxBundleSettings = 'assets/default-bundle.json';
    const rfxSpritesheet = 'assets/revoltfx-spritesheet.json';
    const additionalAssets = ['assets/rfx-examples.json'];

    //Load bundle files and the additional example spritesheet
    fx.loadBundleFiles(rfxBundleSettings, rfxSpritesheet, null, additionalAssets).then(function (data) {

        app.ticker.add(function () {
            //Update the RevoltFX instance
            fx.update();
        });

    }).catch(function (err) {
        console.log('Error', err);
    });
Particle Emitters
After the system is initialized you can create particle emitters defined in your bundle by using their names:
//Get the emitter
const emitter = fx.getParticleEmitter('plasma-corona');

//Inititialize it with the target PIXI container
emitter.init(displayContainer);
You can also change the global scale of an emitter instance
//Get the emitter
const emitter = fx.getParticleEmitter('plasma-corona');

//Inititialize it with the target PIXI container and a scale of 2
emitter.init(displayContainer, true, 2);
Pause an emitter
emitter.paused = true;Stop an emitter to be recycled. Pass true (default) to the method, if the system shall wait until all particles have died, before recycling.
emitter.stop();Set the x/y position and rotation
emitter.x = 100;
emitter.y = 100;
emitter.rotation = Math.PI;
Set a target, so that the emitter will automatically adopt the target's position and rotation
emitter.target = displayObject;Set a target offset, so that the emitter will automatically offset its position
emitter.targetOffet = 50;Effect Sequences
After the system is initialized you can create effect sequences defined in your bundle by using their names:
//Get the effect sequence
const sequence = fx.getEffectSequence('top-big-explosion');

//Inititialize it with the target PIXI container
sequence.init(displayContainer);
Set delay, autostart and scale
//Get the effect sequence
const sequence = fx.getEffectSequence('top-big-explosion');

const delay = 0.5;
const autostart = true;
const scale = 1.5;
sequence.init(displayContainer, delay, autostart, scale);
Set the x/y position and rotation
sequence.init = 100;
sequence.init = 100;
sequence.init = Math.PI;
Events
ParticleEmitters, Particles and EffectSequences dispatch signals on different events
ParticleEmitter
emitter.on.started.add(emitter => { });
emitter.on.exhausted.add(emitter => { });
emitter.on.completed.add(emitter => { });
emitter.on.particleUpdated.add(particle => { });
emitter.on.particleSpawned.add(particle => { });
emitter.on.particleBounced.add(particle => { });
emitter.on.particleDied.add(particle => { });
Usage (Example)
emitter.on.particleSpawned.add(particle => {
    console.log('Particle spawned:', particle);
});

emitter.on.completed.addOnce(function(emitter) {
    console.log('Done');
});
Particle
particle.on.bounced(particle => { });
particle.on.updated(particle => { });
particle.on.died(particle => { });
Usage
emitter.on.particleSpawned.add(particle => {

    //Register for an update signal for that particle
    particle.on.updated.add(particle => {
        //Do something with the particle
        if (particle.x > 200 && particle.time >= 0.5) {
        	particle.stop();
        }
    });

    //Register for a died signal for that particle
    particle.on.died.add(particle => {
        console.log('Particle', particle, 'died');
    });
});
EffectSequence
sequence.on.started(sequence => { });
sequence.on.exhausted(sequence => { });
sequence.on.completed(sequence => { });
sequence.on.effectSpawned((effectType, effect) => { });
sequence.on.triggerActivated(triggerValue => { });
Usage (Example)
sequence.on.effectSpawned.add((type, effect) => {
	console.log('Effect spawned:', type, effect);
});

sequence.on.triggerActivated.add(triggerValue => {
	console.log('Trigger:', triggerValue);
});
Update
Call the update method every frame with the ticker's delta value (optional)
app.ticker.add(function (delta) {
    //Update the RevoltFX instance
    fx.update(delta);
});
Bundler
It's important that there is only one Pixi instance in your app. Here are some setup instructions for Webpack, Rollup and Parcel:
Webpack
Webpack provides a feature called "aliasing" that you can use to ensure that only one Pixi instance is bundled and used.
Update webpack.config.js: Add an alias for PixiJS in your Webpack configuration file.
const path = require('path');

module.exports = {
  // ... other configurations ...
  resolve: {
    alias: {
      'pixi.js': path.resolve(__dirname, 'node_modules/pixi.js')
    }
  }
};
Rollup
Install Rollup Alias Plugin:
npm install @rollup/plugin-alias --save-devUpdate your rollup.config.js to include the alias configuration.
import alias from '@rollup/plugin-alias';
import path from 'path';

export default {
  // ... other configurations ...
  plugins: [
    // ... other plugins ...
    alias({
      entries: [
        { find: 'pixi.js', replacement: path.resolve(__dirname, 'node_modules/pixi.js') }
      ]
    })
  ]
};
Parcel
Add an alias for PixiJS in your package.json.
{
  // ... other package.json settings ...
  "alias": {
    "pixi.js": "./node_modules/pixi.js"
  }
}
Build
Clone the repository and to compile the Typescript sources and create the distribution version run
npm install
npm run build