
sg-autocomplete
v0.0.4
Published
sg-autocomplete component

Readme
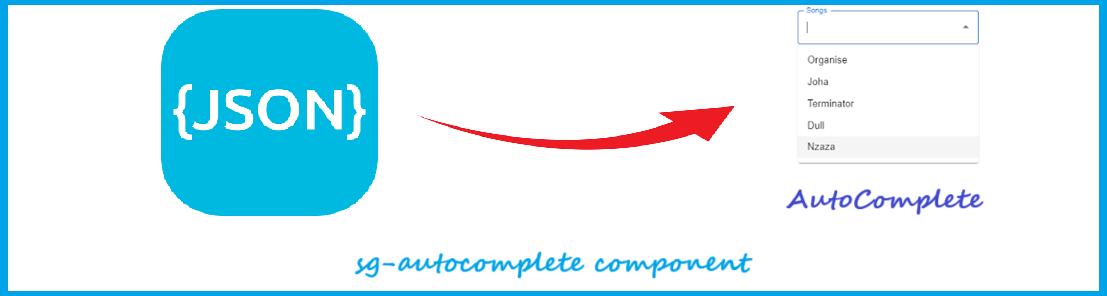
sg-autocomplete Component
sg-autocomplete component is a user interface element that functions like a text input field, but as the user types, it dynamically suggests relevant options from a predefined json list, allowing them to quickly select a matching value instead of typing the full term manually.
You can configure with any elements from the json file.
You can navigate the autocomplete dropdown using mouse or tab key from keyboard.
Getting Started
Use the below command to add your package in your application
npm i sg-autocompleteyou can consume it in your application as shown below:
<sg-autocomplete autotext="JSON-ELEMENT-NAME"></sg-autocomplete>Say for Example if you JSON element is like this
  {
    url: "https://cdn-icons-png.flaticon.com/512/1804/1804486.png",
    title: "URL",
    description:"URL"
  },
  {
    url: "https://i.ibb.co/7XqwsLw/fox.jpg",
    title: "Fox",
    description:"Fox"
 },
If you want to add "description" as the autocomplete suggestion list, you can do so like this
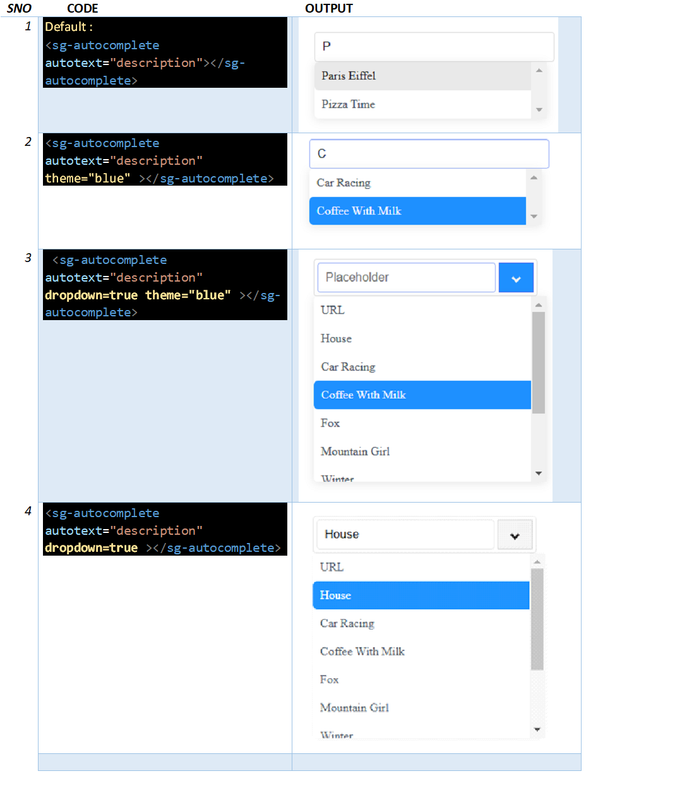
<sg-autocomplete autotext="description"></sg-autocomplete>Options
| Property | Attribute | Type | Description |
| ------------- | ---------------- | --------- | :-----------------------------------------------------------------: |
| autotext | autotext | array list | (Required) It is used to load the suggestion list from Json object. |
| placeholder | placeholder| string | (Optional) It is used to display temporary text in an input field |
| dropdown | dropdown | boolean | (Optional) It is used enable the dropdown button Default: false |
| theme | theme | string | (Optional) It is used to set the color of the dropdown button, There are 2 themes 1) blue and gray Default: Gray |
Examples:
Usage
Now we will see how to integrate this libiary in your applications.
Vanilla JavaScript
- Using a CDN: Add a tag in the of your HTML file, pointing to the component's JavaScript file hosted on a CDN. For example:
<script src="https://cdn.jsdelivr.net/npm/your-component-package/dist/sg-autocomplete/sg-autocomplete.js"></script>Using ES Modules: If you prefer to use ES Modules, you can import the component using an import statement: Code
     import { defineCustomElements } from './dist/sg-autocomplete/loader/index.es2017.mjs';
        defineCustomElements();
  </script>
Make sure to adjust the paths according to your project structure.
Use the component in your HTML:
You can now use the component in your HTML like any other HTML element: Code
<sg-autocomplete id="sg-autocomplete" placeholder="placeholder" autotext="description" dropdown=true ></sg-autocomplete>Interact with the component using JavaScript:
Example of Setting the JSON data
 const autocompleteLst = [
        {url: "https://cdn-icons-png.flaticon.com/512/1804/1804486.png", title: "URL", description:"URL"},
        {url: "https://icons.iconarchive.com/icons/microsoft/fluentui-emoji-flat/256/House-With-Garden-Flat-icon.png", title: "House", description:"House"},
        {url: "https://i.ibb.co/dBCHzXQ/paris.jpg", title: "Paris Eiffel", description:"Paris Eiffel"},
        {url: "https://i.ibb.co/JKB0KPk/pizza.jpg", title: "Pizza Time", description:"Pizza Time"},
        {url: "https://i.ibb.co/VYYPZGk/salmon.jpg", title: "Salmon ", description:"Salmon"},
      ];
      document.querySelector('sg-autocomplete').suggestionlist = autocompleteLst
You can access and manipulate the component using standard DOM APIs:
const input = document.querySelector('#sg-autocomplete');Handle events:
  input.addEventListener('click', function(event) {
  // Code to execute when the button is clicked
     console.log('Input Value:'+ event.target.value);
 });

  input.addEventListener("keydown", (e) => {
     console.log(e.key+'Input Value keydown:'+ e.target.value);
  });
Angular
Step 1: Add an import to main.ts
import { defineCustomElements} from '../node_modules/sg-autocomplete/loader';And somewhere near the bottom we'll call this function.
defineCustomElements();Step 2: Next, in app.module.ts add the CUSTOM_ELEMENTS_SCHEMA.
import {CUSTOM_ELEMENTS_SCHEMA} from `@angular/core`;and then
schemas: [
    CUSTOM_ELEMENTS_SCHEMA
]
Your app.module.ts should look like this:
import { NgModule, CUSTOM_ELEMENTS_SCHEMA } from '@angular/core';

@NgModule({
  declarations: [],
  imports: [],
  schemas: [ CUSTOM_ELEMENTS_SCHEMA],
  providers: [],
  bootstrap: [AppComponent]
})

export class AppModule { }
Please Note: schemas: [ CUSTOM_ELEMENTS_SCHEMA ] need to be added to each component where you are using custom HTML tags.
Step 3: Declare the arrayData: In your Angular component's TypeScript file, declare the arrayData that you are passing.
 arrayData  =[{"url": "https://i.ibb.co/10fFGkZ/car-race.jpg", "title": "Car Racing", "description":"Car Racing"} ,
    {"url": "https://i.ibb.co/gM5NNJX/butterfly.jpg", "title": "Butterfly", "description":"Butterfly"},
    {"url": "https://i.ibb.co/ygqHsHV/coffee-milk.jpg", "title": "Coffee with Milk", "description":"Coffee with Milk"}];
  autotext  =this.arrayData ;
Now, Set the arraydata value to the sg-autocomplete component
 ngOnInit() {
     const myElement = this.el.nativeElement.querySelector('sg-autocomplete');
      if (myElement) {
        myElement.suggestionlist =this.autotext;
      }
    }
Step 4: Now, in app.component.html you utilize your new custom element.
<sg-autocomplete autotext="description" dropdown=true></sg-autocomplete>Note: Here "description" is the JSON element name that will show it as a dropdown suggestion list.
Step 5: To consume the autocomplete value you can create function access it like this
 getValue() {
      const autocompleteValue = this.el.nativeElement.querySelector('sg-autocomplete') as HTMLInputElement;
    }
React
Step 1:
Now we'll add an import to index.js
import { defineCustomElements} from '../node_modules/sg-autocomplete/loader';And somewhere near the bottom we'll call this function.
defineCustomElements();Step 2:
Next, in app.js Pass the json array and utilize the new custom element,
function App() {
  const arrayData  =[{"url":
    {"url": "https://i.ibb.co/gM5NNJX/butterfly.jpg", "title": "Butterfly", "description":"Butterfly"},
    {"url": "https://i.ibb.co/ygqHsHV/coffee-milk.jpg", "title": "Coffee with Milk", "description":"Coffee with Milk"},
    {"url": "https://i.ibb.co/7XqwsLw/fox.jpg", "title": "Fox", "description":"Fox"},
    ];

  const myElement = useRef(arrayData);
    useEffect(() => {
      if (myElement.current) {
        const element = myElement.current;
        document.querySelector('sg-autocomplete').suggestionlist = element;
      }
    }, []);
  return (
    <div>
          <sg-autocomplete autotext="description" dropdown="true"></sg-autocomplete>
    </div>
  );
}
Vue
Add defineCustomElements to one of our main files. Specifically main.js for Vue.
import { defineCustomElements} from '../node_modules/sg-autocompleter/loader';And somewhere near the bottom we'll call this function.
defineCustomElements();Next, in App.Vue you consume the custom element.
<template>
  <div>
  <sg-autocomplete autotext="description" dropdown="true"></sg-autocomplete>
  </div>
</template>

<script>
    export default {
      data() {
        return {
        arrayData:[
            {"url": "https://i.ibb.co/gM5NNJX/butterfly.jpg", "title": "Butterfly", "description":"Butterfly"},
            {"url": "https://i.ibb.co/VYYPZGk/salmon.jpg", "title": "Salmon ", "description":"Salmon"},
            {"url": "https://i.ibb.co/10fFGkZ/car-race.jpg", "title": "Car Racing", "description":"Car Racing"}
           ]
      }
   },
    mounted() {
      document.querySelector('sg-autocomplete').suggestionlist = this.arrayData;
    }
};
</script>
Please Note: If you are using multiple component then you can define the defineCustomElements as shown below:
import { defineCustomElements as defineCustomElements1} from '../node_modules/sg-copyright/loader';
import { defineCustomElements as defineCustomElements2} from '../node_modules/sg-avatar/loader';
import { defineCustomElements as defineCustomElements3} from '../node_modules/sg-json-table/loader';
import { defineCustomElements as defineCustomElements4} from '../node_modules/sg-image-viewer/loader';
import { defineCustomElements as defineCustomElements5} from '../node_modules/sg-autocomplete/loader';
.
.
.
defineCustomElements1();
defineCustomElements2();
defineCustomElements3();
defineCustomElements4();
defineCustomElements5();
Click Here for Vue application live demo.