
t2-cli
v0.1.23
Published
The starting point of Tessel 2's command line interface
Downloads
271


Readme
t2-cli

![]()
![]()

![]()

The starting point for the Tessel 2 command line interface.
Documentation: Tessel 2 Command Line Interface
Contents
Installation for development
Prerequisites for installation: Node.js and Git.
- Clone this repository by entering the following:
git clone https://github.com/tessel/t2-cli. - Go to the root directory of repository:
cd t2-cli. - Create a symbolic link:
npm link --local.
Windows
You may encounter the following error when executing npm link on windows:
19798 error Windows_NT 6.3.9600
19799 error argv "C:\\Program Files\\nodejs\\\\node.exe" "C:\\Program Files\\nodejs\\node_modules\\npm\\bin\\npm-cli.js" "link"
19800 error node v0.12.4
19801 error npm  v2.10.1
19802 error code ELIFECYCLE
19803 error [email protected] postinstall: `tessel install-drivers || true; tessel trademark || true`
19803 error Exit status 1
19804 error Failed at the [email protected] postinstall script 'tessel install-drivers || true; tessel trademark || true'.
This error occurs because of windows folder permissions. To resolve this make sure you are running cmd or powershell as an administrator and that the permissions on the node_modules folder is set to full control for the user.
Source Tab Completion
For bash users, add this line to your ~/.bashrc or ~/.bash_profile file:
source /PATH/TO/t2-cli/bash_completion
For zsh users, add these lines to your ~/.zshrc file:
# Add custom completion scripts
fpath=(/PATH/TO/t2-cli $fpath)

# compsys initialization
autoload -U compinit
compinit
Updating
Just run t2 update to make sure you are running the most recent build of OpenWRT and firmware.
Testing
Overview
In order to maintain a reliable code base, there is extensive code coverage and style checking involved with adding to or editing this repo. Grunt is used as the task runner, along with plugins for the following tools:
- jshint: used to verify our best practices and prevents us from making mistakes that could lead to hard-to-find bugs, see
.jshintrcfor our configuration - jscs: used to maintain the project's preferred code style, see
.jscsrcfor our configuration - jsbeautifier: used to format code into the repo's preferred style, see
Gruntfile.jsfor our configuration - nodeunit: used to create and run unit tests
All of these tasks can be run by entering npm test (an alias for grunt test without needing to have the grunt-cli installed globally) into your command line. Be sure to run this command before pushing new code so JSHint and style errors can be caught as soon as possible.
Writing Tests
Check out the nodeunit documentation for general usage of the library. For this project, there is a global test setup file (found under test/common/bootstrap.js) for including any dependencies needed to run the various test modules, as well as two simulator modules, RemoteProcessSimulator and TesselSimulator, for simulating command line and hardware interactions in the tests.
Unit tests are found in the test/unit/ directory, named after the feature being tested. A typical unit test looks like the following example:
// Test dependencies are required and exposed in common/bootstrap.js

// The module name is usually the name of the function being tested, i.e. Tessel.prototype.findAvailableNetworks
exports['functionName'] = {
  // this is called before the each test is run
  setUp(done) {
    // sinon is used to watch and mock parts of the Tessel codebase used by the tested function
    this.sandbox = sinon.sandbox.create();
    this.functionName = this.sandbox.spy(Tessel.prototype, 'functionName');

    // create a new TesselSimulator to be used by this module
    this.tessel = TesselSimulator();

    done();
  },

  // this is called after each test is run, should cleanup all mocks
  tearDown(done) {
    this.tessel.mockClose();
    this.sandbox.restore();
    done();
  },

  // this should be something recognizable and clearly states what outcome of the function is being tested
  testName(test) {
    // the number of assertions the test should expect
    test.expect(1);

    this.tessel.functionName();

    // `equal` is a function passed through by the Node.js `assert` module, see https://github.com/caolan/nodeunit#api-documentation for more info
    // `callCount` is a property from Sinon's spy, see http://sinonjs.org/docs/#spies for more info
    test.equal(this.functionName.callCount, 1);

    // this should always be called when every assertion is done
    test.done();
  }
};
Releasing
For all releases, a maintainer will complete the following steps:
- Update the version, commit it, and tag it (all of these things happen with the following command):
npm version [<newversion> | major | minor | patch]Where <newversion> is either "major", "minor" or "patch" (currently, we are in pre-1.0 "patch" releases). More than likely, you will type npm version patch.
git push --tags(orgit push remote-name --tags, whereremote-nameis the name of your remote that points to[email protected]:tessel/t2-cli.git)git push remote-name mastergrunt changelogwill produce a pre-formatted changelog that looks something like this:
| Commit | Message/Description |
| ------ | ------------------- |
| sha    | we fixed stuff      |
Copy the table to clipboard
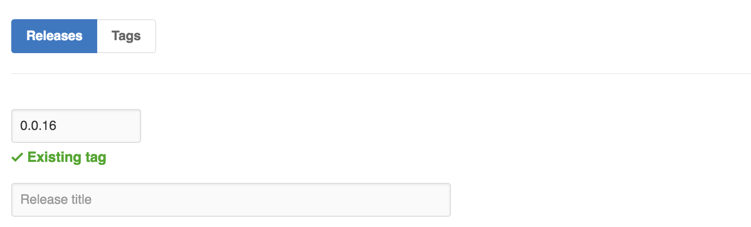
- Open https://github.com/tessel/t2-cli/releases and click
Editon the right hand side of the "Latest Release":

Type the tag name into the "Release title" field:
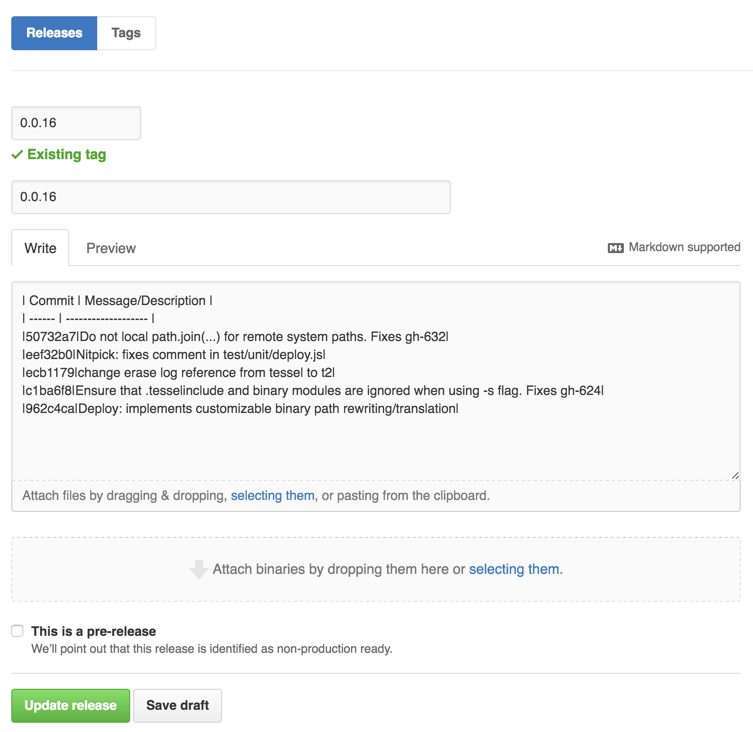
Paste the changelog into the "Describe this release" field:
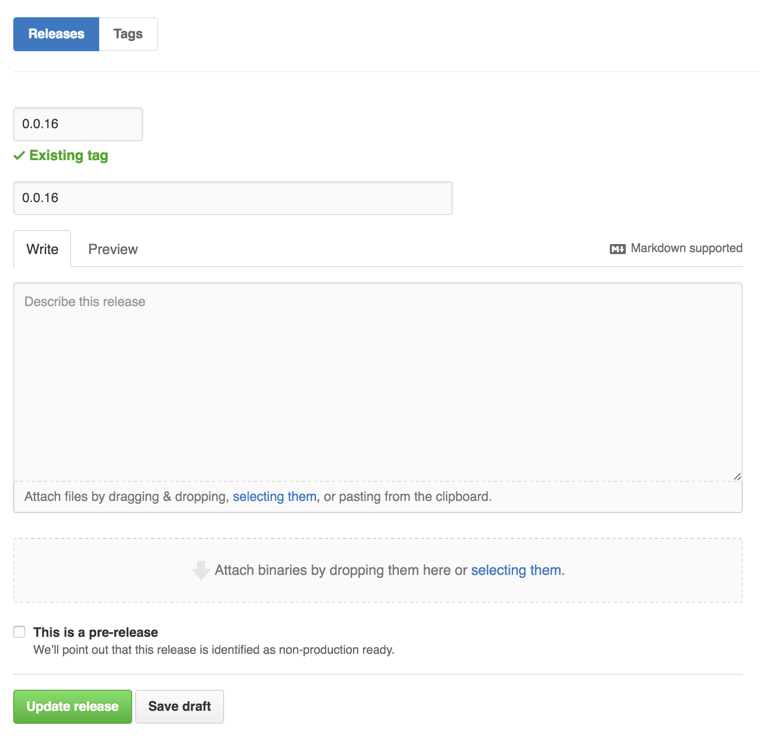
When complete it will look something like this:
- Publish updated module to npm:
If not logged in to npm through the cli, do so: npm login
Then: npm publish
Check the npm page to see the latest release!