
taro-builder
v1.1.2
Published
基于 tarojs 的所见即所得框架,用于需要可视化构建小程序,WEB,APP 的项目。

Readme
TARO-BUILDER
基于 tarojs 的所见即所得框架,用于需要可视化构建小程序,WEB,APP 的项目。
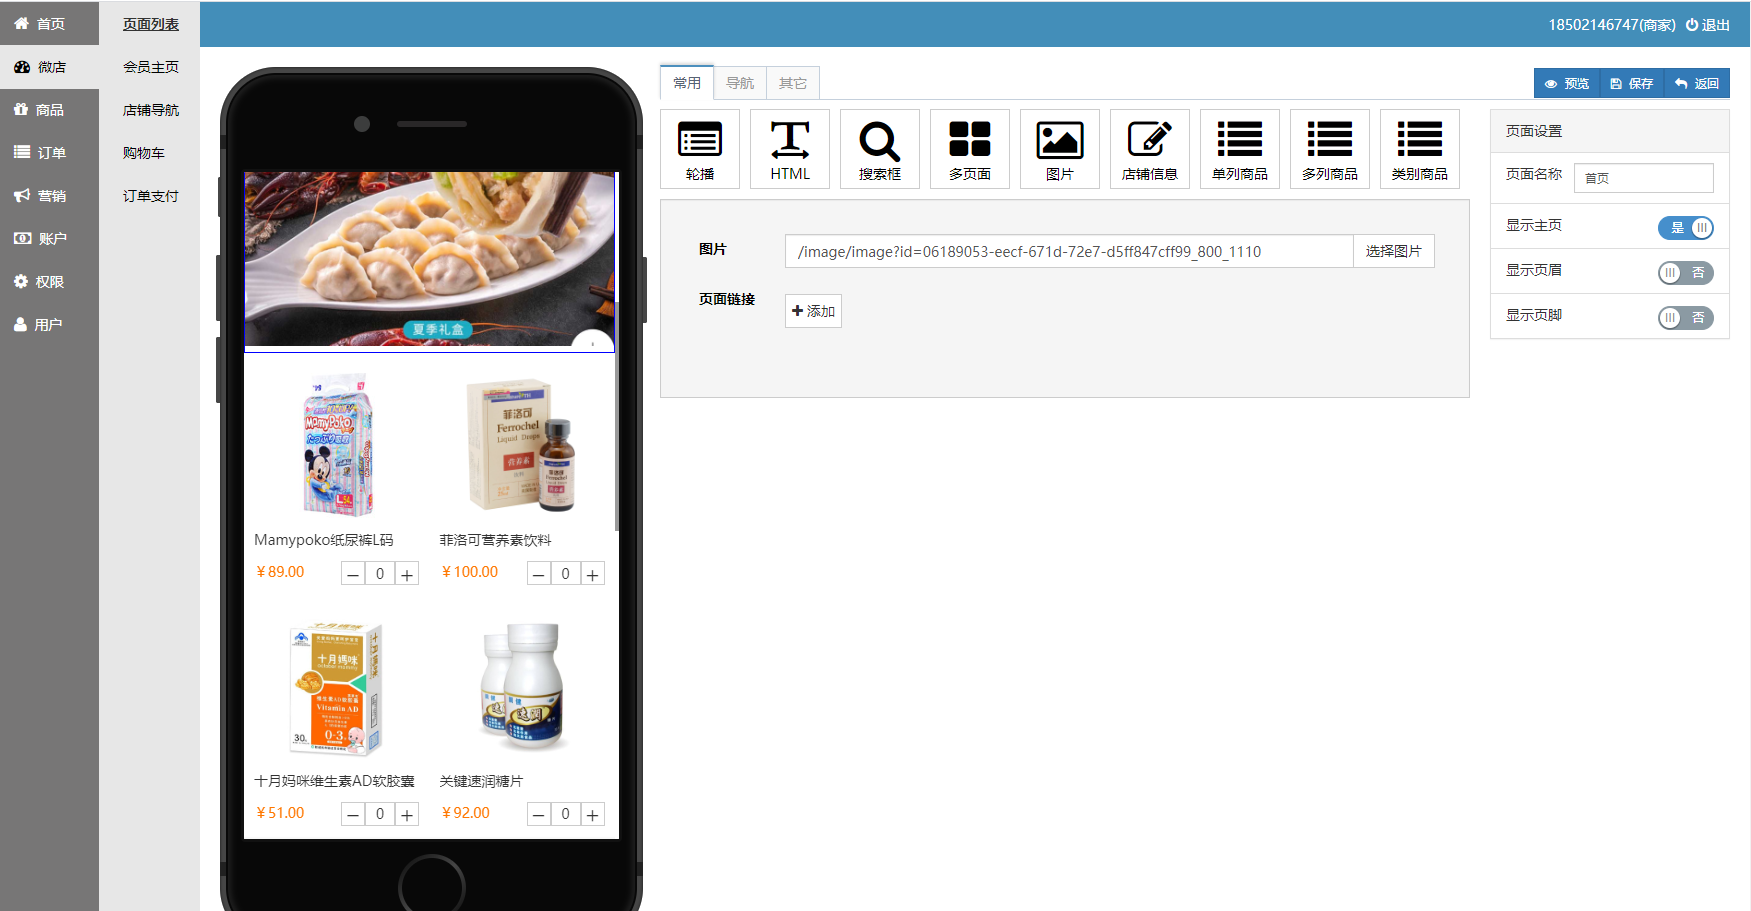
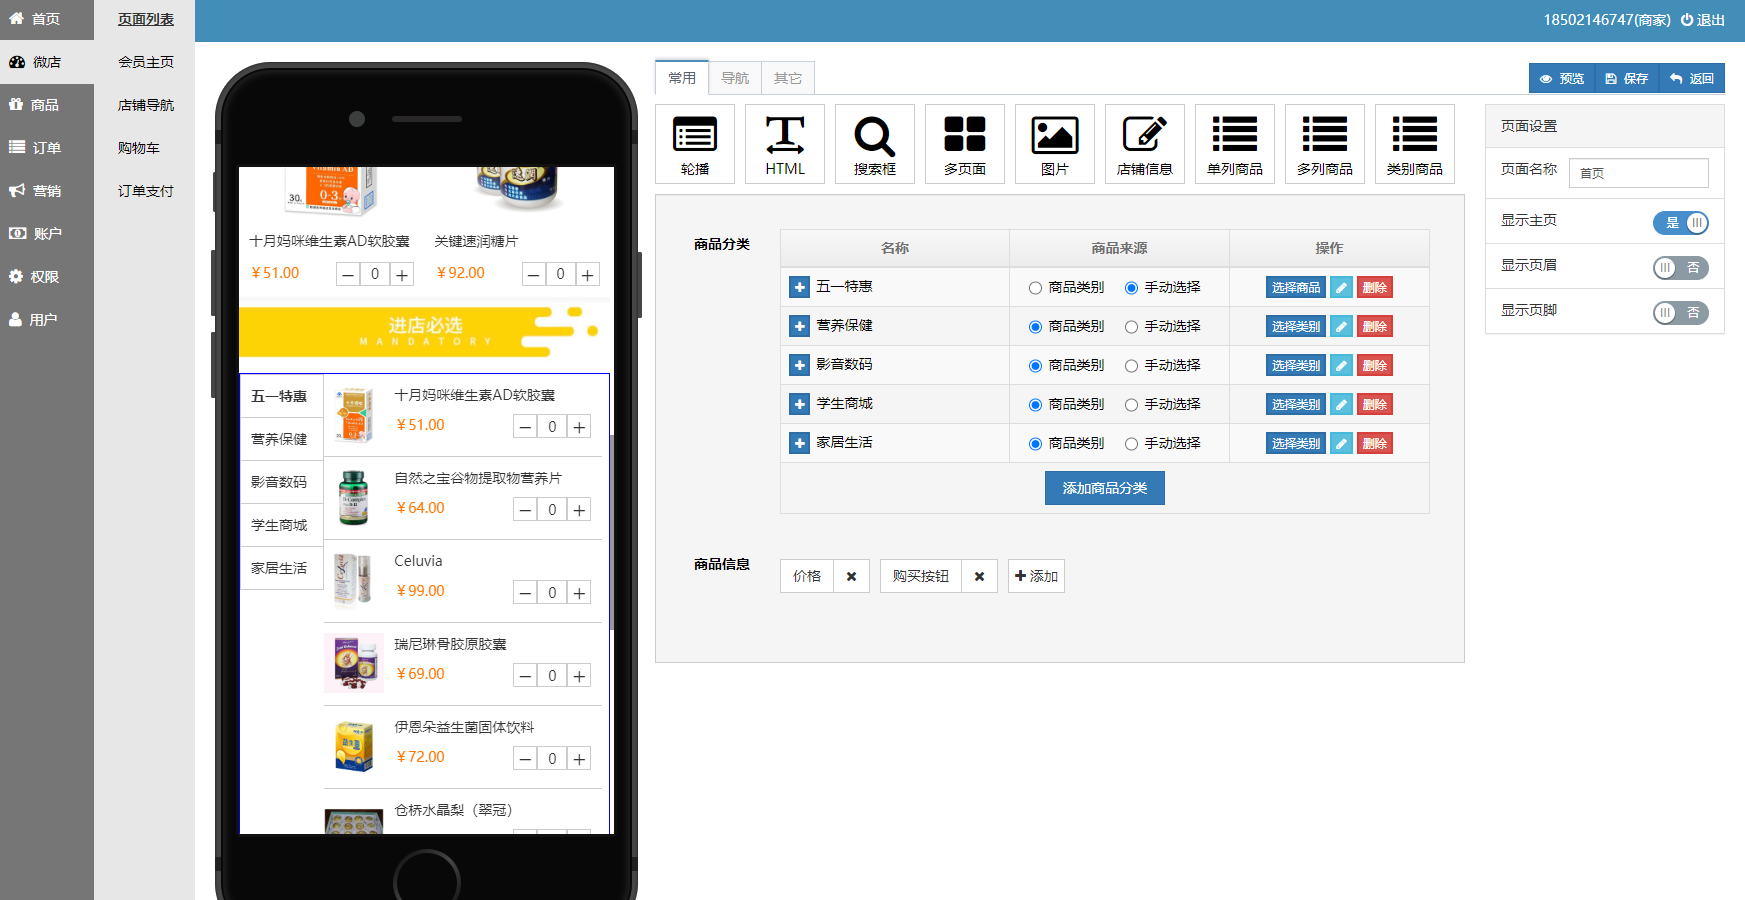
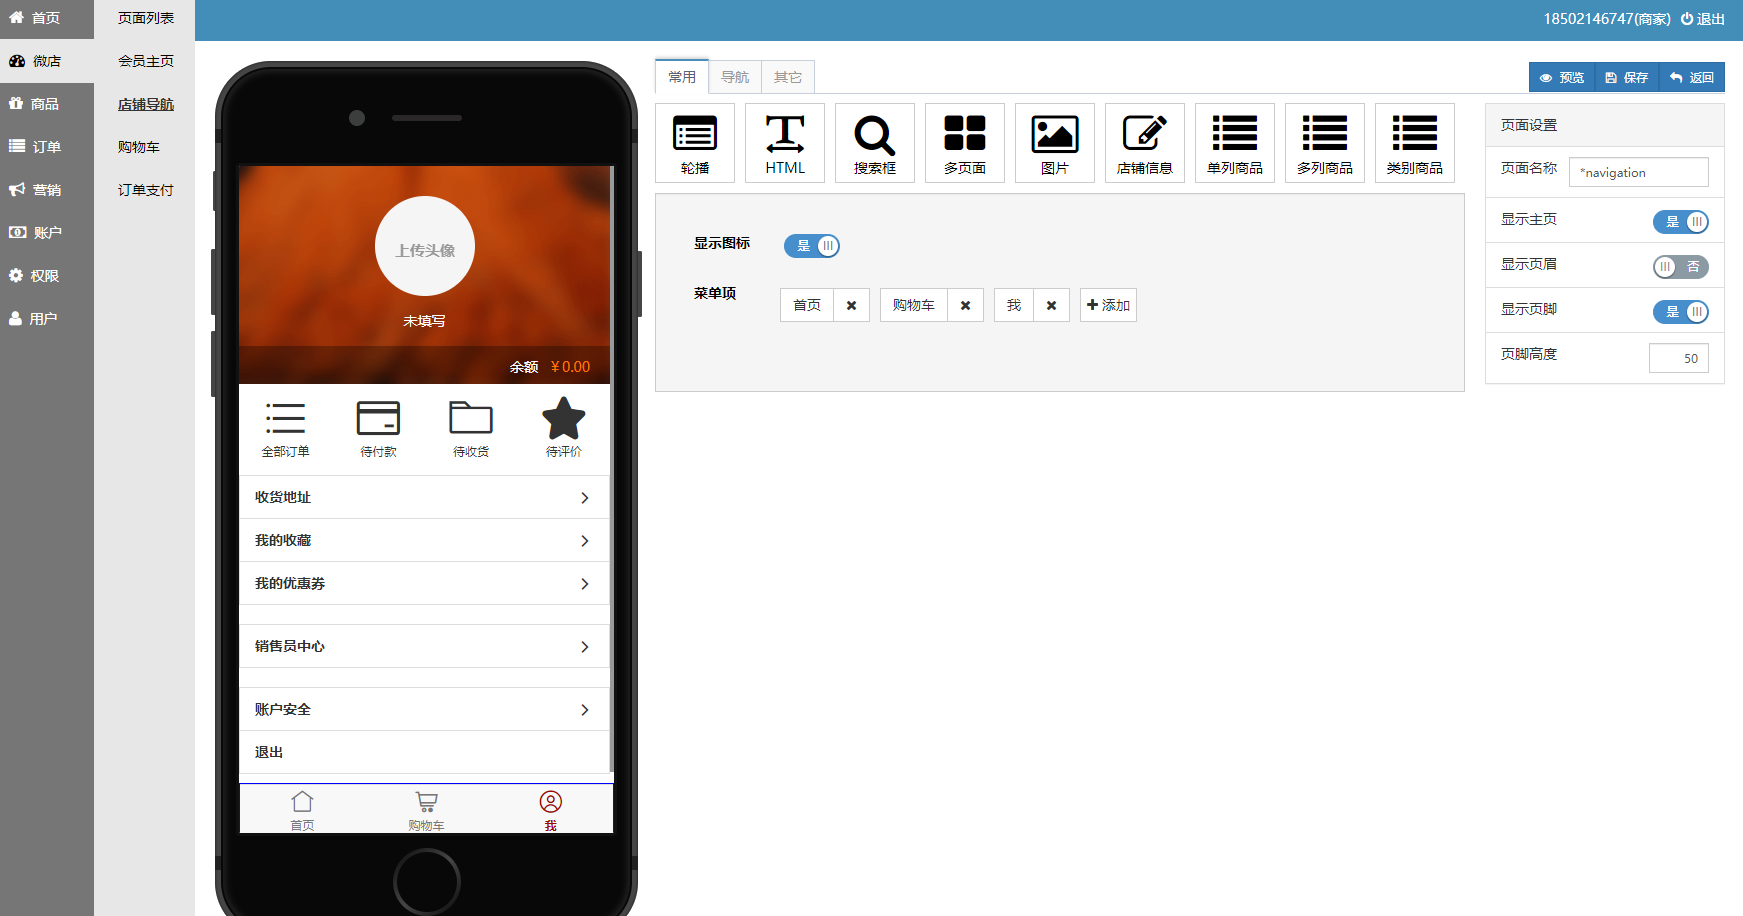
截图
案例:电商系统小程序页面构造
配置
配置文件为 config.js
| 字段 | 含义 | | ---------------- | --------------- | | port | 网站端口 | | db | 数据库配置 | | componentStation | 组件库 URL 地址 |
组件库站点配置
每个组件库站点都需要提供一个 config.json 文件,设计器通过这个配置文件加载组件及其设计器。
{
  "components": [
    {
      "displayName": string,
      "icon": string,
      "introduce": string,
      "type": string,
      "path": string
    }
  ]
}
示例
{
  "components": [
    {
      "displayName": "店铺信息",
      "icon": "icon-edit",
      "introduce": "显示店铺相关信息,包括店铺图标,店铺名称,商品数量,订单数量等等,一般放置在首页顶部。",
      "type": "SummaryHeader",
      "path": "components/summary-header/component"
    },
    {
      "displayName": "店铺顶栏",
      "icon": "icon-map-marker",
      "introduce": "在顶部显示购物车图标,显示用户位置",
      "type": "LocationBarControl",
      "path": "components/store-top-bar/component"
    },
    {
      "displayName": "单列商品",
      "icon": "icon-list",
      "introduce": "单列展示商品",
      "type": "SingleColunmProducts",
      "path": "components/single-colunm-products/component",
      "design": "design/single-colunm-products"
    },
    {
      "displayName": "轮播",
      "icon": "icon-list-alt",
      "introduce": "多张图片轮流播放",
      "type": "Carousel",
      "path": "components/carousel/component",
      "editor": "editors/carousel"
    }
  ]
}
在设计器界面显示
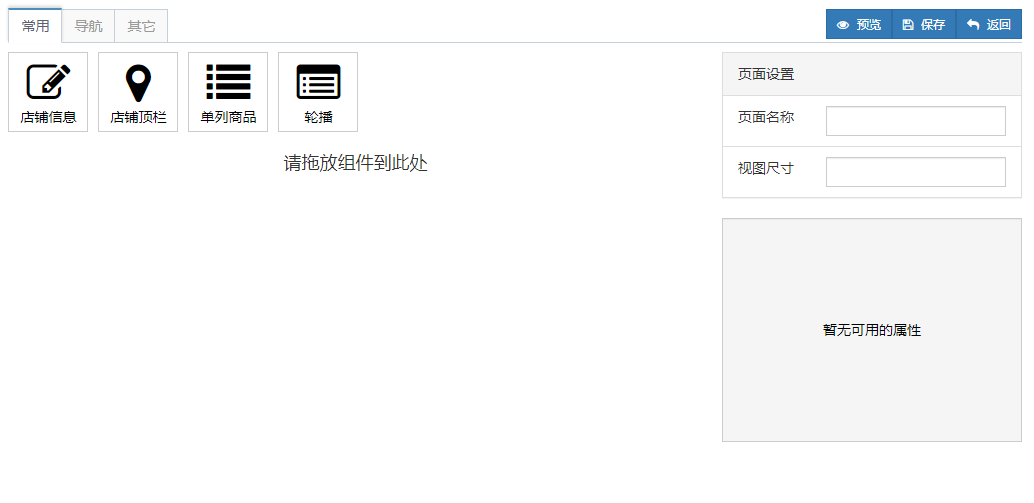
组件的开发
在组件站点内,创建一文件夹
hello-world
├── component.tsx
└── editor.tsx
component.tsx 文件内容
import * as React from 'react'

interface Props {
  text: string
}

export default class HelloWorld extends React.Component<Props> {
  static defaultProps: Props = { text: 'No Text' }

  render () {
    let { text } = this.props
    return <div>{text}</div>
  }
}
editor.tsx 文件内容
import { Component, TextInput } from 'maishu-jueying'

Component.setPropEditor({
  displayName: '文本',
  componentType: 'HelloWorld',
  propName: 'text',
  editorType: TextInput
})
配置 config.json 文件
在 config.json 文件的 components 字段,添加组件的配置信息
{
  "displayName": "你好",
  "icon": "icon-list-alt",
  "introduce": "Hello World 示例",
  "type": "HelloWorld",
  "path": "hello-world/component",
  "editor": "hello-world/editor"
}
使用组件
刷新界面可以看到组件面板多了一个明为 "你好" 的组件,将该组件添加到页面视图,点击该组件,修改文本框的文字为 "Hello World",可以看得到界面上显示了 "Hello World" 文字。
编辑器的开发
示例
在下面的示例中,创建一组件,用于改变 HelloWorld 组件的文字颜色。
首先,要修改一下 HelloWorld 组件,即 hello-world.tsx 文件,实现文字颜色的显示。
import * as React from "react";

interface Props {
    text: string,
    color?: string,
}

export default class HelloWorld extends React.Component<Props> {

    static defaultProps: Props = { text: "No Text" }

    render() {
        let { text, color } = this.props;
        return <div style={{ color }}>{text}</div>
    }
}
在 "hello world" 文件夹中,添加名为 text-color.tsx 文件。
文件内容如下:
import { PropEditor, PropEditorState } from "maishu-jueying";
import *  as React from "react";

let colors = ["#BF0705", "#85BB49", "#E469A2"];
export class TextColor extends PropEditor<string>{
    changeColor(value: string) {
        this.props.updateComponentProp(value);
    }
    render() {
        return <ul>
            {colors.map(c => <li className="pull-left"
                style={{ width: 20, height: 20, display: "block", backgroundColor: c, marginRight: 4 }}
                onClick={() => this.changeColor(c)}></li>)}
        </ul>
    }
}
说明
所有的编辑器组件,都需要继承于类 PropEditor ,其中第一个泛类参数为属性值的类型。这个示例中,color 的类型为 string 。
this.props.updateComponentProp 用于更新组件对应的属性值。