
wc-chatbot
v0.2.1
Published
A simple WebComponent for chatting with real people or bots, such as OpenAI ChatGPT or Google Bard AI.

Readme
wc-chatbot
![]()


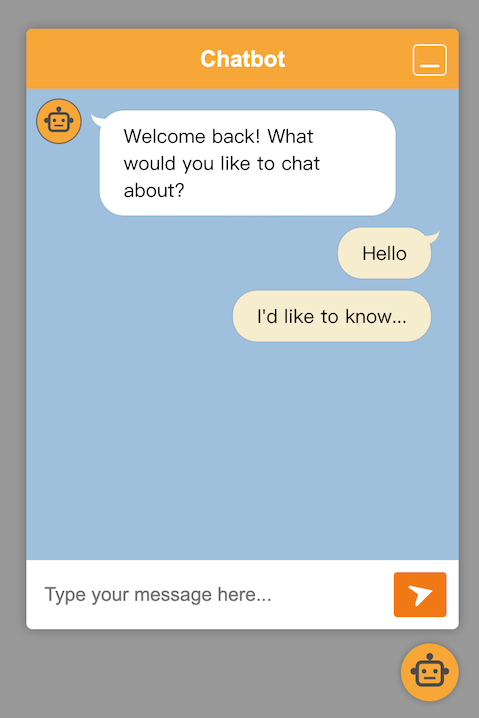
A user-friendly chatbot UI WebComponent that streamlines the integration of backend services for chatting with both human agents and AI bots. This component allows easy integration with popular AI services such as OpenAI ChatGPT, Google Bard AI, and others, into your website or application.
Installation
You can install wc-chatbot with npm, or just get started quickly with CDN.
Install from npm
To install from npm, open terminal in your project folder and run:
npm install wc-chatbotAfter the package is installed, then you can import the chatbot WebComponent into you code:
import Chatbot from 'wc-chatbot';

window.onload = function() {
  let chatBotElement = document.createElement('chat-bot');
  document.body.appendChild(chatBotElement);
}
Install from CDN
There is jsDelivr CDN available for quickly integrated with your web page.
<!-- Latest version -->
<script src="https://cdn.jsdelivr.net/npm/wc-chatbot"></script>

<!-- Specific version -->
<script src="https://cdn.jsdelivr.net/npm/[email protected]"></script>
Basic Usages:
<html>
  <head>

    <!-- Load Chatbot WebComponent library -->
    <script src="https://cdn.jsdelivr.net/npm/wc-chatbot"></script>
    <!-- End Load -->

  </head>

  <body>

    <!-- Using "chat-bot" html tag to render the chabot ui component -->
    <chat-bot></chat-bot>

  </body>
</html>
Demo page
Attributes
title
String type. The title string of the chatbot, which will be displayed on the header of chat dialogue.
Element Properties
| Property | Type | Description | | --------- | ------- | ----------- | | messages | Array | The array of all messages in the chat dialogue. |
For example:
const chatBot = document.getElementsByTagName("chat-bot")[0];

if (chatBot !== undefined) {
  console.log(chatBot.messages);
  /* The output example: */
  /*
    [
      {
        "message": "<p>Welcome back! What would you like to chat about?</p>",
        "continued": false,
        "right": false,
        "delay": 0,
        "loading": false,
        "sender": {
            "name": "bot",
            "id": "00000000-0000-0000-0000-000000000001",
            "avatar": "https://ui-avatars.com/api/?name=Bot"
        }
      },
      {
        "message": "<p>hello</p>",
        "continued": false,
        "right": true,
        "delay": 0,
        "loading": false,
        "sender": {
          "name": "Anonymous",
          "id": "00000000-0000-0000-0000-000000000002"
        }
      }
    ]
   */
}
Method
sendMessage(str, options)
This method sends a message to the chatbot UI. The str parameter is a string containing the message to be sent. The options parameter is an optional object of type Message, containing additional options for the message.
Parameters
str- A string containing the message to be sent.options- An optional object of type Message containing additional options for the message.
Message Options
The Message object can contain the following properties:
message- A string containing the message to be sent.continued- A boolean indicating whether the message should be displayed in a continued message bubble. Default value is false.right- A boolean indicating whether the message should be displayed on the right side of the chat UI. Default value is false.delay- A number representing the delay in milliseconds before the message is displayed in the chat UI. Default value is 0.loading- A boolean indicating whether the message is a loading message. Default value is false.sender- An object of type Sender containing information about the message sender. The sender object can contain the following properties:name- A string containing the name of the message sender.id- A string containing the ID of the message sender.avatar- An optional string containing the URL of the message sender's avatar.
Examples:
const chatBot = document.querySelector('chat-bot');

// Send Bot message
chatbot.sendMessage('Hello, how can I help you?', {
  right: false,
  sender: {
    name: 'bot',
    id: '001',
    avatar: 'https://ui-avatars.com/api/?name=Bot'
  }
});

// Send User message
chatbot.sendMessage('Hi', {
  right: true,
  sender: { name: 'Alice', id: '007' }
});

// Send HTML message
chatbot.sendMessage(null, {
  message: '<p>Link: <a href="https://github.com/">Github</a></p>',
  right: false,
  sender: {
    name: 'bot',
    id: '001',
    avatar: 'https://ui-avatars.com/api/?name=Bot'
  }
});Warning: It is better to send a HTML message only with the trusted data source, or doing HTML sanitization before sending.
hideLoading(index)
This method is used to remove a specific loading bubble from the chatbot UI.
Parameters
index- The index of the chat-bubble element to be removed.
hideAllLoading()
This method is used to remove all loading bubbles from the chatbot UI.
hideLastLoading()
This method is used to remove the last loading bubble from the chatbot UI.
Event
sent event
When a message is sent by calling, a sent event will be dispatched and with the message in the detail.
For example:
const chatBot = document.querySelector('chat-bot');
chatBot.addEventListener("sent", function(e) {
  console.log(
    "A message is sent:",
    e.detail.message
  );
});
Customized styles
By specifying CSS variables, you can customize the chat chatbot styles aboiut the color and avatar.
For example:
<style>
  chat-bot {
    --chatbot-avatar-bg-color: #F9A825;
    --chatbot-avatar-img: url('https://ui-avatars.com/api/?name=Bot');
    --chatbot-avatar-margin: 10%;
    --chatbot-header-bg-color: #F9A825;
    --chatbot-header-title-color: #FFFFFF;
    --chatbot-body-bg-color: #9dbfde;
    --chatbot-send-button-color: #F9A825;
    --chatbot-container-width: 360px;
    --chatbot-container-height: 500px;
  }
</style>
| CSS Variable Name | Description | | ------------------ | ------------ | | --chatbot-avatar-bg-color | This variable sets the background color of the avatar used for the chatbot. | | --chatbot-avatar-img | This variable sets the image used for the avatar. It's a url path of the image in this case, and you can also specify a base64 encoded image as the value. | | --chatbot-avatar-margin | This variable sets the margin for the avatar. | | --chatbot-header-bg-color | This variable sets the background color of the chatbot header. | | --chatbot-header-title-color | This variable sets the color of the title in the chatbot header. | | --chatbot-body-bg-color | This variable sets the background color of the chatbot message box. | | --chatbot-send-button-color | This variable sets the color of the send button. | | --chatbot-container-width | This variable sets the width of the chat UI. | | --chatbot-container-height | This variable sets the height of the chat UI. |
Bubble element style
And you can also customize the chat-bubble, too. For example:
<style>
  chat-bot::part(chat-bubble) {
    --chat-bubble-avatar-color: #0D8ABC;
  }
</style>
To see the styles can be customized, please look the document of wc-bubble.