
wtt-cursor
v1.1.8
Published
CLI to copy bundled .cursor rules and run Context7 setup.

Readme
wtt-cursor
Bootstrap Cursor project setup with one command.
Quick start
Run inside your project root:
npx -y wtt-cursorAlternative with pnpm:
pnpm dlx wtt-cursorWhat this command does
- Copies package
.cursor/*into<project-root>/.cursor/* - Creates or updates
<project-root>/.cursorignore - Ensures
.cursorignorecontains:.cursor.env
- Tries to run Context7 setup:
npx --yes ctx7 setup --cursor --mcp --oauth
What these rules do
The bundled .cursor/rules files define how the agent should work in your project: coding style, workflow expectations, testing behavior, and safety constraints for edits and commands. In practice, this makes AI output more consistent with your stack and reduces generic or off-pattern changes.
You should still review generated code, but the rules provide a strong baseline for predictable, project-specific behavior.
First prompt to align rules with your stack
After setup, run this as your first message in Cursor chat:
Review the project stack and update the copied .cursor rules to match this repository.

Project stack and conventions:
- Framework/runtime:
- Language:
- Package manager:
- Testing tools:
- Lint/format tools:
- Architecture/style constraints:

Please adjust only what is necessary, keep diffs small, and explain the changes.
Verify setup
Check that files were created:
ls -la .cursorCheck .cursorignore:
cat .cursorignoreWhat is .cursorignore?
.cursorignore works like an AI context ignore list. Files and paths listed there are excluded from indexing/context, so the agent is less likely to read or reference them.
Default entries added by this CLI:
.cursorto avoid recursive/self-referential rule context.envto reduce secret exposure risk
Context7 authentication (Cursor)
If Context7 setup opens a browser, complete the OAuth login flow.
Follow these steps in Cursor:
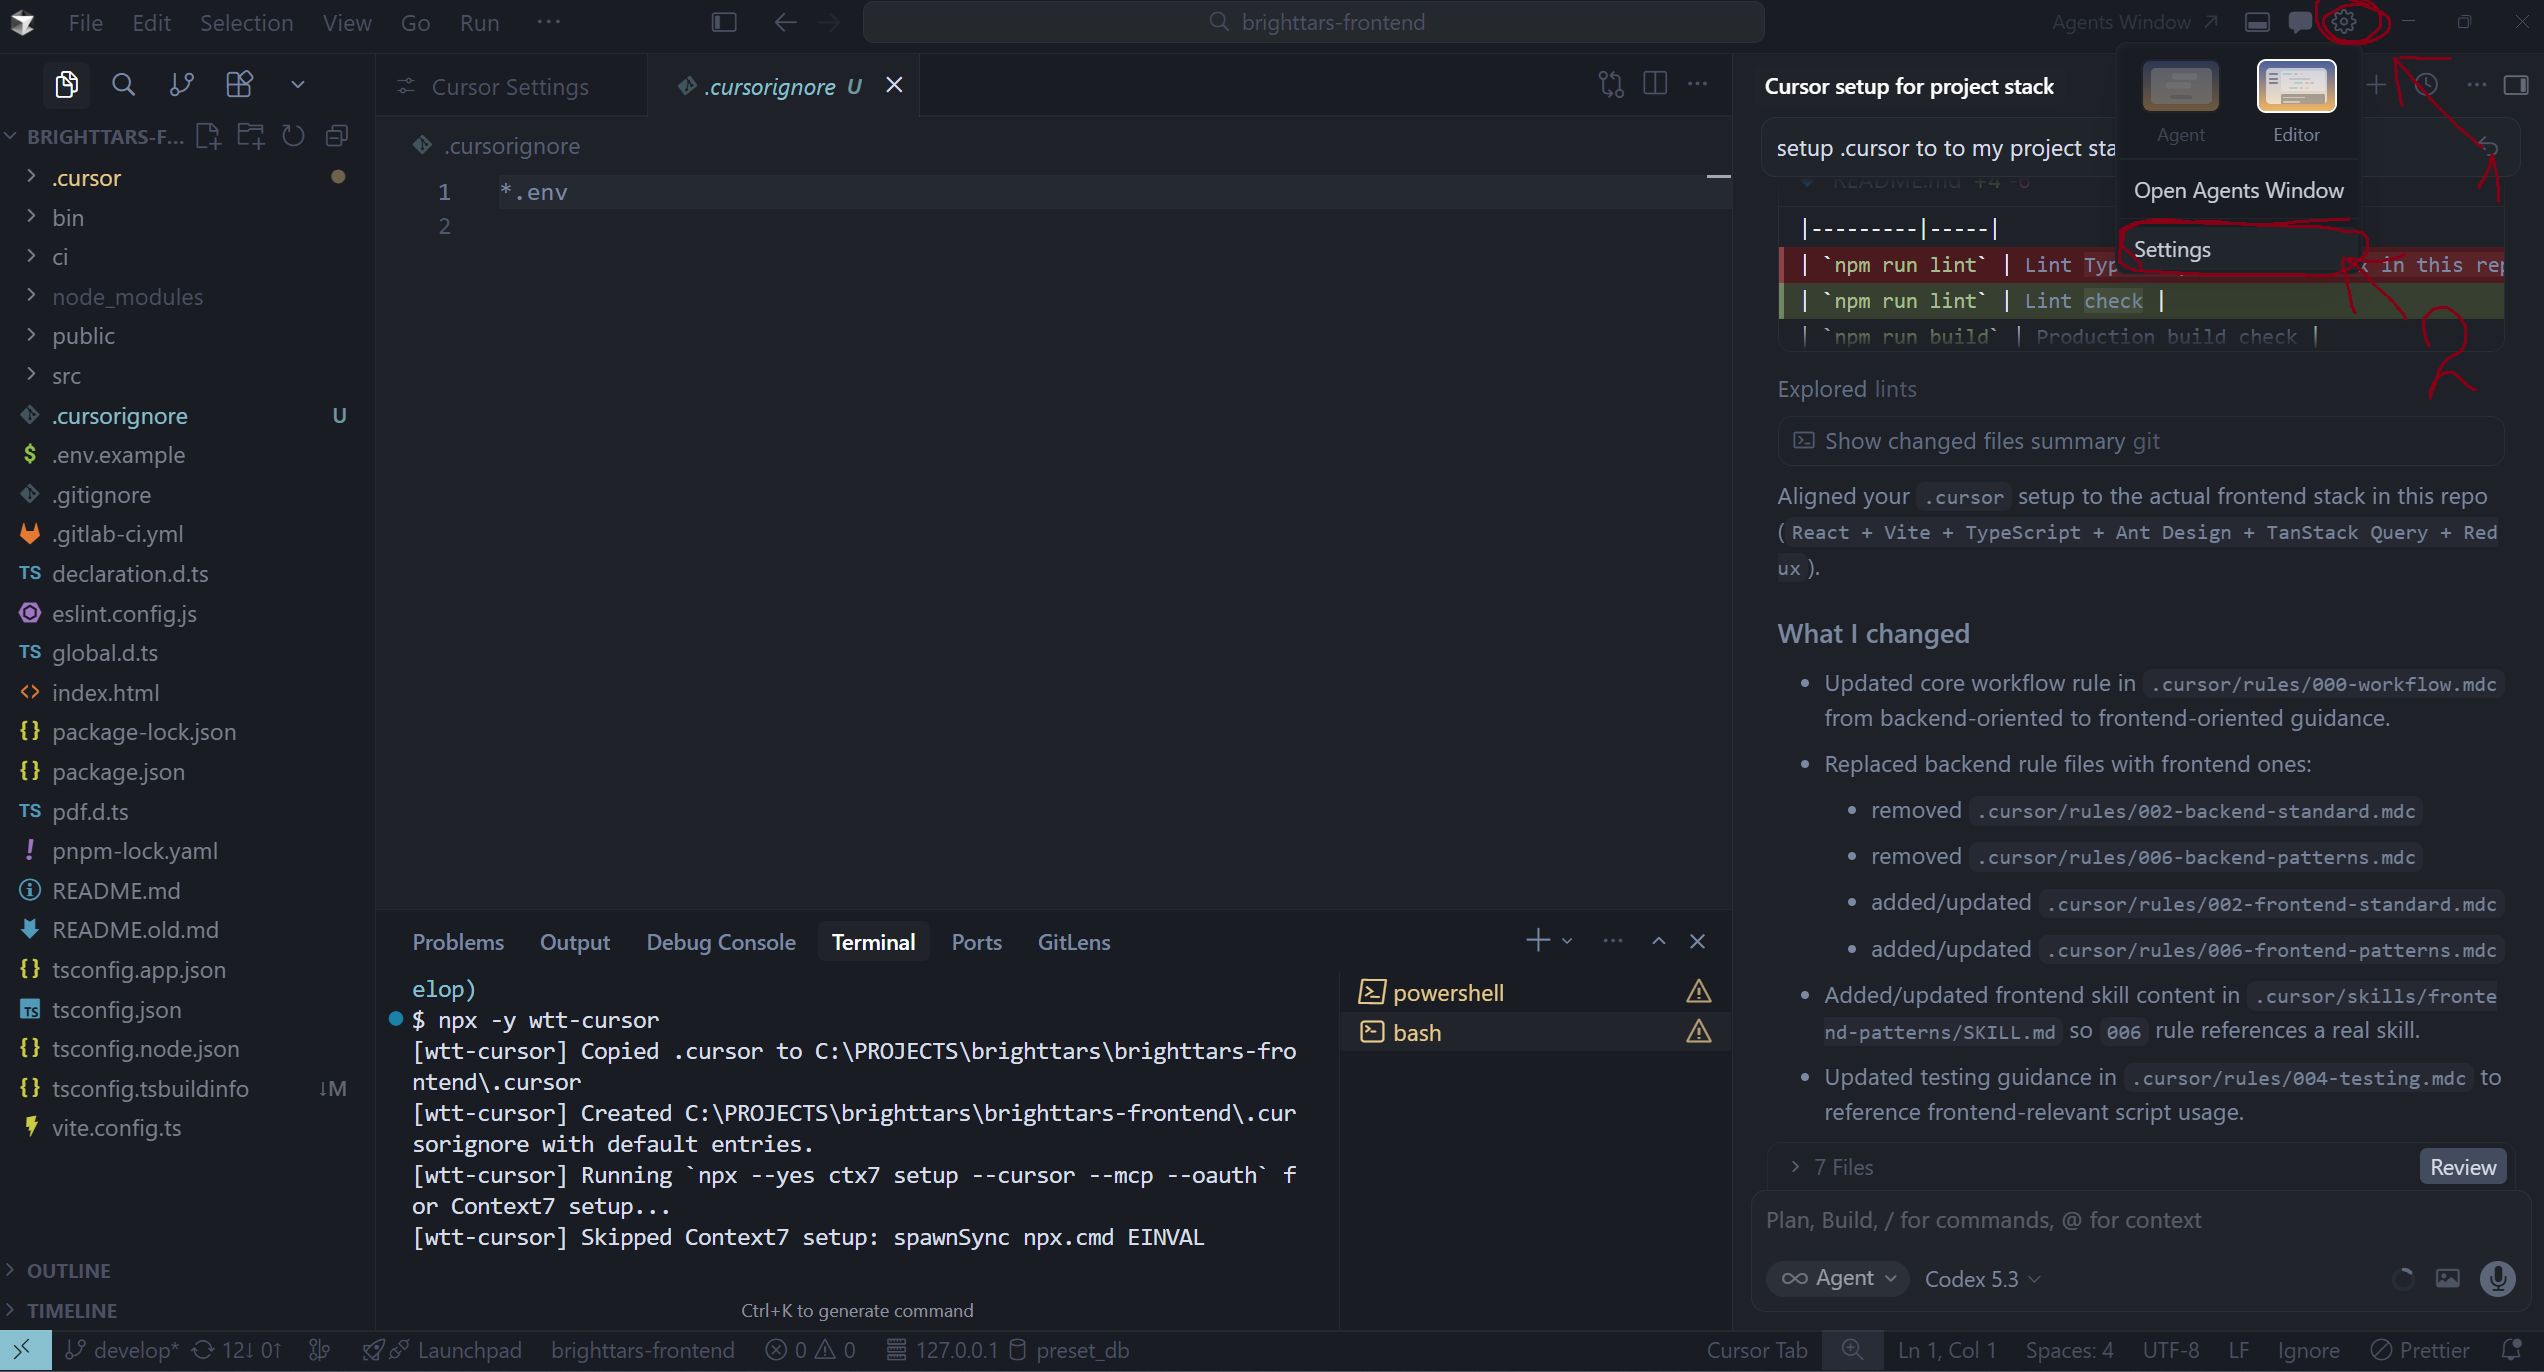
- Open Settings from the top-right menu.
Step 1 - Open Cursor Settings
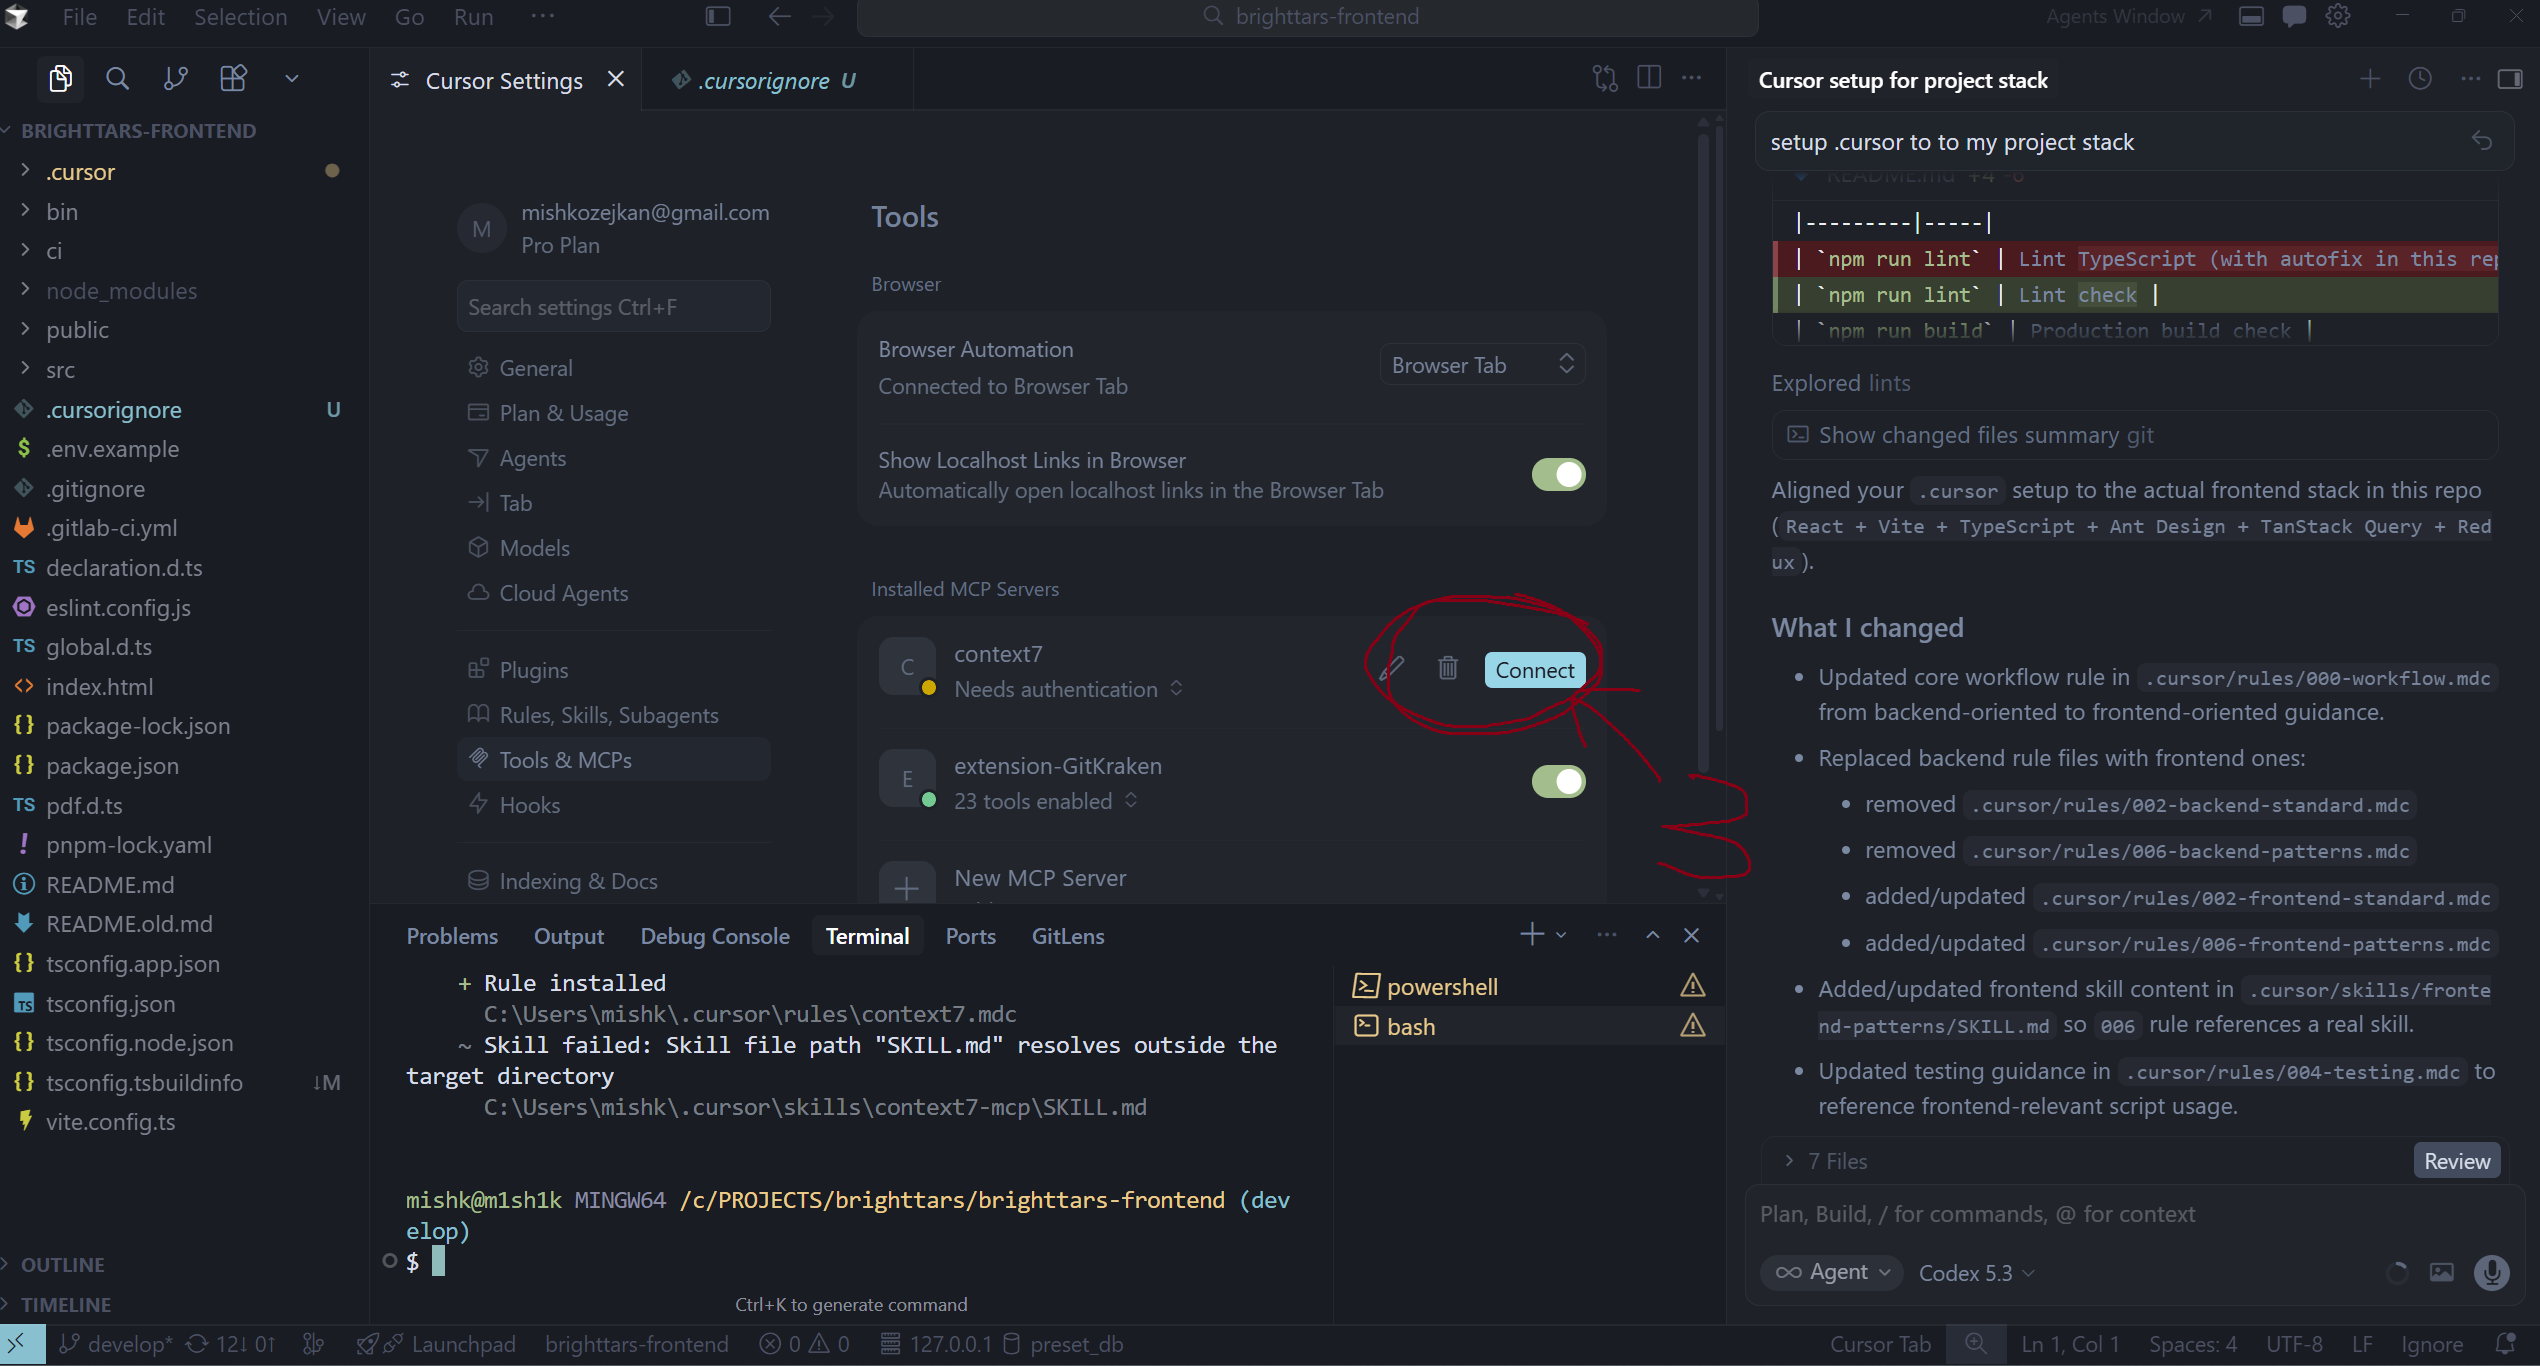
- Go to Tools & MCPs and find
context7in Installed MCP Servers. - Click Connect for
context7.
Step 2 - Connect Context7 MCP
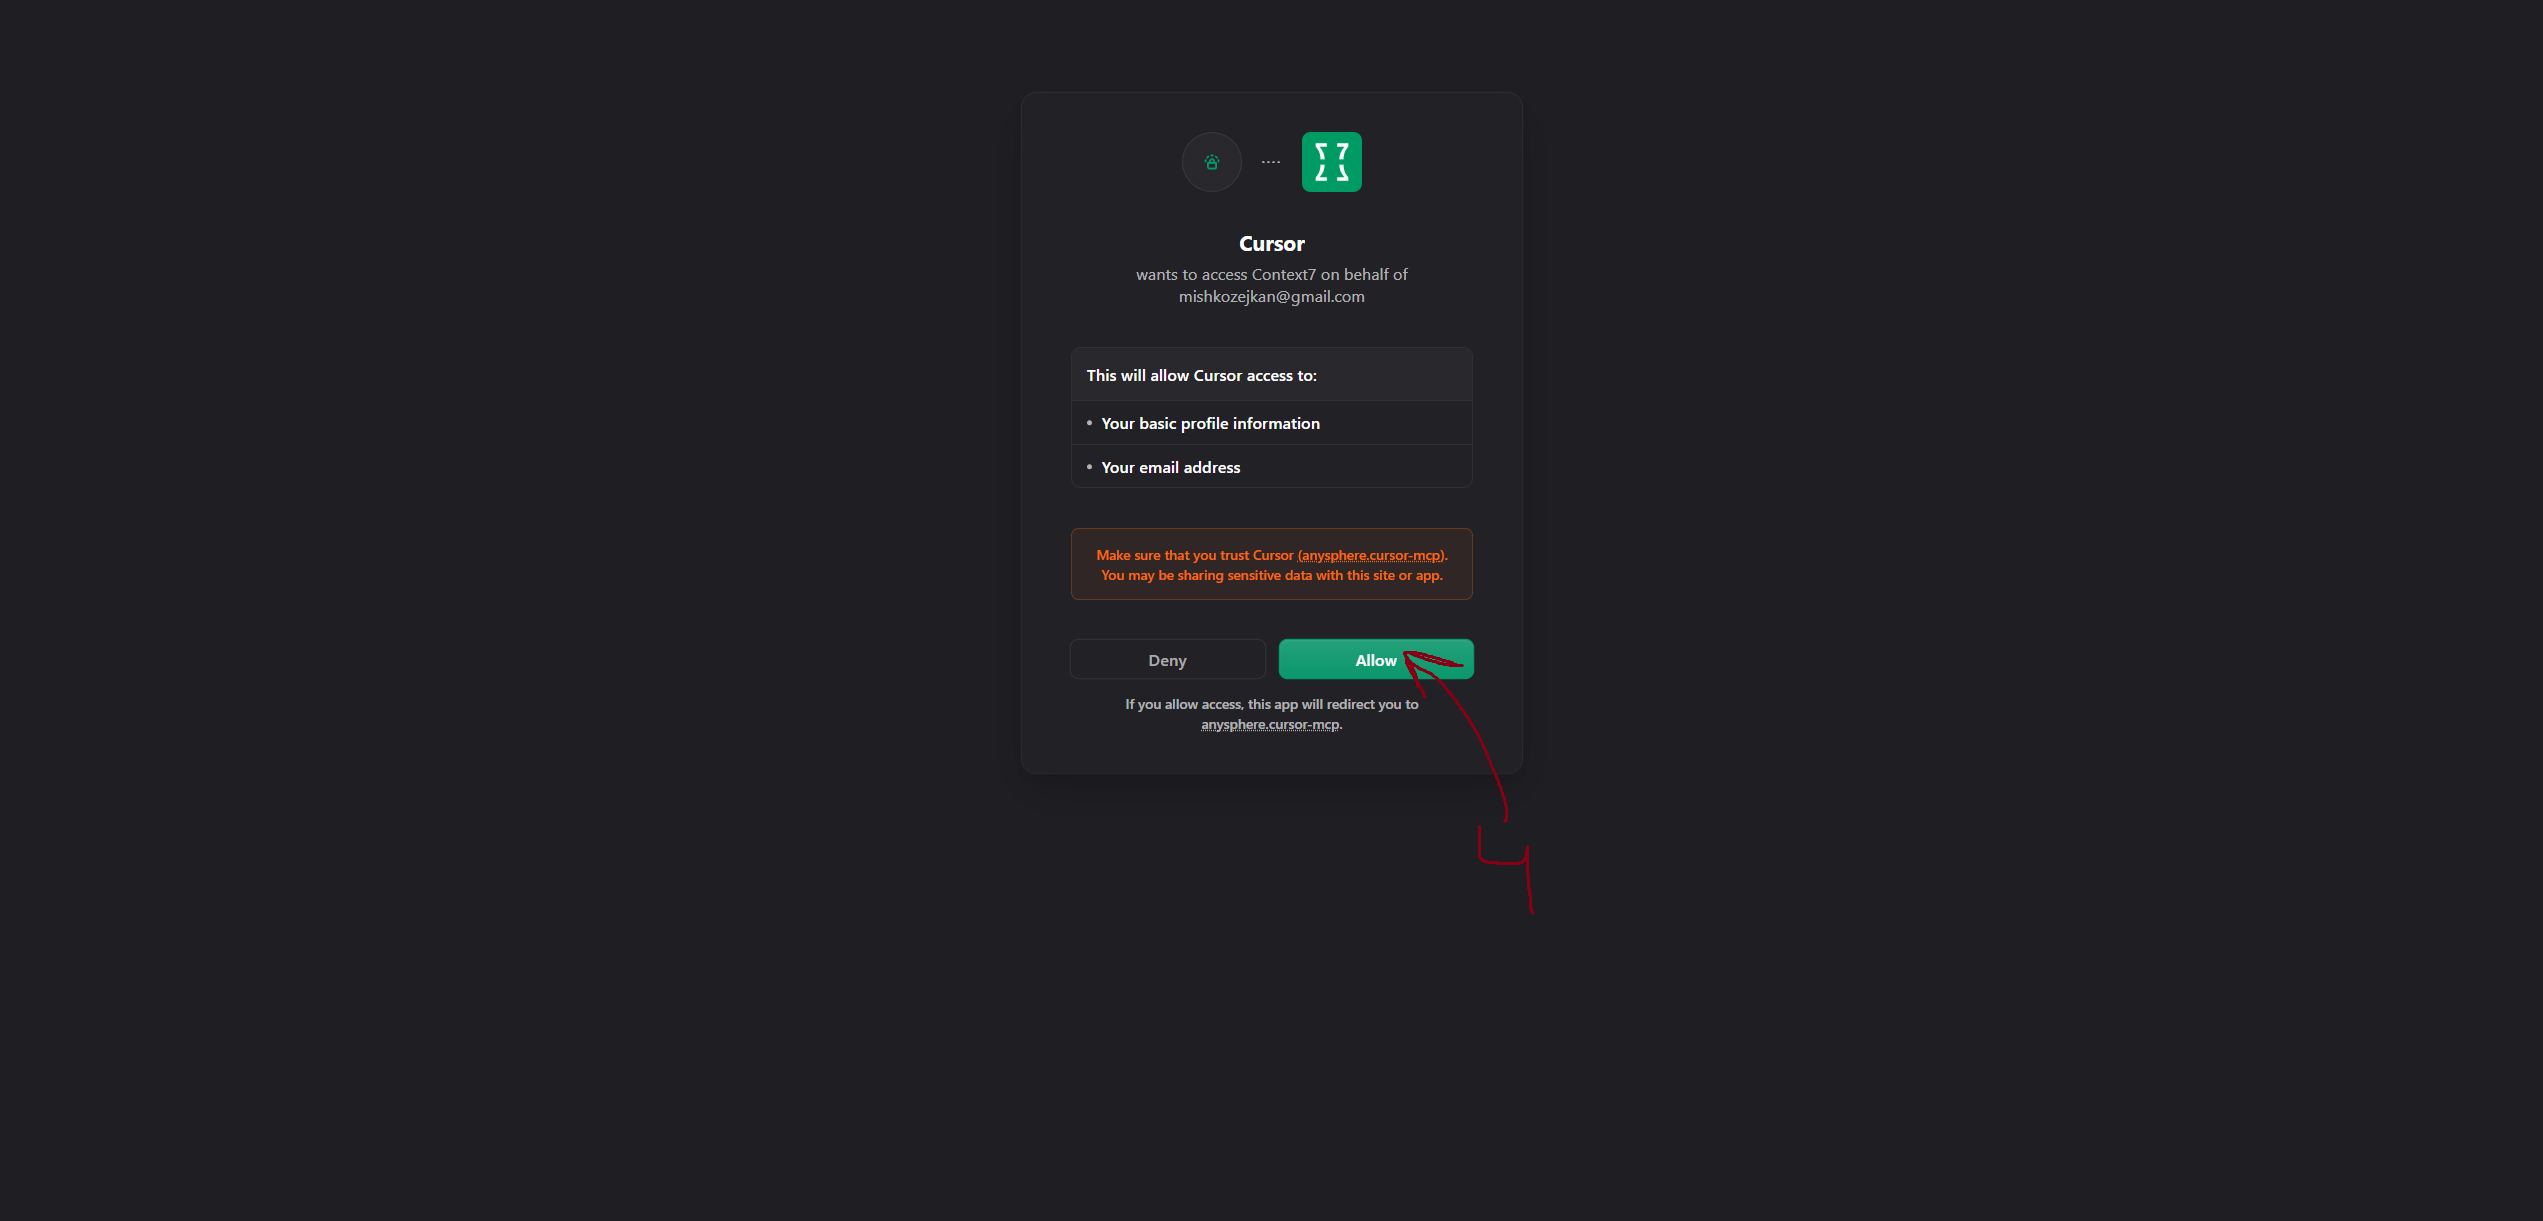
- In the browser OAuth page, click Allow.
Step 3 - Allow OAuth Access
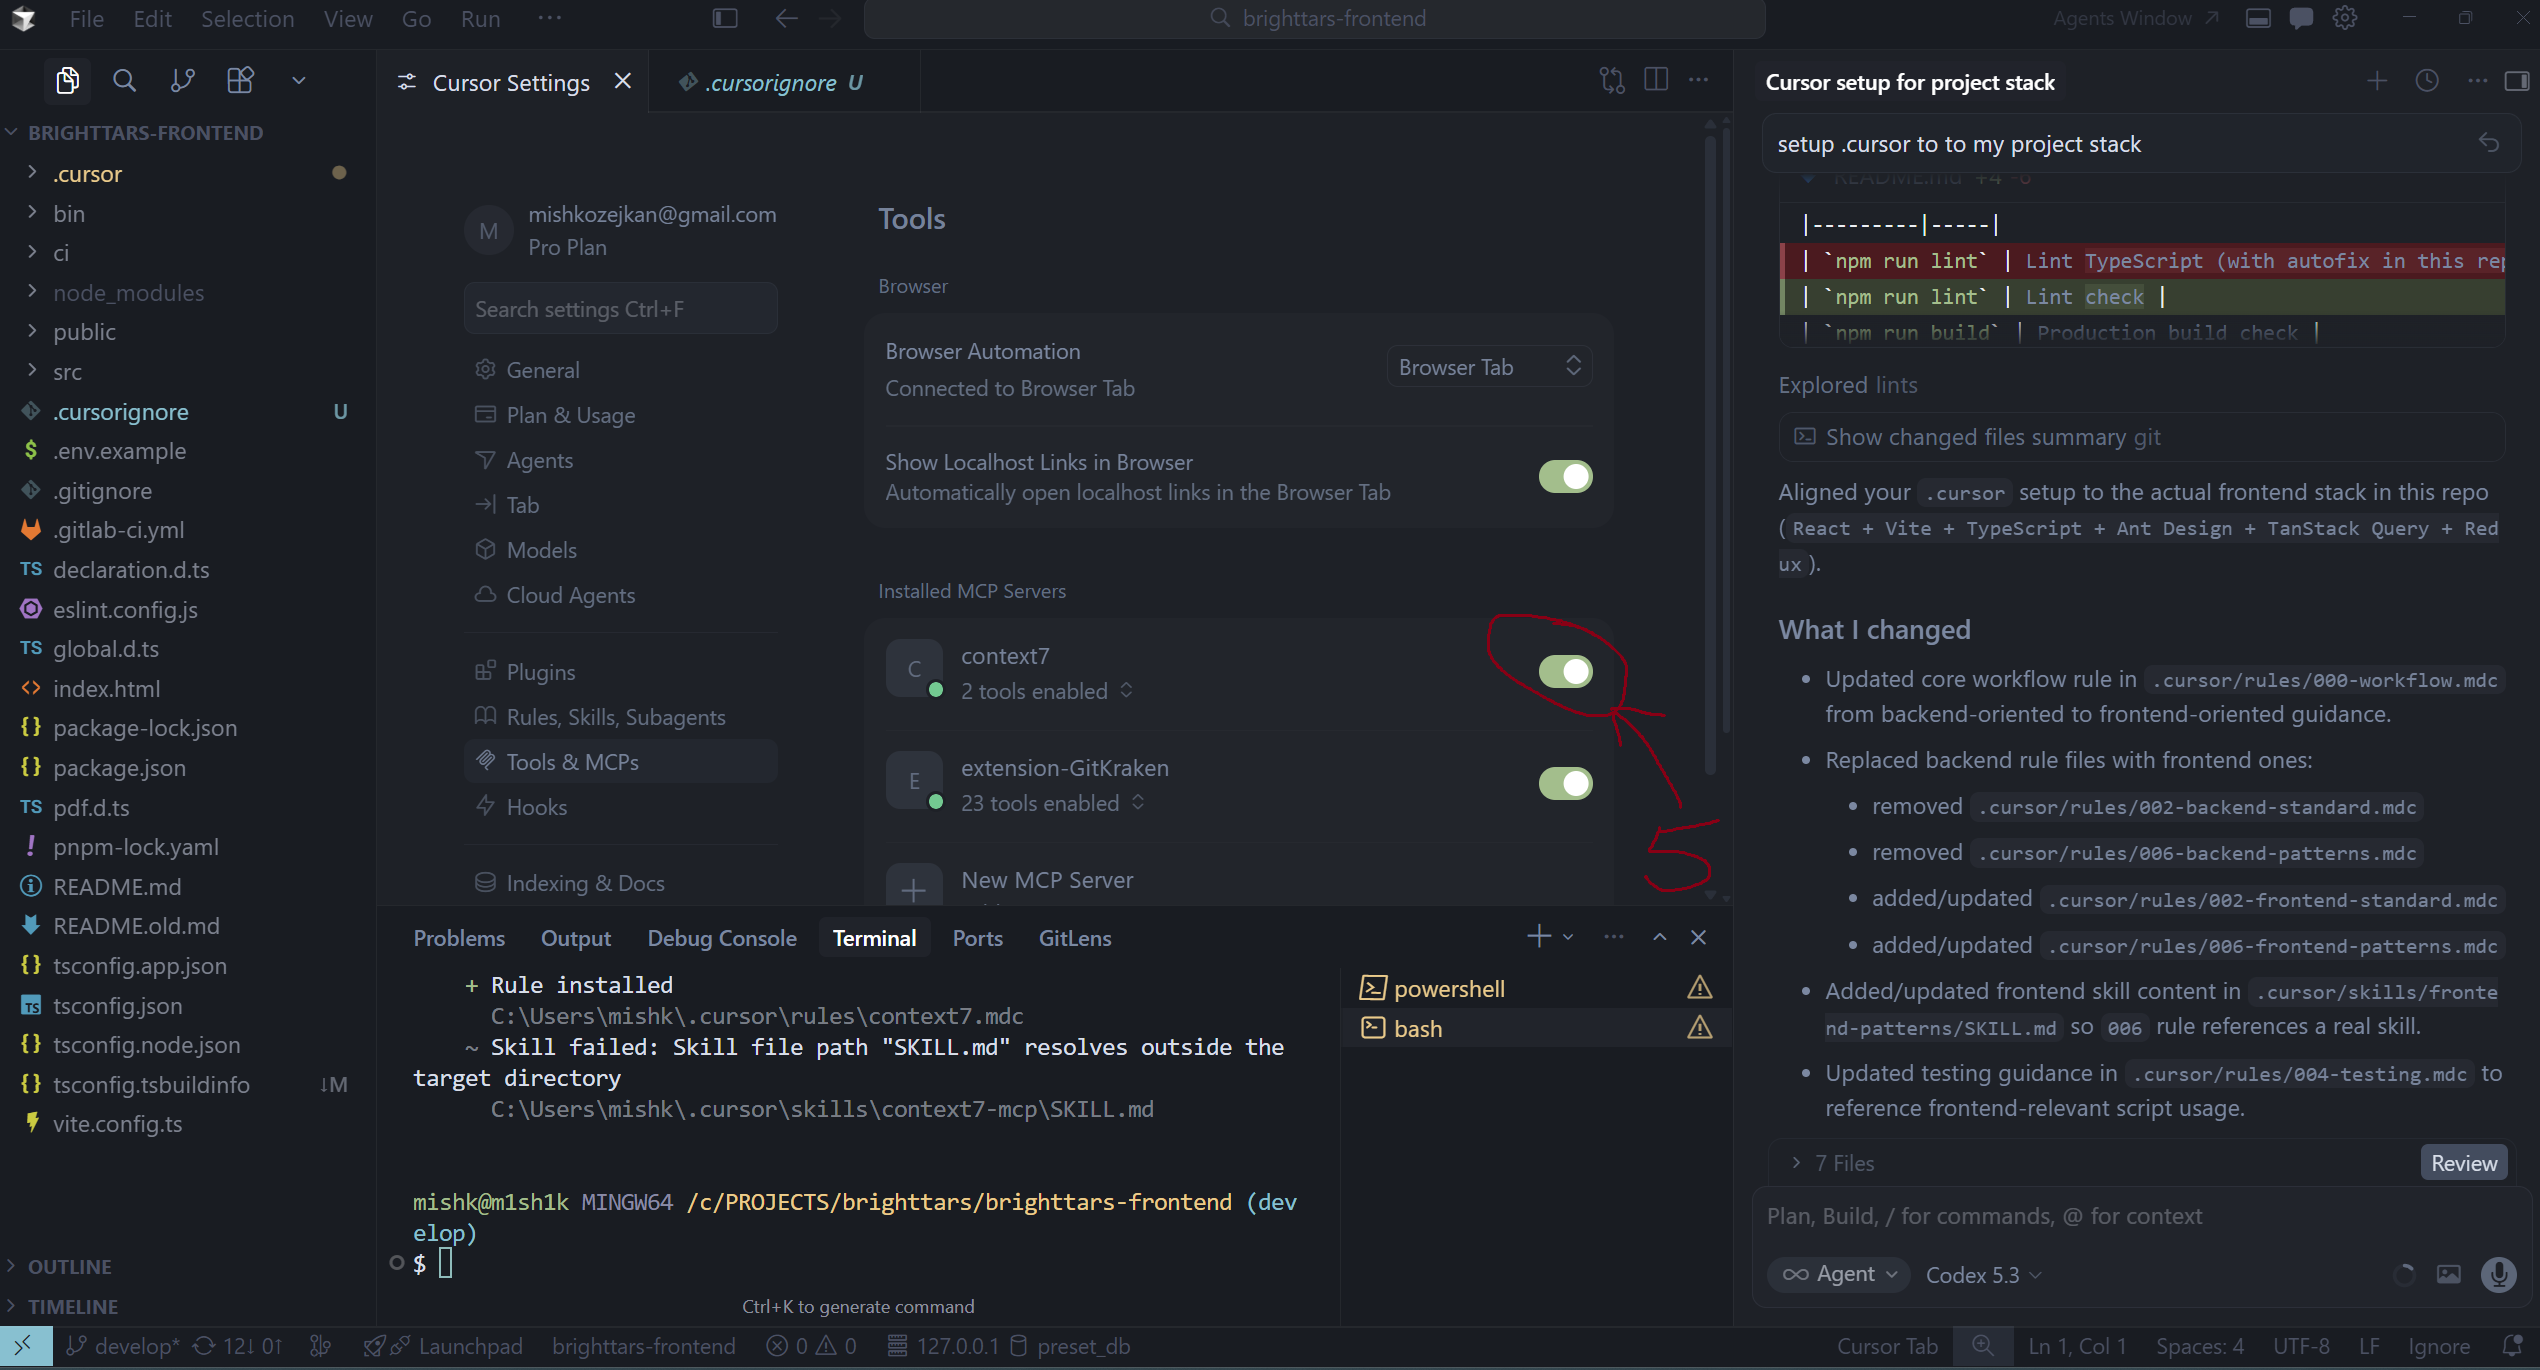
- Return to Cursor and confirm
context7is enabled.
Step 4 - Context7 Enabled
If Context7 setup is skipped on Windows
If you see spawnSync npx.cmd EINVAL, run Context7 setup manually:
npx --yes ctx7 setup --cursor --mcp --oauthThis does not affect copying .cursor; only the automatic Context7 step is skipped.
Manual MCP endpoint (optional)
- Endpoint:
https://mcp.context7.com/mcp - API key (optional for higher limits): https://context7.com/dashboard